Notice: There is no legacy documentation available for this item, so you are seeing the current documentation.
Are you looking to configure Schema.org markup on your site?
If so, this article will walk you through the steps to configuring Schema in All in One SEO.
If you’re not sure what Schema markup is, check out our Guide to Schema.org Markup for Rich Snippets here.
In This Article
Tutorial Video
Knowledge Graph Settings
To get started, click on Search Appearance in the All in One SEO menu.

On the Global Settings tab, scroll down to the Knowledge Graph section.
You’ll see fields for Website Name and Alternate Website Name.
The Website Name field will default to the name you’ve entered in the Site Title field under Settings » General in WordPress. You can replace it with another name if you wish.
The Alternate Website Name field can be used to enter any alternate name you have for your site.

Google may use the Website Name or Alternate Website Name in mobile search results.
Person or Organization
Next, you’ll see is Person or Organization.

Use this option to select whether your website or blog is for a person or for an organization. Based on the selection here, additional fields will be displayed as detailed below.
Organization Settings
If you selected Organization you will see the following fields:
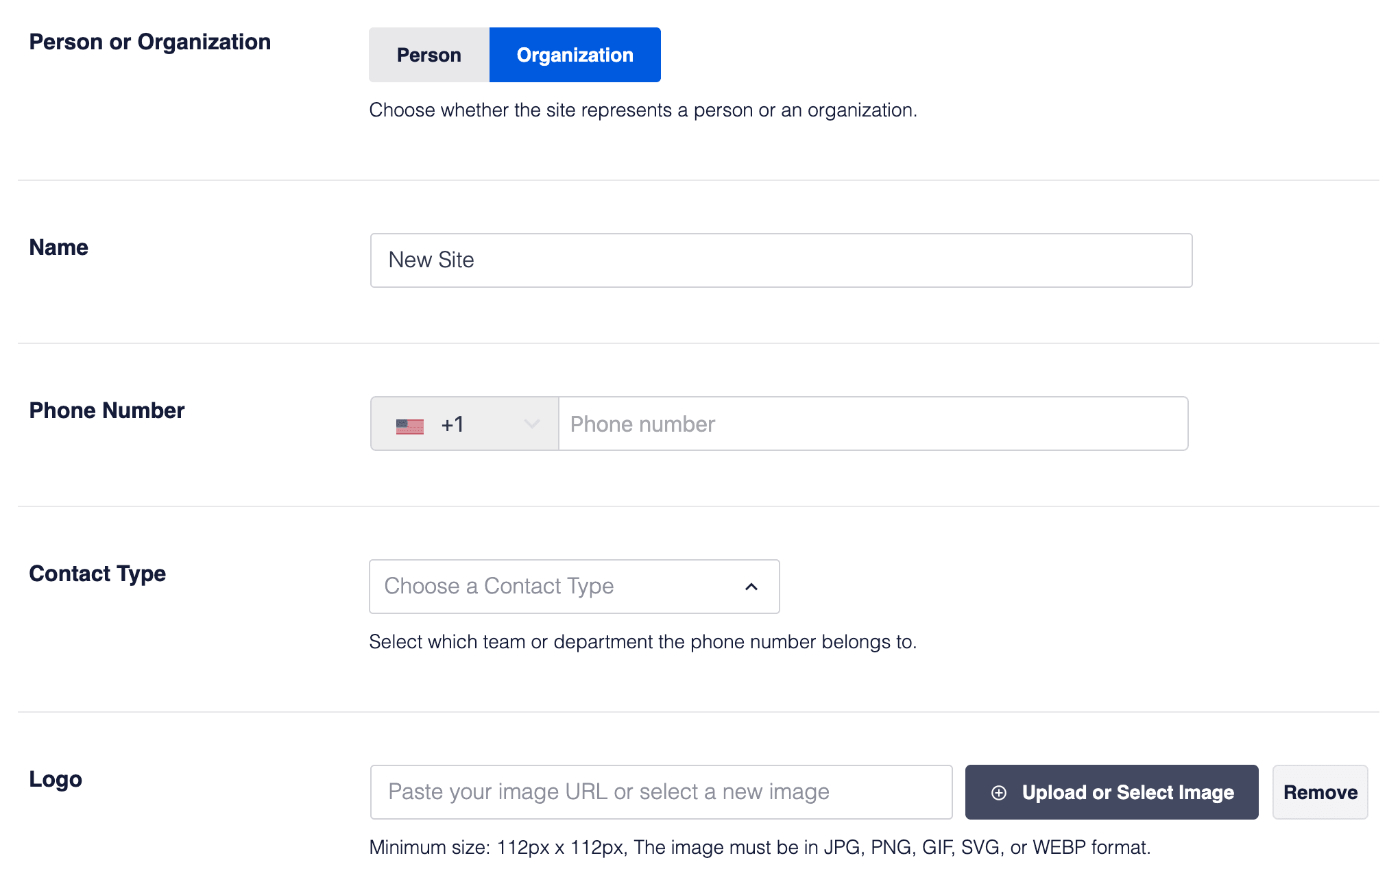
- In the Name field, enter the name of your organization or business
- In the Phone Number field, enter the phone number for your business you’d like listed on search engines
- In the Contact Type field, select the type that best describes the Phone Number you entered
- In the Logo field, upload the logo for your organization or business. The image MUST be a minimum size of 112px by 112px and must be in JPEG, PNG, SVG, WEBP, or GIF format. The image URL MUST be crawlable and indexable. If you don’t set a logo here, All in One SEO will use the logo set in your theme (if there is one).
NOTE:
Phone numbers are formatted in a specific way that’s required by search engines. When you enter your phone number, you can type it as you normally would with the area code (and leading zero if there is one), then the number.
All in One SEO will format it as an international number in the source code, adding the plus sign and country code and removing any leading zero from the area code.
Person Settings
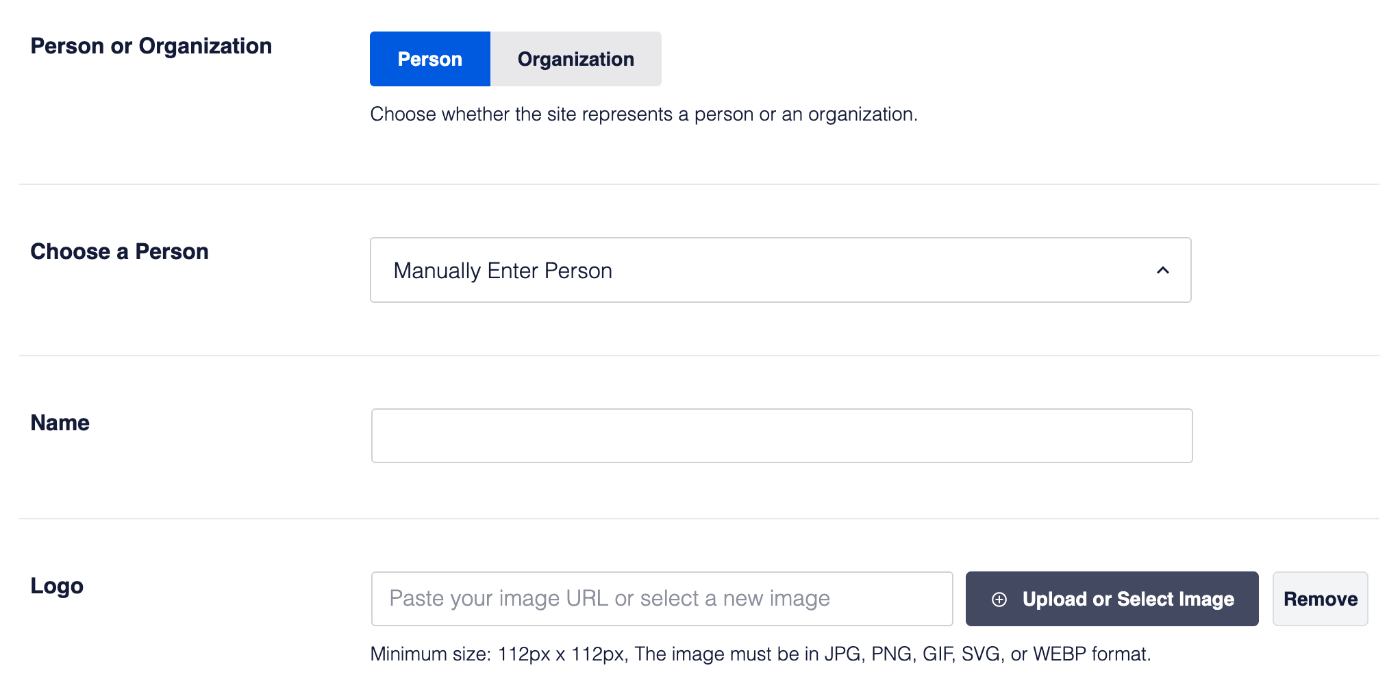
If you selected Person you will see the following fields:
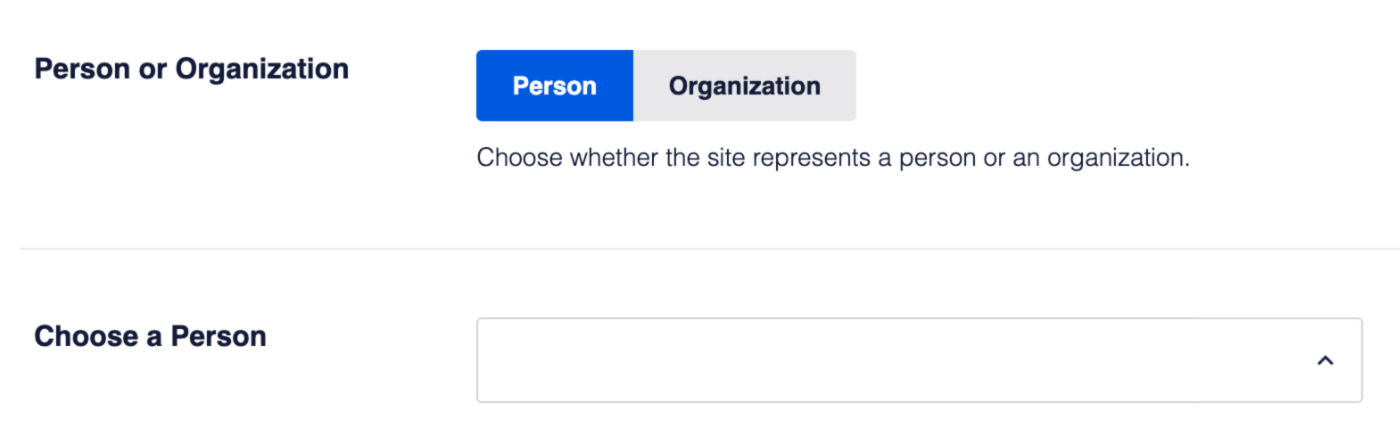
- In the Choose a Person field, choose the primary owner for your site from the list of users. Only users with the role of Author, Editor, or Administrator will be listed here
- You can also select Manually Enter Person from the drop down and then complete the Name and Logo fields
- In the Name field, enter the name of the primary owner for your site
- In the Logo field, upload an image of the primary owner for your site. The image MUST be a minimum size of 112px by 112px and must be in jpg, png, or gif format. The image URL MUST be crawlable and indexable.
Now that we’ve configured the main Knowledge Graph settings, we can move on to the settings for each content type.
Content Specific Schema Settings
NOTE:
The control of Schema settings for each content type is available to customers with a Basic plan or above for All in One SEO Pro.
Upgrade to All in One SEO Pro today to get this and many more features!
In the All in One SEO menu, click on Search Appearance and then click on the Content Types tab.
Here you’ll see sections for each of the types of content on your site such as Posts, Pages, etc.
Click on the Schema Markup tab in each section to configure Schema for that type of content.
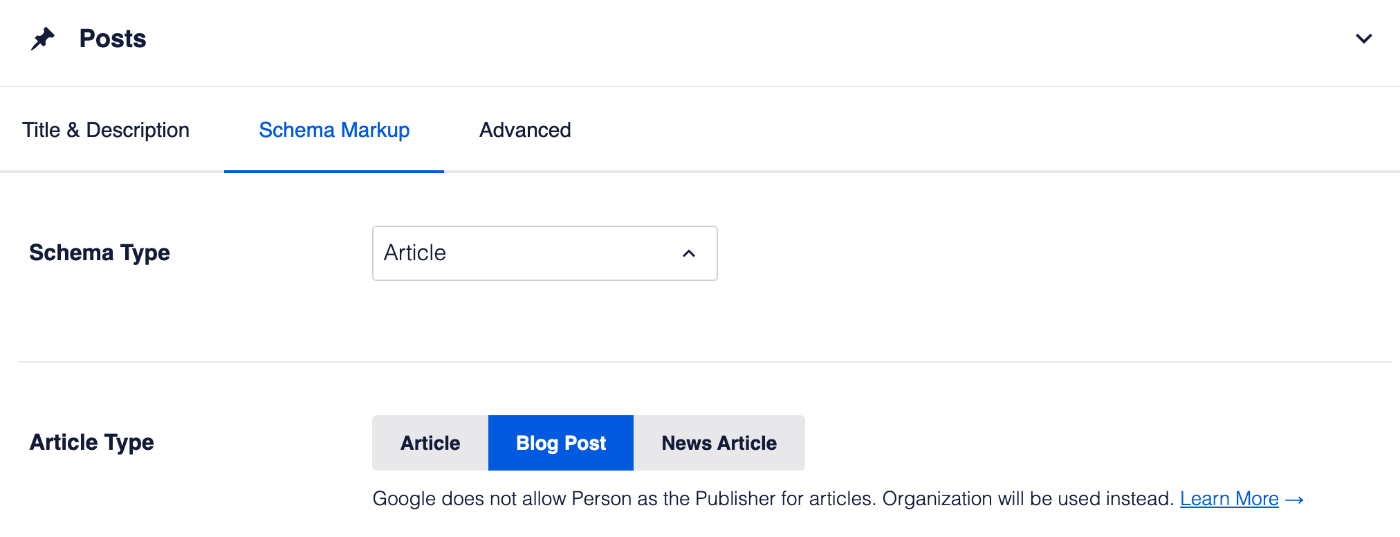
The first setting is for Schema Type. Use this drop down to select the type that best describes this content.
For example, for your Posts, the type that best matches would be Article. For your Pages, the type that best matches would be Web Page.
Depending on what you select, you may see an additional setting. Use this to select which type best describes this content.
You can repeat these steps for each of your content types listed on the Content Types tab.
Setting the Schema Type for Individual Content
NOTE:
The control of Schema settings for individual content is available to customers with a Basic plan or above for All in One SEO Pro.
Now that you’ve set the default Schema Types for your content, you may need to set additional Schema information in your content.
If you’ve selected one of the following Schema Types for your content then you can configure these by editing your content:
- Article
- Book
- Course
- Data Set
- Event
- Fact Check
- FAQ
- How To
- Job Posting
- Movie
- Music
- Person
- Product
- Recipe
- Service
- Software Application
- Video
- Web Page
For details on how to do this, click on the links in the list above.
Check out more documentation on our Schema Settings here.