Do you want to know how to easily track URL redirects in WordPress?
Tracking URL redirects lets you troubleshoot your 404 errors or broken links and immediately fix them before they hurt your rankings in search engines.
In this post, we’ll show you how to track URL redirects in WordPress. We’ll also cover why you should track website redirects and how to use the redirect checker.
Feel free to use these quick links to jump straight to different sections:
In This Article
What Is a 301 Redirect?
A 301 redirect is the most common type of redirect and is a permanent move of a URL. It’s a setting that automatically sends your website visitors to a different URL than the one they landed on.
Technically speaking, it’s a code that tells a web browser that the page it’s trying to load is deleted or moved. The 301 redirect tells it to navigate to a different page of your choice instead.
Best of all, when a redirect is set up properly, your visitors often won’t even notice they’ve been redirected to a different page.
Check out our overview of redirect types you should know for more information on how to handle different changes in URLs.
When to Use 301 Redirects
301 redirects are used when:
- You’ve changed the URL of an existing web page
- You’ve deleted old content on your site and want to redirect visitors to your new page
- You’ve redesigned your website and are moving it to a new domain
So now that you know what a 301 redirect is and when to use it, let’s take a look at why you should track your website or URL redirects next.
Why Should You Track Website Redirects?
You should track website redirects to be aware of 404 errors on your website. That way, you can redirect those URLs that no longer exist to a new URL and maintain your rankings in search engines.
A 404 error is the error page your website visitors see when one of your URLs is broken on your site. It happens when a page is deleted or moved without being redirected to a new one.
Having too many 404 page not found errors and not redirecting these can cause your rankings on Google to drop.
Here are a few ways not tracking and redirecting your URLs can hurt your SEO:
- Users Can Still Find Your Deleted Pages in Search Results: Your deleted pages are still indexed, and users might end up on your deleted page, which doesn't provide a good user experience.
- Your Bounce Rate Will Increase: When your users visit a 404 error page, they’ll immediately click away, which will increase your bounce rate and ultimately hurt your SEO.
- You’ll Lose Worked-Up Backlinks: The backlinks you’ve managed to get to your website will be lost when your content is moved or deleted.
- Your SEO Rankings May Drop: When too many URLs are changed, it can take Google a lot of time to reprocess and rediscover them. This may result in drops in rankings.
- It Can Cause Search Invisibility: By not redirecting your 404 pages, you can lose visibility for your important content. That’s because Google has to spend time crawling your non-existent or unnecessary pages and may not index your important pages.
With that said, let’s show you how to easily track URL redirects in WordPress next.
Easily Track URL Redirects in WordPress

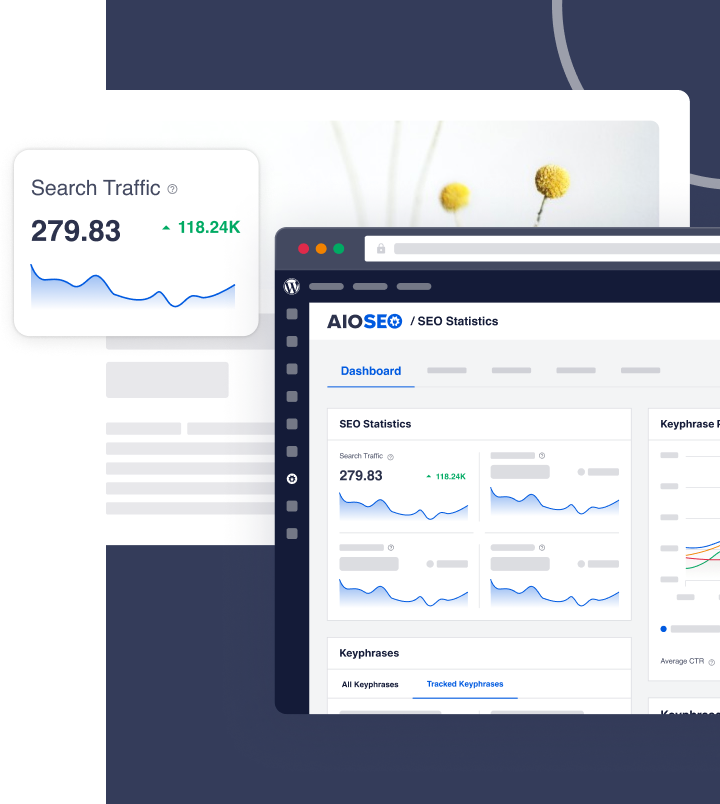
With All in One SEO’s Redirection Manager, you can easily track your URL redirects and check that they’re working properly.
AIOSEO offers the simplest way to track and perform redirects without needing to have any server knowledge. Not only that, but it also offers many more advanced and powerful SEO tools and features, such as:
- Cornerstone Content: Easily build topic clusters and enhance your topical authority and semantic SEO strategy.
- Search Statistics: Keep track of important SEO metrics right from your WordPress dashboard.
- Author SEO: Boost your Google E-E-A-T signals right in WordPress, giving you an edge over competitors.
- SEO Revisions: Track any changes you make to your site and see their impact on your SEO. Plus, you get to see on a timeline how Google updates affect your site.
- Keyword Rank Tracker: Get real-time data on your keyword performance right inside your WordPress dashboard.
- Advanced Robots.txt Generator: Easily generate and customize your robots.txt file for better crawling and indexing.
- Next-gen Schema generator: This no-code schema generator enables users to generate and output any schema markup on your site.
- Link Assistant: Powerful internal linking tool that automates building links between pages on your site. It also gives you an audit of outbound links.
- And more.
How to Track URL Redirects in WordPress
Ready to track URL redirects on your site?
Here are a few simple steps to help you do just that.
Enable Redirects on Your Website
To get started, you first need to enable redirects on your website. To be able to do this, you need to get the AIOSEO Pro or Elite license, and then download and install the plugin. For detailed instructions, see our guide on how to install All in One SEO.
If you've never installed a plugin before, please visit WPBeginner's step by step guide on how to install a WordPress plugin.
After installing AIOSEO’s Redirection Manager, you navigate to Redirects in the All in One SEO menu and click on the Activate Redirects button.
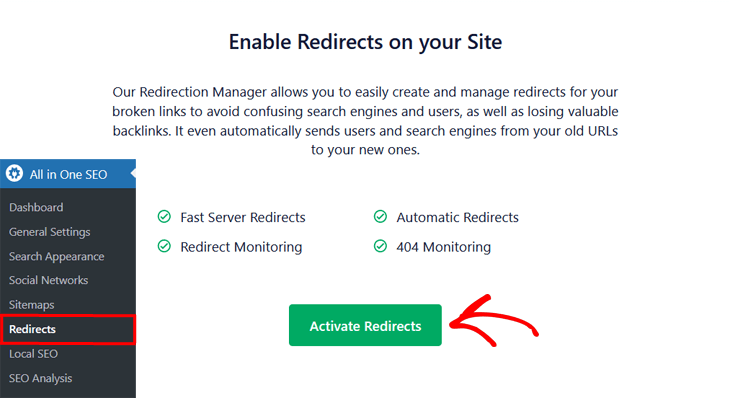
This will take you to the Redirects screen. Here you’ll first see the Add New Redirect option, where you can redirect your URLs.

If you've never created a redirect before, you can check out our beginner's guide on how to add 301 redirects in WordPress.
That said, let's take a look at how to track your URL redirects next.
Tracking Your URL Redirects
When using AIOSEO’s Redirection Manager, you won’t need any additional redirect tracker. It’s all there for you to easily track and manage your redirects.
So if you scroll down beneath the Add New Redirect setting, you’ll see the Redirect Table, where you can view all your redirects.

Here you can easily keep track of all the redirects you’ve made on your website. And you can easily Enable or Disable your redirects by using the toggle to the right.
Tracking Your 404 Error Pages
To start tracking your 404 error pages, you first need to make sure that the 404 Logs setting is enabled, which we’ll show you how to check next.
Enabling 404 Logs
To enable your 404 logs, go to Redirects and click on the Settings tab. Then, scroll down until you see the Logs section. To start logging or tracking your 404 errors, click the 404 Logs toggle so it turns blue.
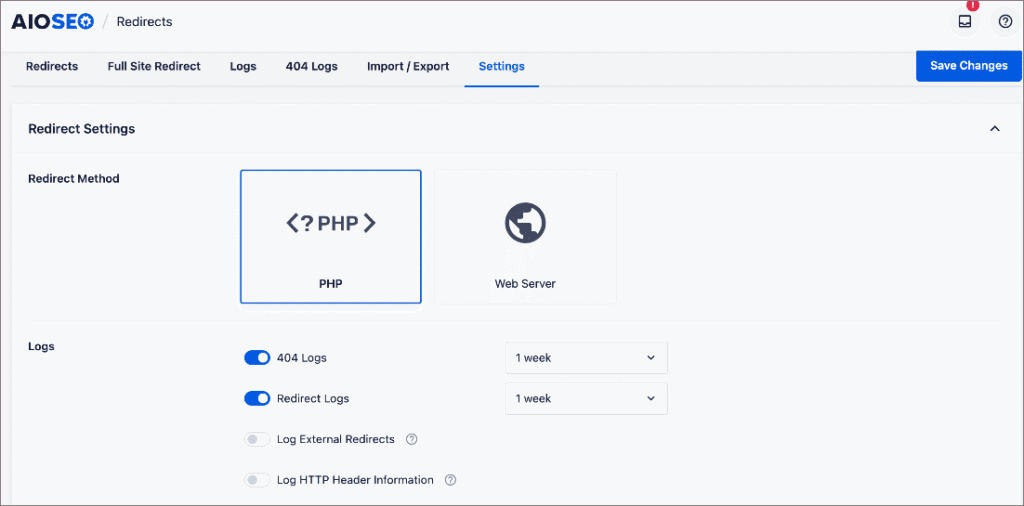
Setting the Log Retention
You can then set how long you want to track your 404 errors. Simply click on the drop-down menu to the right of the 404 Logs toggle and choose your time frame.
Tracking and Redirecting Your 404 Pages
Now that you’ve set up logging, you can start tracking your 404’s and easily redirect them to the new page of your choice.
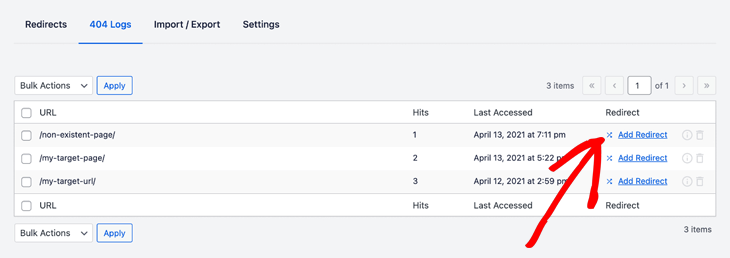
All your 404 pages will appear in the 404 Logs tab.

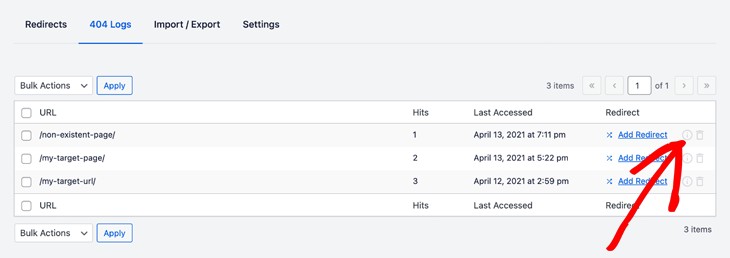
And to redirect them, simply click on the Add Redirect link to the right, and add your new URL.
Understanding the 404 Logs Tab
In the URL column, you can see the 404 page that someone has visited on your website.
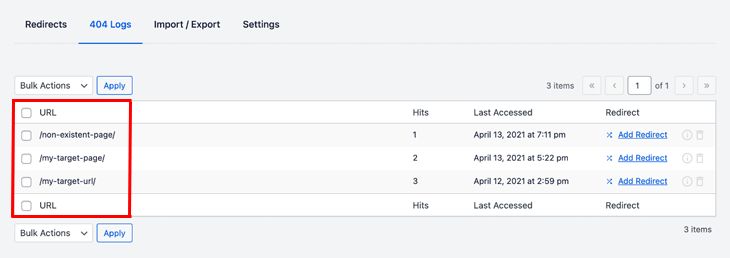
Just like in the Redirects Table, the Hits column shows how many times it’s been visited. You can also see the date the URL was last visited in the Last Accessed column.
And to view the log details, simply click on the Additional info icon in the right menu.
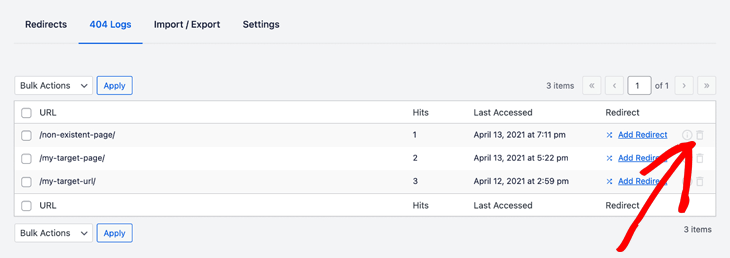
If you want to delete your log entries, you simply click on the Delete or trash can icon in the same menu.
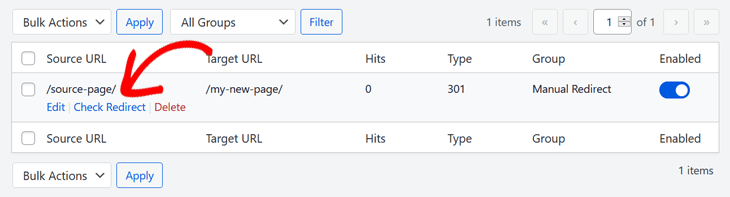
Checking Your Redirects
AIOSEO’s Redirection Manager comes with a built-in redirect checker. This allows you to quickly check if your redirects are working properly.
Just click on the Check Redirect link, and it'll show you the page you've redirected to.
It’s quick and easy! Exactly the way we want it to be to manage your SEO using the best SEO plugin for WordPress, AIOSEO.
Why is tracking URL redirects important?
Tracking URL redirects is crucial for maintaining a healthy website. It helps you ensure that visitors and search engines reach the intended destination, preventing 404 errors and maintaining your SEO rankings. It also allows you to identify and fix any broken links.
How can I track URL redirects in WordPress?
Many SEO plugins like All in One SEO (AIOSEO) offer built-in redirect managers. These plugins allow you to create, manage, and track your redirects directly from your WordPress dashboard, often with logging features and redirect checkers.
Can I check if my redirects are working properly?
Yes, AIOSEO's Redirection Manager includes a built-in redirect checker. You can simply click a “Check Redirect” link to quickly verify that your redirects are functioning as intended and leading to the correct destination.
I hope this post helped you find the best SEO agency software for your business. You may also want to check out other articles on our blog, like our list of the best content analysis tools or our ultimate guide to WordPress SEO.
If you found this article helpful, then please subscribe to our YouTube Channel. You’ll find many more helpful tutorials there. You can also follow us on X (Twitter), LinkedIn, or Facebook to stay in the loop.
Disclosure: Our content is reader-supported. This means if you click on some of our links, then we may earn a commission. We only recommend products that we believe will add value to our readers.
Want to Try AIOSEO for Free?
Enter the URL of your WordPress website to install AIOSEO Lite.