This documentation will cover the options available under the Full Site Redirect tab in the Redirection Manager of All in One SEO Pro.
Here's how to easily add a redirect in All in One SEO Pro.
NOTE:
The Full Site Redirect feature is available to customers with a Pro plan or above for All in One SEO Pro.
Upgrade to All in One SEO Pro today to get Redirection Manager and many more features!
In This Article
Tutorial Video
To get started, click on Redirects in the All in One SEO menu and then click on the Full Site Redirect tab.

The following options are available on this screen:
Relocate a Site
This option will enable you to relocate your entire website to another domain.
Click the Relocate Site toggle to display the field where you can enter your new domain name.
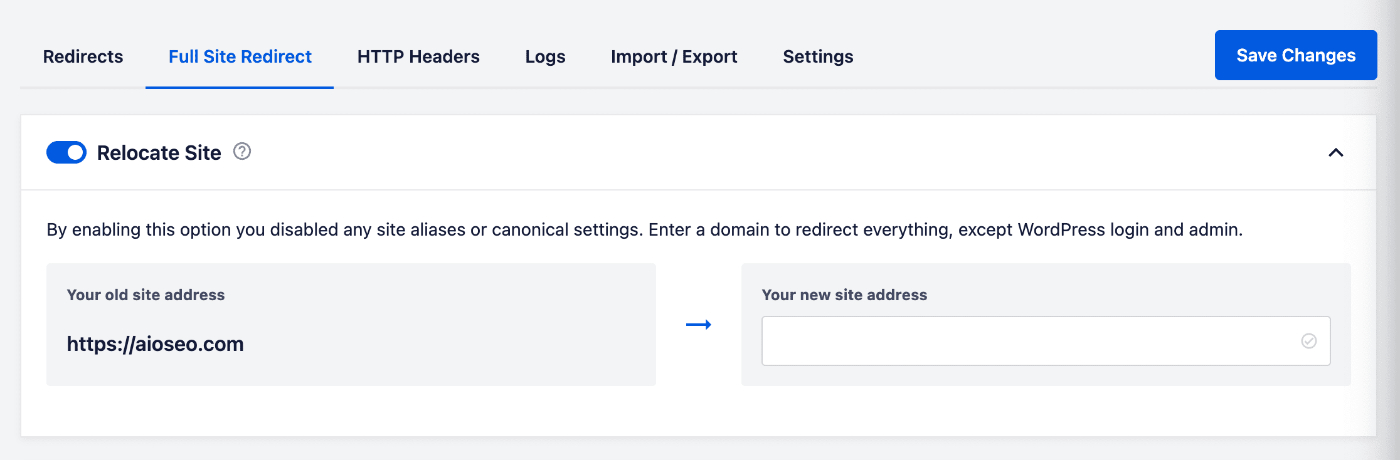
Enter a valid website address (without the HTTPS://) in the Your new site address field and click the Save Changes button.
NOTE:
URLs under the Admin, Login, Rest API, Content and Includes ( wp-admin, wp-login, wp-json, wp-content and wp-includes ) are not redirected meaning you won't loose control of your installation once you activate this option.
When you enable Relocate Site option, the Site Aliases and Canonical Settings (covered below) options will be disabled.
Site Aliases
A site alias is another domain or subdomain that you want to be redirected to your site.
Enter the domain name or subdomain name in the field to redirect it to your site.
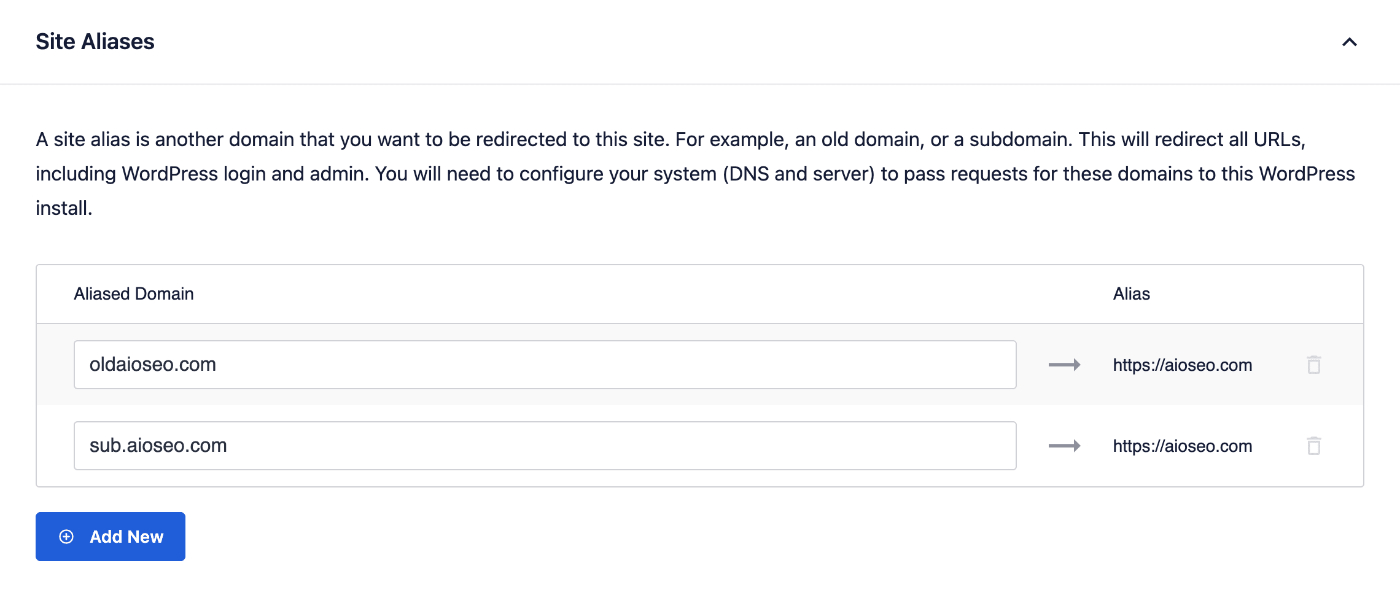
You can click the Add Aliased Domain button to redirect more domains or click the trash can icon to remove a domain.
IMPORTANT:
This will redirect all URLs, including WordPress login and admin. You will also need to configure your system (DNS and server) to pass requests for these domains to this WordPress install.
Canonical Settings – Redirect from HTTP to HTTPS
Canonical settings allow you to force an HTTPS redirection and to add or remove www from your site URL.
IMPORTANT:
Make sure HTTPS is working before forcing a redirect.
To redirect your site from HTTP to HTTPS, click the Canonical Settings toggle to display the Redirect from HTTP to HTTPS setting.
Then click the Redirect from HTTP to HTTPS toggle and click Save Changes to enable redirection from HTTP to HTTPS on your site.

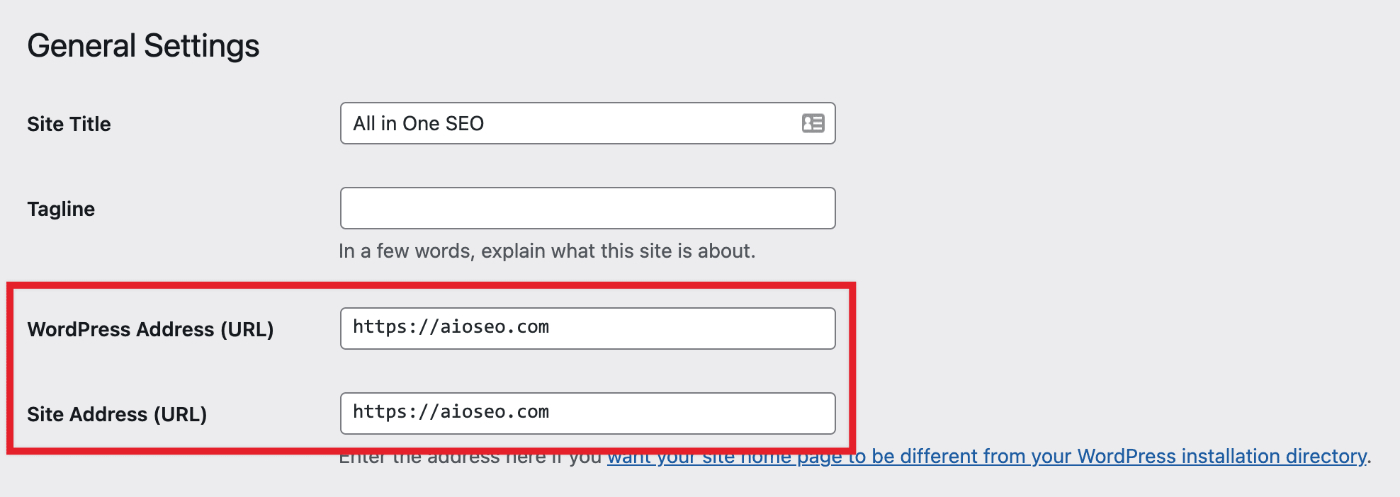
You'll need to update your Site Address URL by going to Settings » General and changing the Site Address (URL) match your new site address.
To help test your HTTPS configuration, try some of these websites:
Canonical Settings – Add or Remove WWW
To add or remove www from your site URL, click the Canonical Settings toggle to display the Preferred domain drop down.

You can select either of the following:
- Leave domain as-is to not change anything
- Add www to domain to add www to your site URLs
- Remove www from domain to remove www to your site URLs
You'll need to update your Site Address URL by going to Settings » General and changing the Site Address (URL) match your new site address.
Check out more documentation on our Redirection Manager here.