
Are you looking to set an image that Facebook displays for your content?
All in One SEO makes it really easy to control the image that's used when you or your visitors share your content on Facebook.
Here we'll show you how you can specify the image that's used, and how to add a default image to fall back to.
In This Article
Tutorial Video
Why Do I Need an Image for Facebook?
When a visitor comes to your site and reads something they like, chances are they'll tell their friends about it on Facebook.
Your site may even have social media buttons where visitors can Like or share content as they're reading it.
When content is shared or Liked, Facebook displays a title, description and an image.
As people scroll through their Facebook feed, their attention is drawn to posts because of the image. A great quality, large, attractive image is more likely to lead to them clicking on that post and visiting your website.
Here's an example of a post shared on Facebook:

Setting the Facebook Image Source
The first thing we're going to do is choose which image is used when your content is shared on Facebook.
To get started, click on Social Networks in the All in One SEO menu and then click on the Facebook tab.
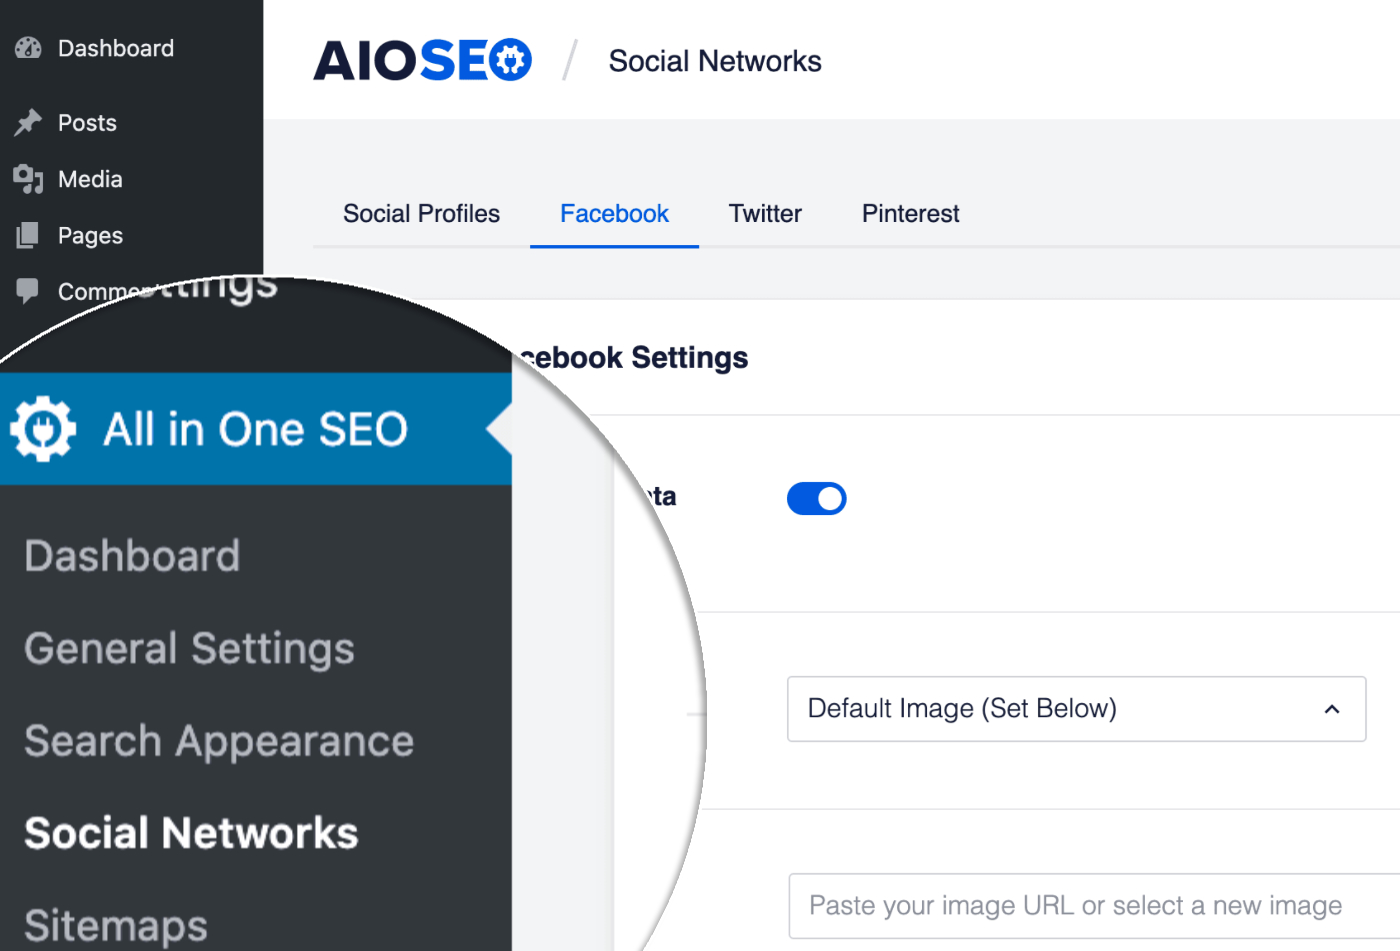
Now you'll see settings for Default Post Image Source and Default Term Image Source. The choices in this drop down relate to images that may exist for your content.
Choose one of the options in the drop down to set that as the image source that will be used when your content is shared on Facebook.
Here's a description of each of the choices in the drop down:
- Default Image – This will use the image set in the Default Facebook Image setting
- Featured Image – This will use the Featured Image which you set on your Posts and Pages
- Attached Image – This will use the first image that is attached to your Post or Page
- First Image in Content – This will use the first image that appears in the content of your Post or Page
- Image from Custom Field – When you select this option, a Custom Field setting will be displayed where you can enter the name of a custom field you want to use for your image
- Post Author Image – This will use the Profile Picture from the user profile for the author of the Post or Page
- First Available Image – This will go through each of the above looking for an image to use
After you've chosen which image source you want to use in the Default Post Image Source and Default Term Image Source settings, you should set a default image which is described below.
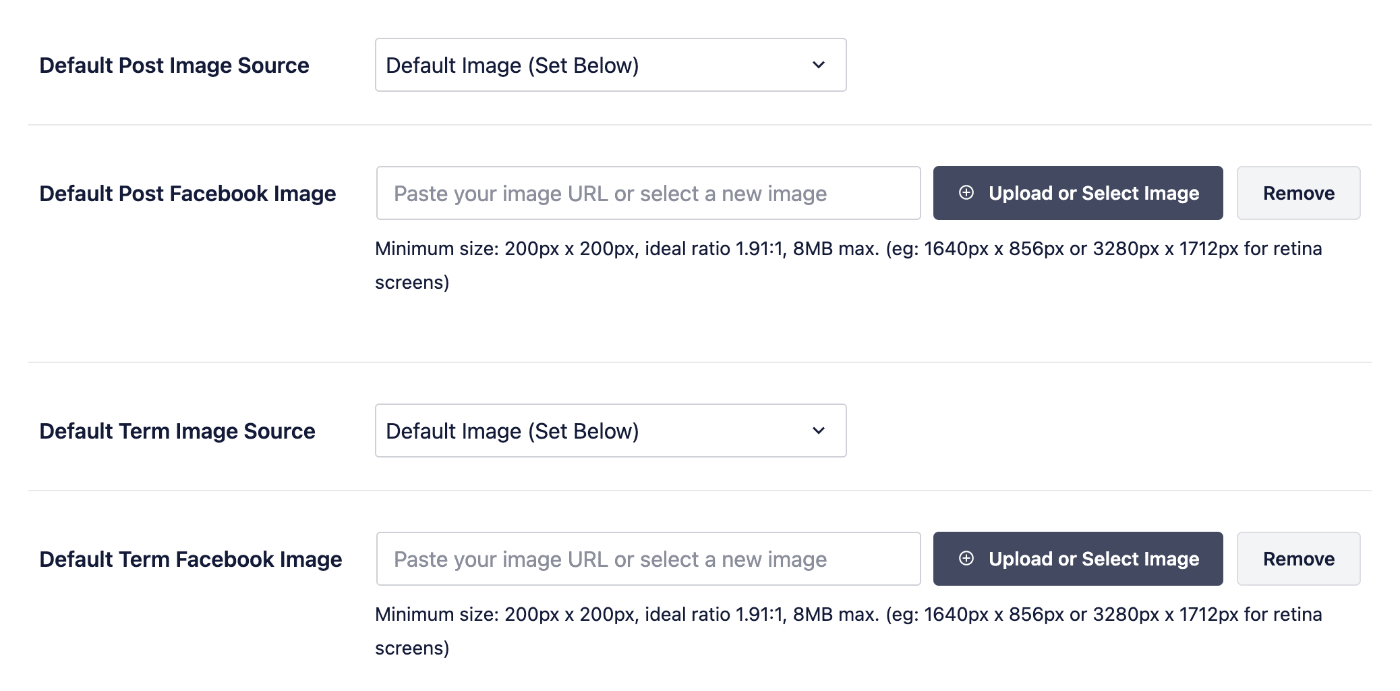
Setting the Default Facebook Image
The Default Post Facebook Image and Default Term Facebook Image will be used as the fall back when there's no image available.
For example, if you chose Featured Image in the Default Post Image Source drop down, but your Post or Page doesn't have a Featured Image, then All in One SEO will use what you set as the Default Post Facebook Image.
If your theme enables you to set a logo, then All in One SEO will automatically use it as your Default Post Facebook Image and Default Term Facebook Image.
To set your default image, click on the Upload or Select Image button and upload an image, or choose an image from your Media Library.

You can also type or paste the URL for an image into the field.
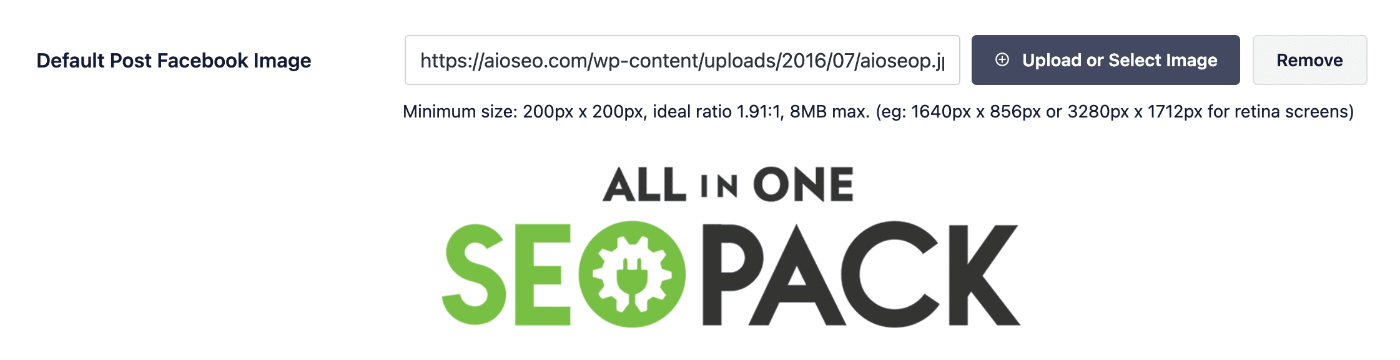
The image you've set will be shown below the field.
Repeat this with the Default Term Facebook Image field.
IMPORTANT:
Facebook prefers images that are 1200 pixels wide by 630 pixels tall. The minimum dimensions they accept are 200 pixels by 200 pixels.
Images should be in GIF, JPEG, WEBP, or PNG format only. No videos or animated images are accepted.
Full details can be found in Facebook's documentation here.
Congratulations! You've now set the default image source and the default image for use on Facebook.
Are you interested in setting this for Twitter too? Check out our article on Setting a Default Image for Twitter.