
Are you looking to customize the robots.txt on your site? This article will help.
The robots.txt module in All in One SEO lets you manage the robots.txt that WordPress creates.
This enables you to have greater control over the instructions you give web crawlers about your site.
In This Article
- Tutorial Video
- About the Robots.txt in WordPress
- Using the Robots.txt Editor in All in One SEO
- Default Robots.txt Rules in WordPress
- Adding Rules Using the Rule Builder
- Editing Rules Using the Rule Builder
- Deleting a Rule in the Rule Builder
- Changing the Order of Rules in the Rule Builder
- Importing Your Own Robots.txt into All in One SEO
- Using Advanced Rules in the Rule Builder
- Blocking Unwanted Crawlers
- Block Crawling of Internal Site Search URLs
- Robots.txt Editor for WordPress Multisite
Tutorial Video
Here's a video on how to use the Robots.txt tool in All in One SEO:
About the Robots.txt in WordPress
First, it's important to understand that WordPress generates a dynamic robots.txt for every WordPress site.
This default robots.txt contains the standard rules for any site running on WordPress.
Second, because WordPress generates a dynamic robots.txt there is no static file to be found on your server. The content of the robots.txt is stored in your WordPress database and displayed in a web browser. This is perfectly normal and is much better than using a physical file on your server.
Lastly, All in One SEO doesn't generate a robots.txt, it just provides you with a really easy way to add custom rules to the default robots.txt that WordPress generates.
NOTE:
Whilst the robots.txt generated by WordPress is a dynamically generated page and not a static text file on your server, care should be taken in creating a large robots.txt for two reasons:
- A large robots.txt indicates a potentially complex set of rules which could be hard to maintain
- Google has proposed a maximum file size of 512KB to alleviate strain on servers from long connection times.
Using the Robots.txt Editor in All in One SEO
To get started, click on Tools in the All in One SEO menu.
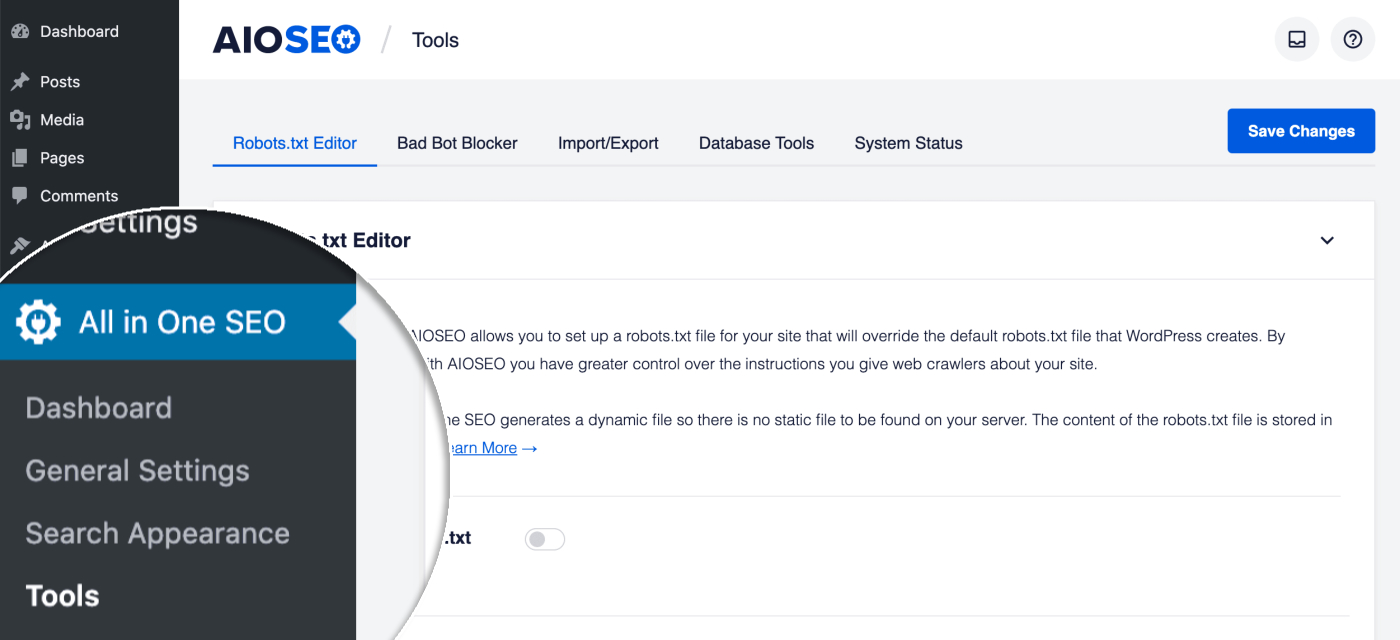
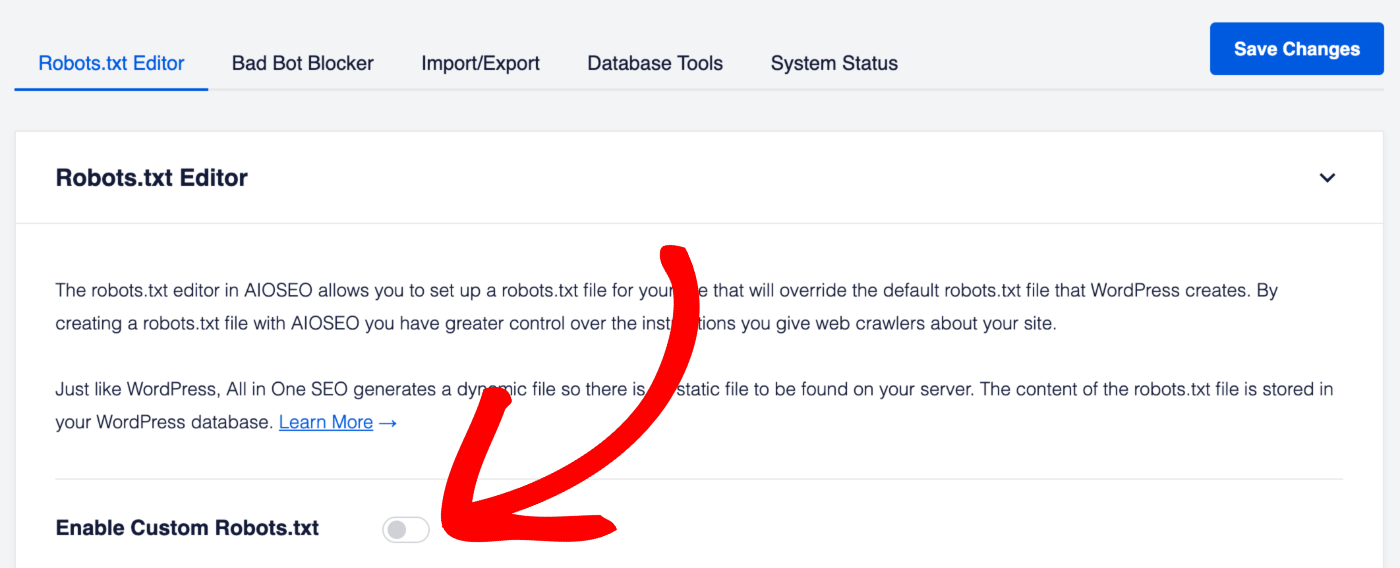
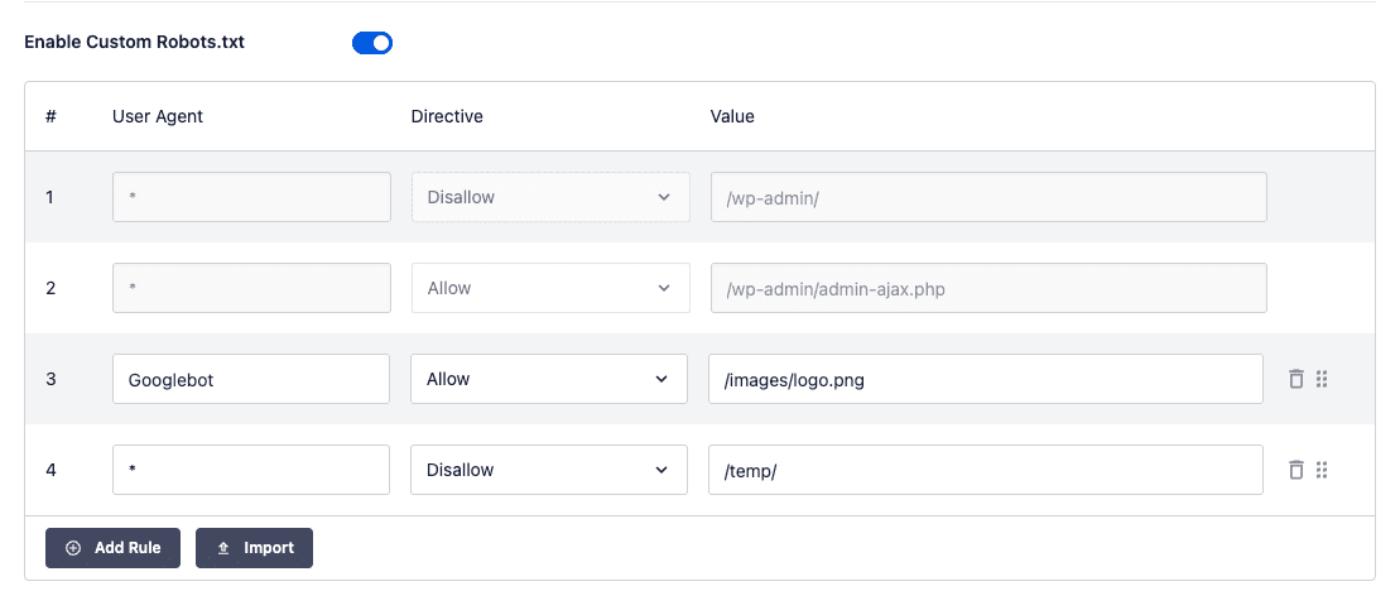
You should see the Robots.txt Editor and the first setting will be Enable Custom Robots.txt. Click the toggle to enable the custom robots.txt editor.
IMPORTANT:
You don't need to enable the Custom Robots.txt unless you have a specific reason to add a custom rule.
The default robots.txt that is generated by WordPress is perfect for 99% of all sites. The Custom Robots.txt feature is for those users who need custom rules.
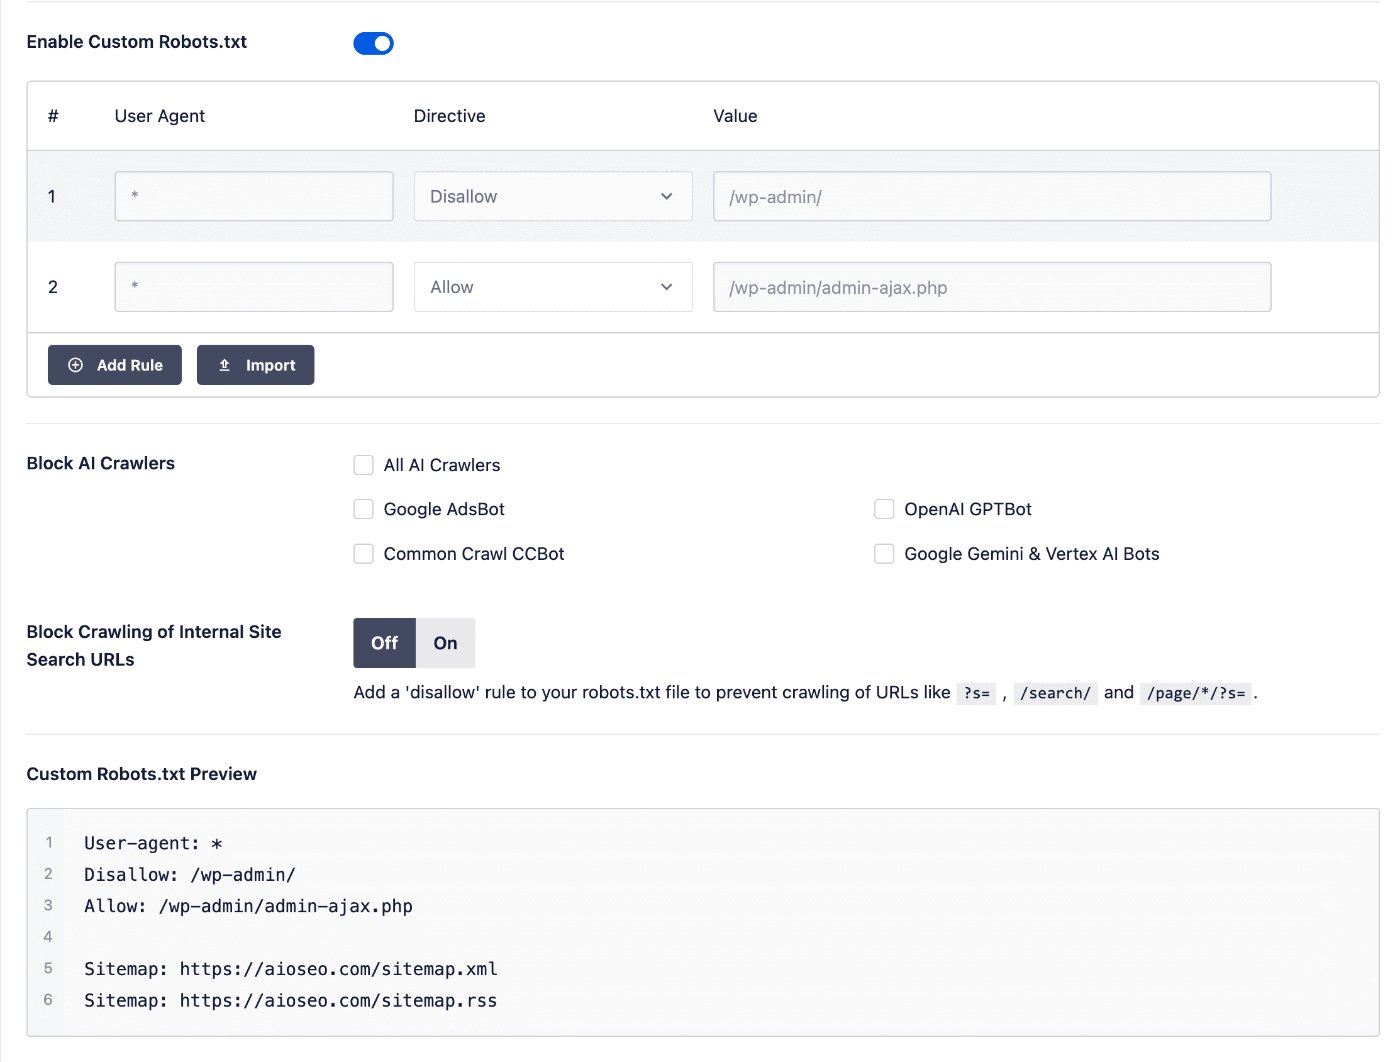
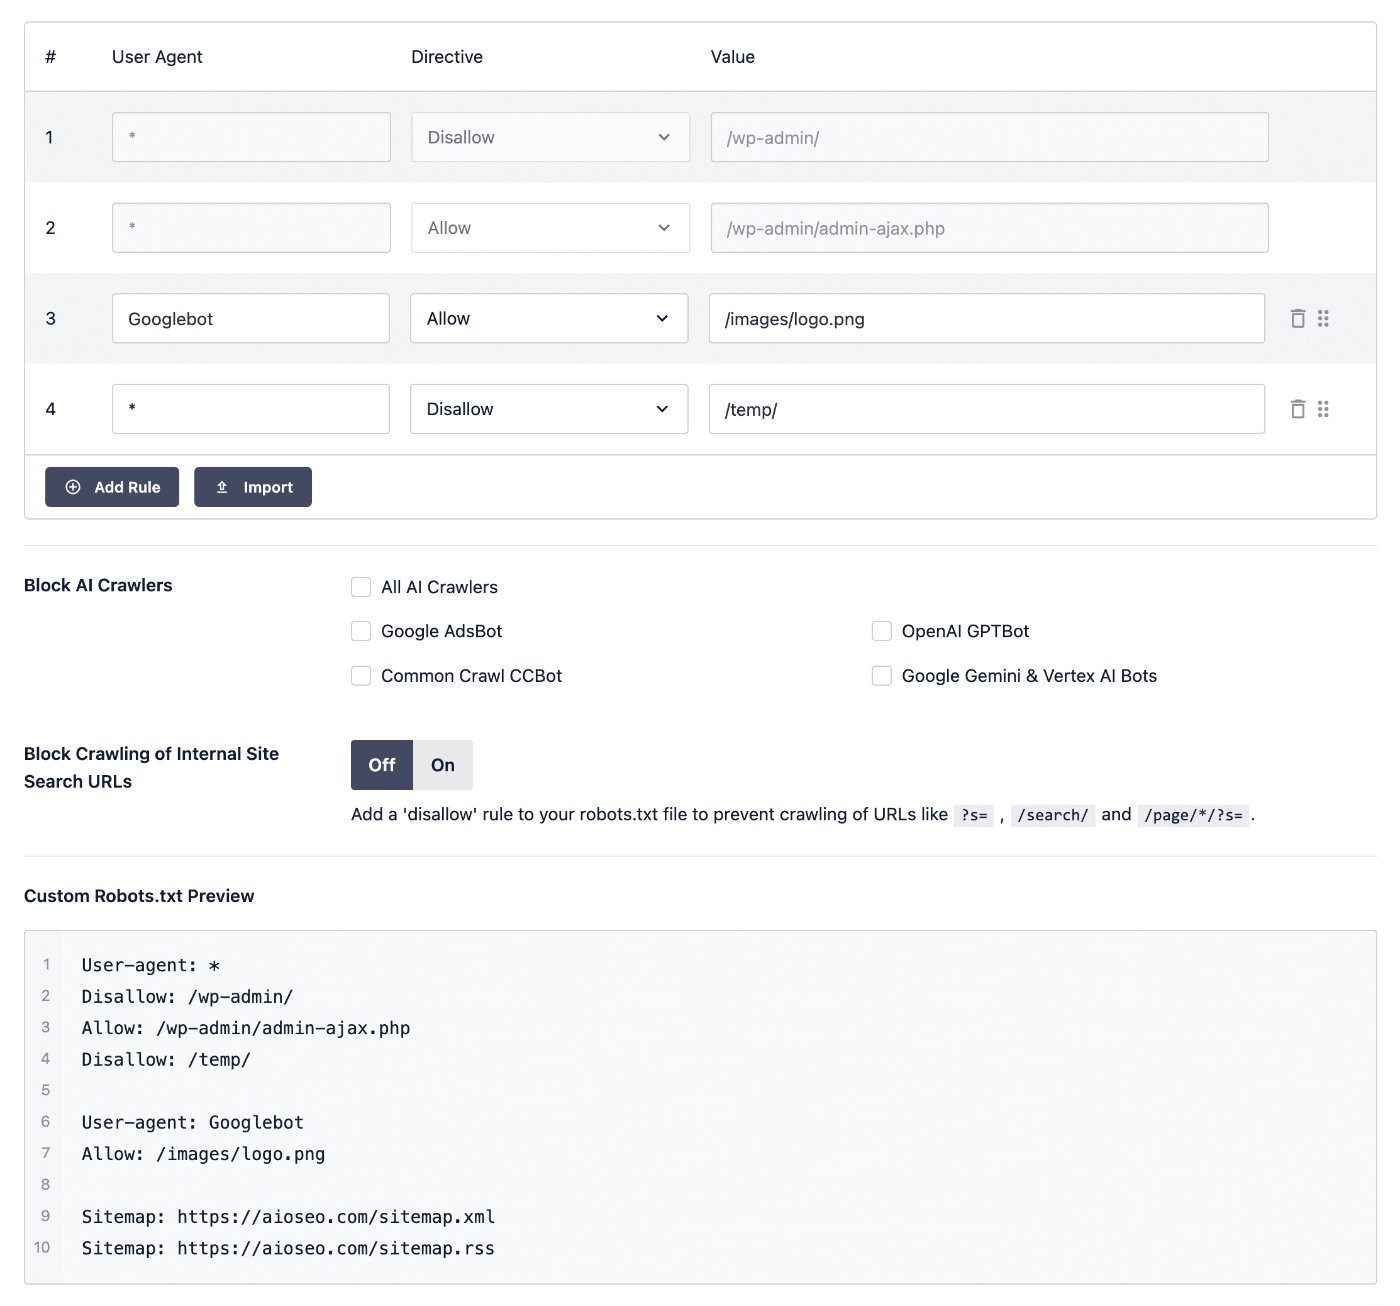
You should see the Custom Robots.txt Preview section at the bottom of the screen which shows the default rules added by WordPress.
Default Robots.txt Rules in WordPress
The default rules that show in the Custom Robots.txt Preview section (shown in the screenshot above) ask robots not to crawl your core WordPress files. It's unnecessary for search engines to access these files directly because they don't contain any relevant site content.
If for some reason you want to remove the default rules that are added by WordPress then you'll need to use the robots_txt filter hook in WordPress.
Adding Rules Using the Rule Builder
The rule builder is used to add your own custom rules for specific paths on your site.
For example, if you would like to add a rule to block all robots from a temp directory then you can use the rule builder to add this.
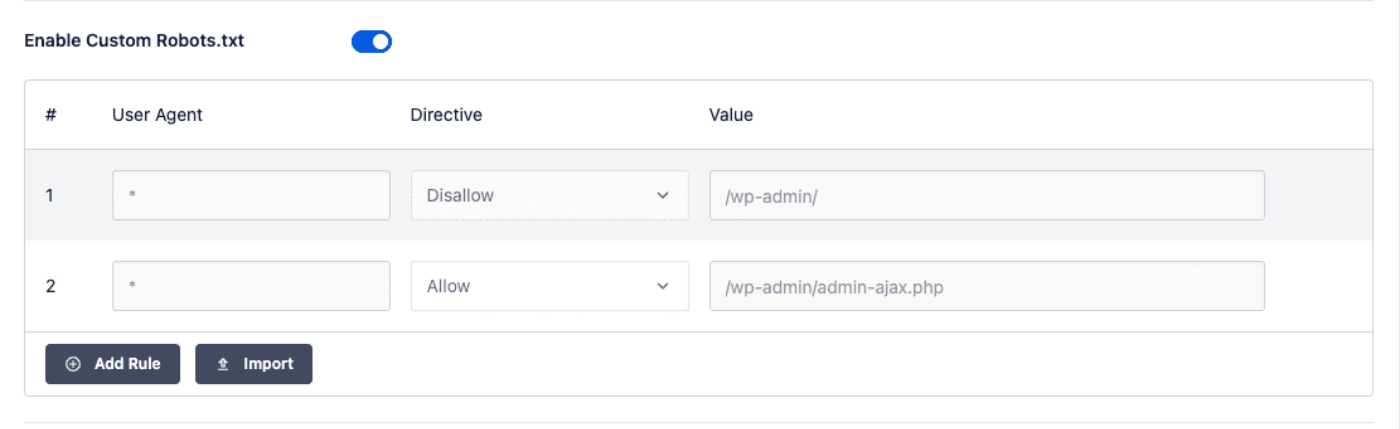
To add a rule, click the Add Rule button and then complete the fields which are described below.
User Agent
First, enter the user agent in the User Agent field.
For example, if you want to specify Google's crawler then enter “Googlebot” in the User Agent field.
If you want a rule that applies to all user agents then enter * in the User Agent field.
Directive
Next, select the rule type in the Directive drop down. There are four rule types you can select from:
- Allow will allow crawlers with the specified user agent access to the directory or file in the Value field.
- Block will block crawlers with the specified user agent access to the directory or file in the Value field.
- Clean-param lets you exclude pages with URL parameters which can give the same content with a different URL. Yandex, the only search engine that currently supports this directive, has a good explanation with examples here.
- Crawl-delay tells crawlers how frequently they can crawl your content. For example, a crawl delay of 10 tells crawlers not to crawl your content more than every 10 seconds.
Currently this directive is only supported by Bing, Yahoo and Yandex. You can change the crawl rate of Google's crawler in Google Search Console.
Value
Next, enter the directory path or filename in the Value field.
You can enter a directory path such as /wp-content/backups/ and file paths such as /wp-content/backups/temp.png.
You can also use * as a wildcard such as /wp-content/backup-*.
If you want to add more rules, then click the Add Rule button and repeat the steps above.
When you're finished, click the Save Changes button.
Your rules will appear in the Custom Robots.txt Preview section and in your robots.txt which you can view by clicking the Open Robots.txt button.
Editing Rules Using the Rule Builder
To edit any rule you've added, just change the details in the rule builder and click the Save Changes button.
Deleting a Rule in the Rule Builder
To delete a rule you've added, click the trash icon to the right of the rule.
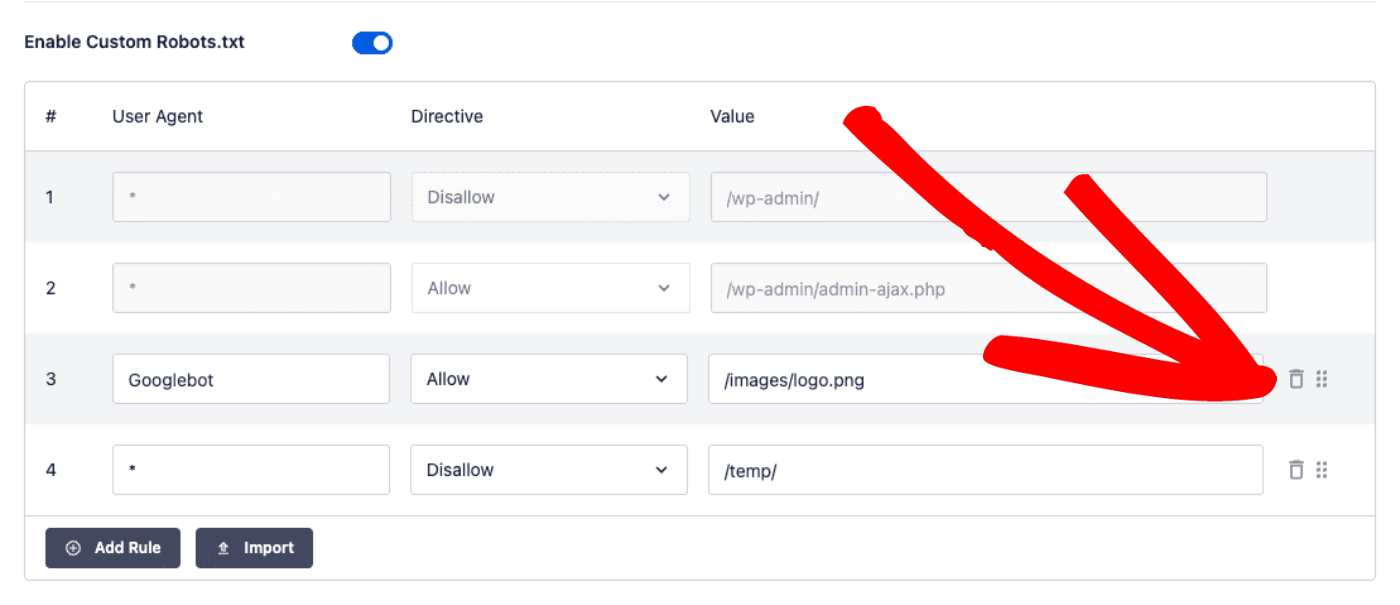
Changing the Order of Rules in the Rule Builder
You can easily change the order in which your custom rules appear in your robots.txt by dragging and dropping the entries in the rule builder.
Click and hold the drag and drop icon to the right of the rule and move the rule to where you want it to appear as seen below.
Google has a good explanation here of why the order in which you place your rules is important.
Importing Your Own Robots.txt into All in One SEO
You can import your own robots.txt or rules from another source very easily.
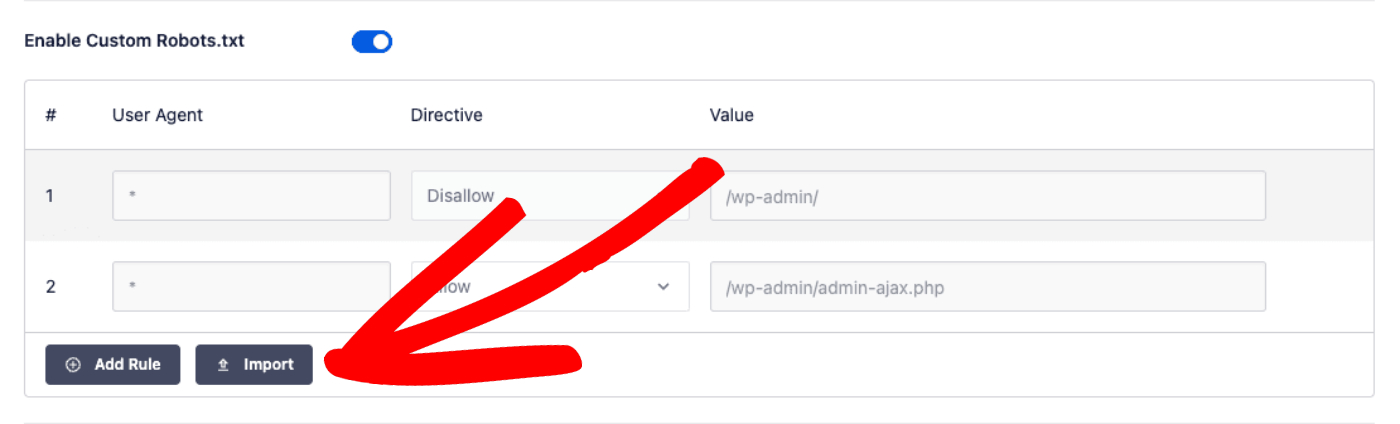
First, click the Import button to open the Import Robots.txt window.
In the Import Robots.txt window you can either import from a URL by entering the URL of a robots.txt in the Import from URL field or you can paste the contents of a robots.txt in the Paste Robots.txt text field.
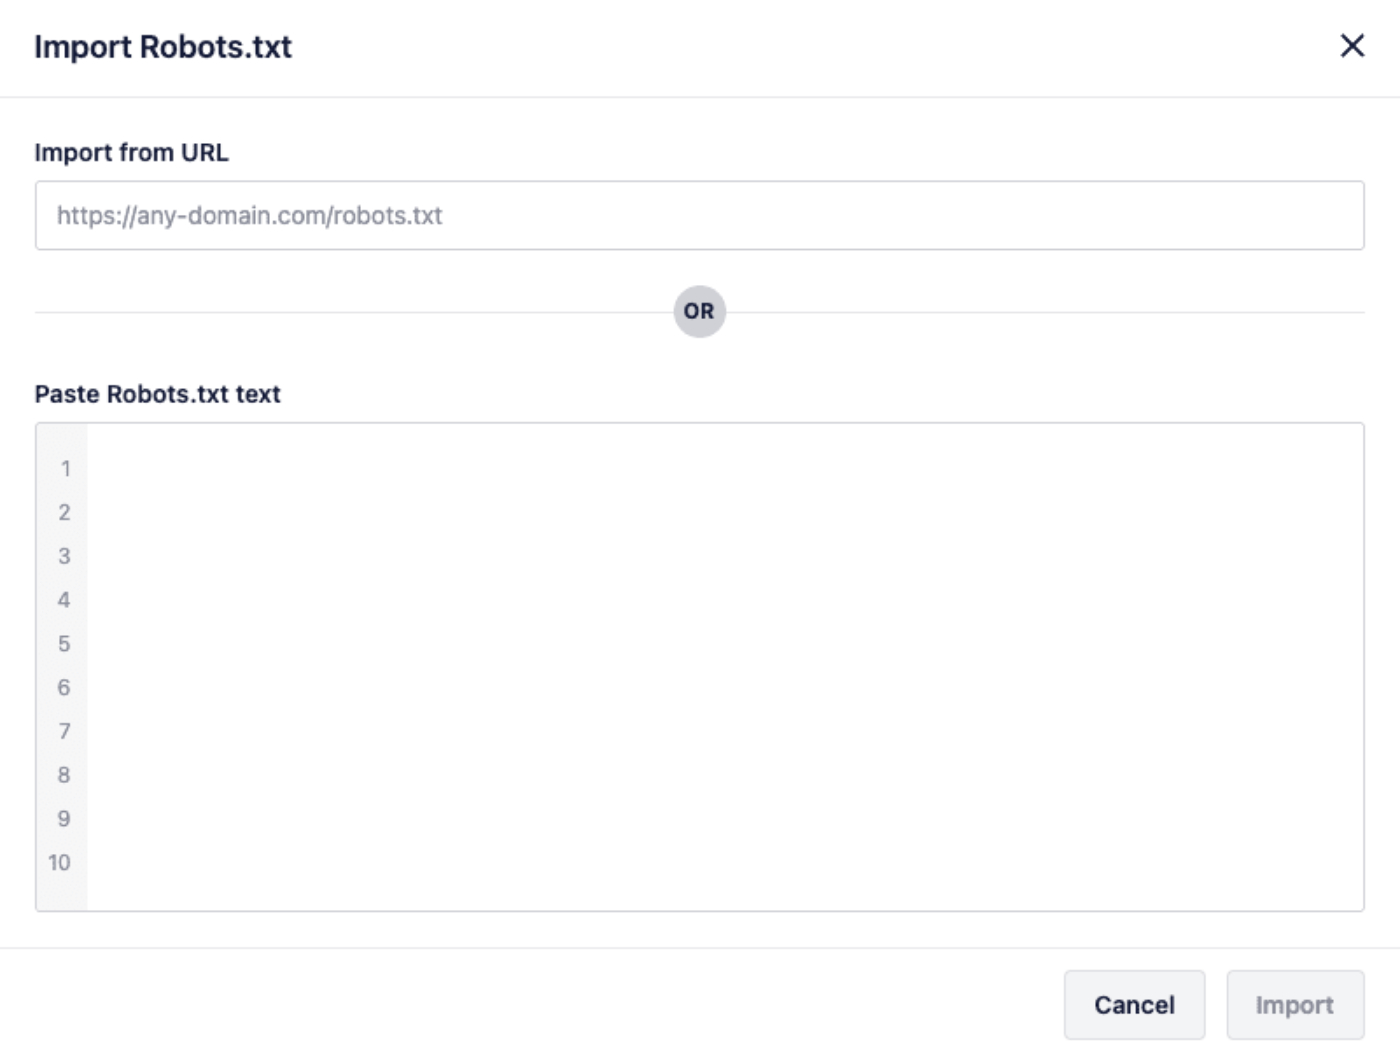
Once you've done this, click the Import button.
Using Advanced Rules in the Rule Builder
The Robots.txt Rule Builder also supports the use of advanced rules. This includes regex patterns as well as URL parameters.
Here are three examples of how advanced rules can be used:
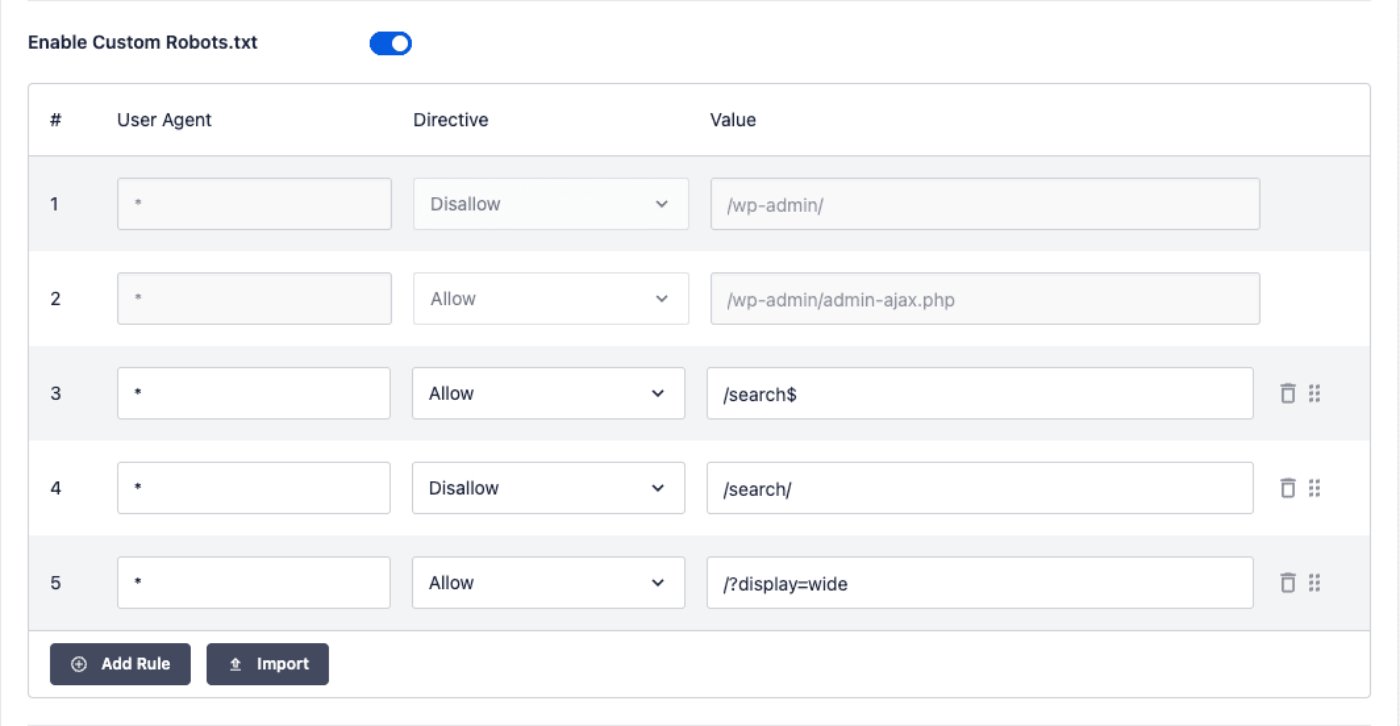
In the examples above, these advanced rules are shown:
- /search$ – this uses regex to allow access to the exact path “/search”
- /search/ – this blocks access to paths that start with “/search/” but are not an exact match
- /?display=wide – this allows access to the homepage with the matching URL parameter
Advanced rules such as these allow granular control over your site's robots.txt file so that you have full control over how user agents access your website.
Blocking Unwanted Crawlers
You can use the Block AI Crawlers to add rules to your robots.txt that block known crawlers such as AI crawlers and Google AdsBot.

You can select each of the crawlers to block them, or you can select All AI Crawlers to block all the ones listed.
Block Crawling of Internal Site Search URLs
You can use the Block Crawling of Internal Site Search URLs setting to add rules to your robots.txt to prevent crawling of URLs for search pages. This reduces unnecessary crawling of your site.

Robots.txt Editor for WordPress Multisite
There is also a Robots.txt Editor for Multisite Networks. Details can be found in our documentation on the Robots.txt Editor for Multisite Networks here.