
Did you know that you can schedule redirects in All in One SEO so that they start, and finish on a specific date and time?
Creating redirects in All in One SEO is already very easy to do. But now, you can also schedule them easily as well.
NOTE:
The Redirection Manager feature is available to customers with a Basic plan or above for All in One SEO Pro.
Some advanced features are available with a Pro plan or above for All in One SEO Pro.
Upgrade to All in One SEO Pro today to get Redirection Manager and many more features!
In This Article
Adding a Redirect
You can learn how to add a redirect in All in One SEO here.
Scheduling a Redirect
Scheduling a redirect can only be done when you add a new redirect. To do this, follow the steps below.
First, click on Redirects in the All in One SEO menu.

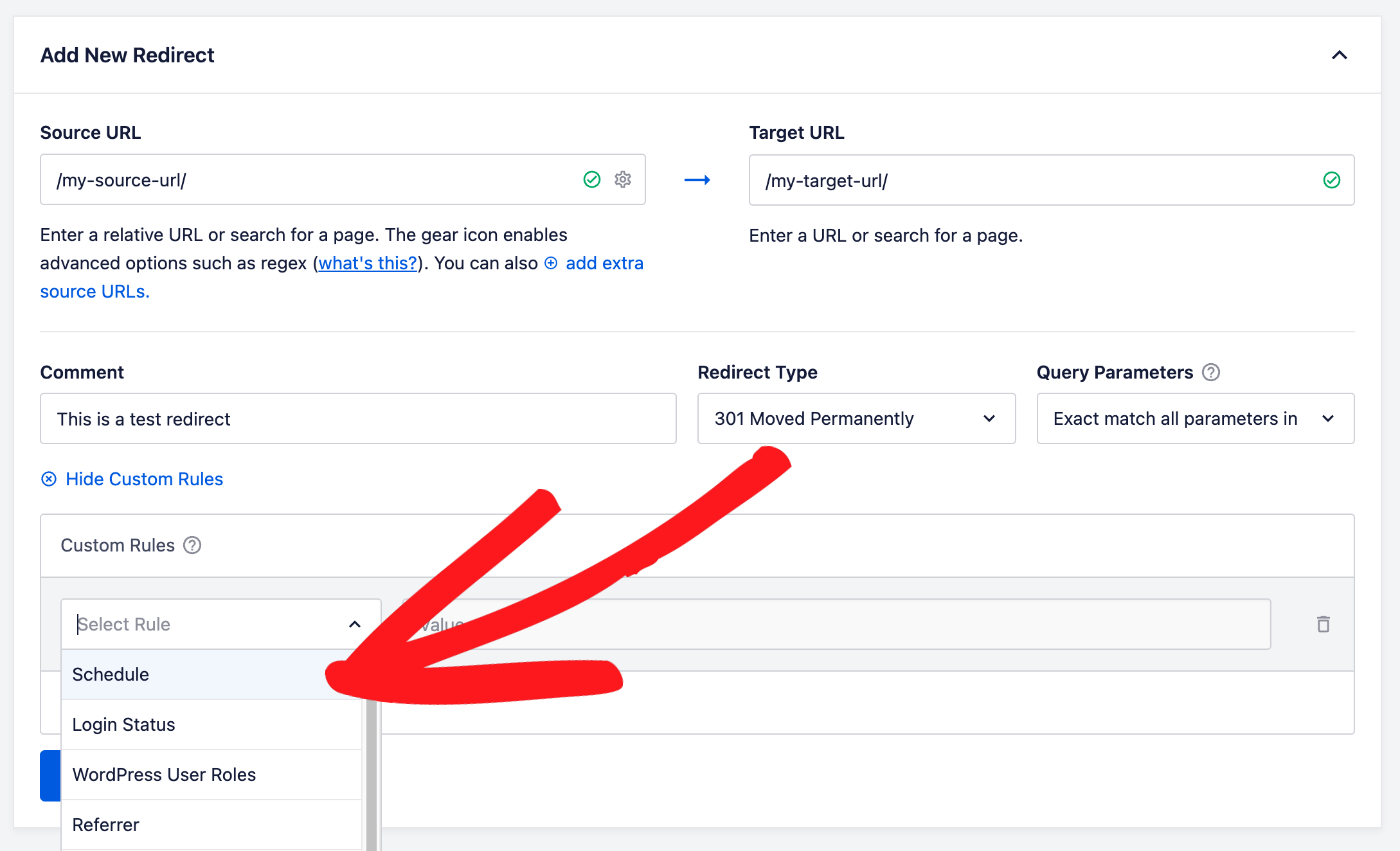
You'll see the Redirects screen and at the top will be the Add New Redirect form.

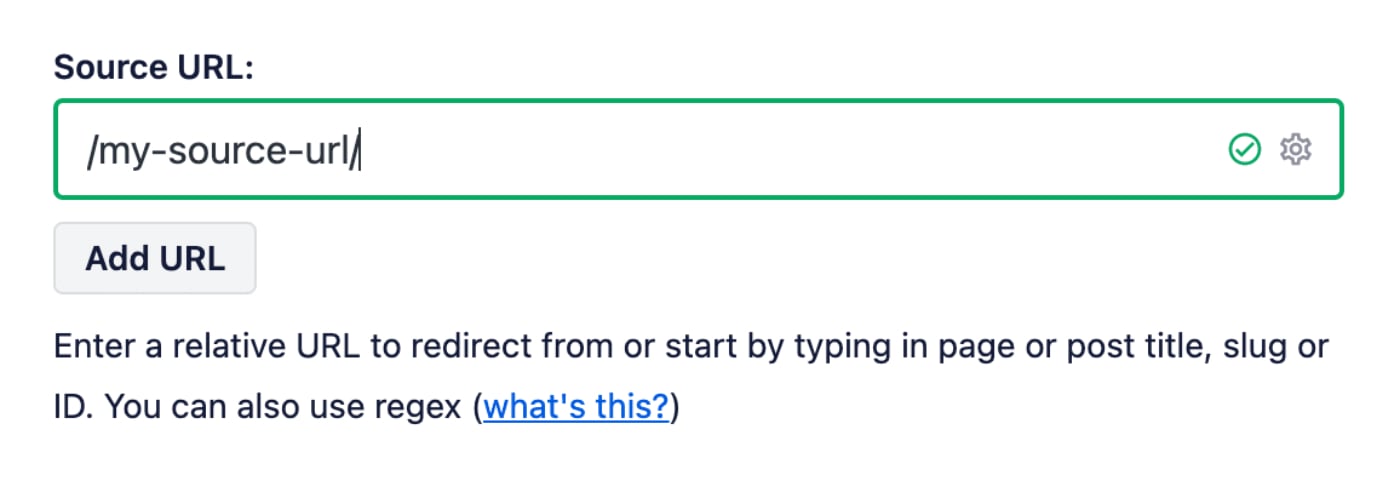
In the Source URL field, enter the URL you want to redirect from. The URL must be a relative URL, i.e. don't include the https://mydomain.com part of your URL.
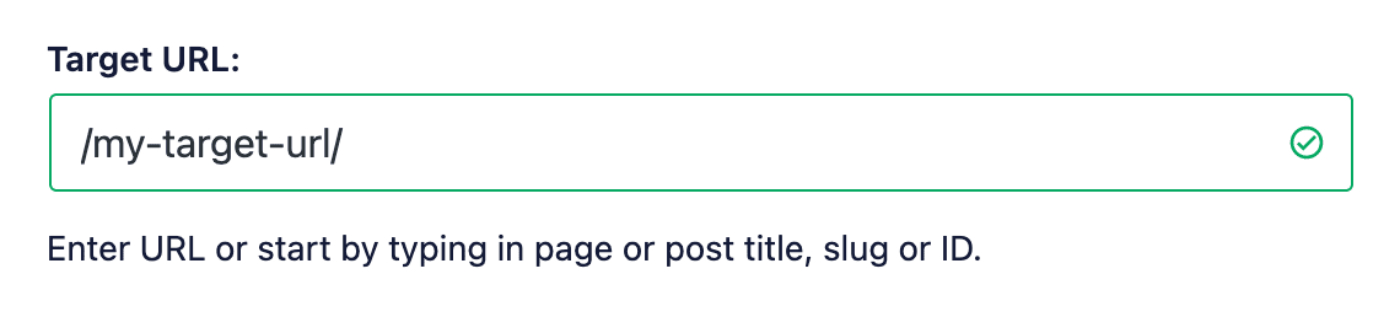
In the Target URL field, enter the URL you want to redirect to. The URL can be either a relative URL or an absolute URL.
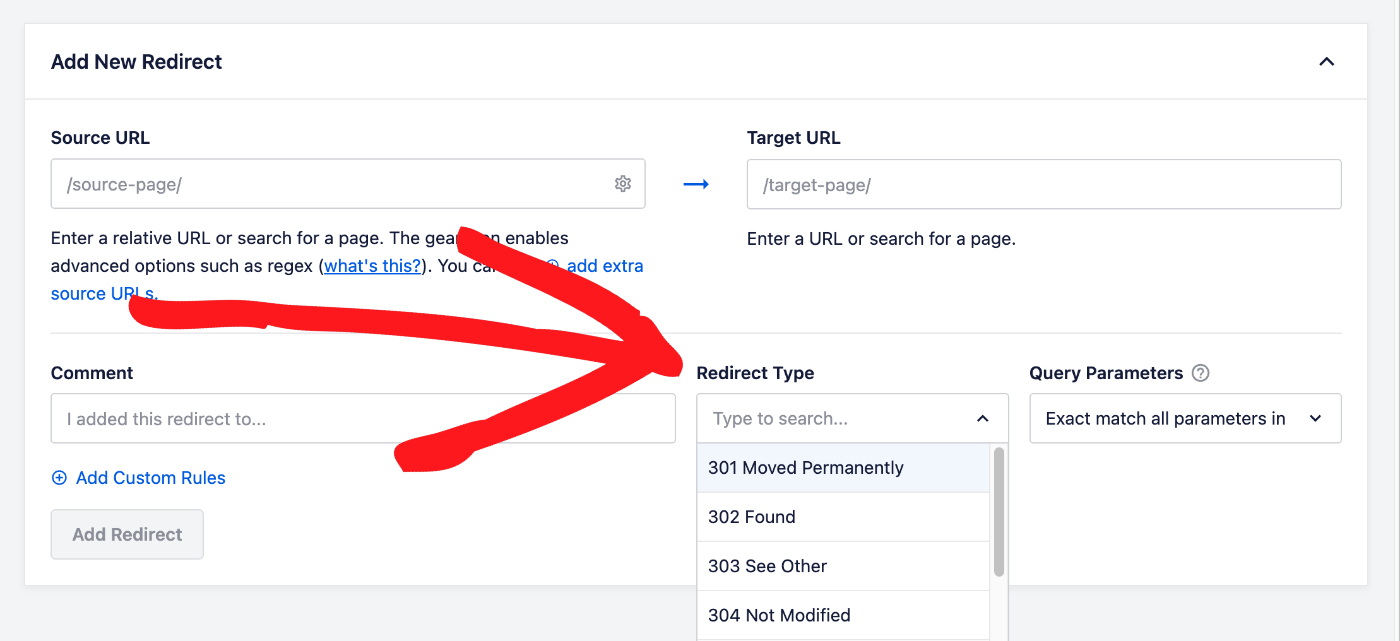
Setting the Redirect Type
To set the Redirect Type, click on the Redirect Type drop down to select the type of redirect you want. The two most common are:
- 301 Moved Permanently: Use this if you want to permanently redirect the old URL because the content has been deleted or moved.
- 307 Temporary Redirect: Use this if you only want to temporarily redirect the old URL.
Scheduling Your Redirect
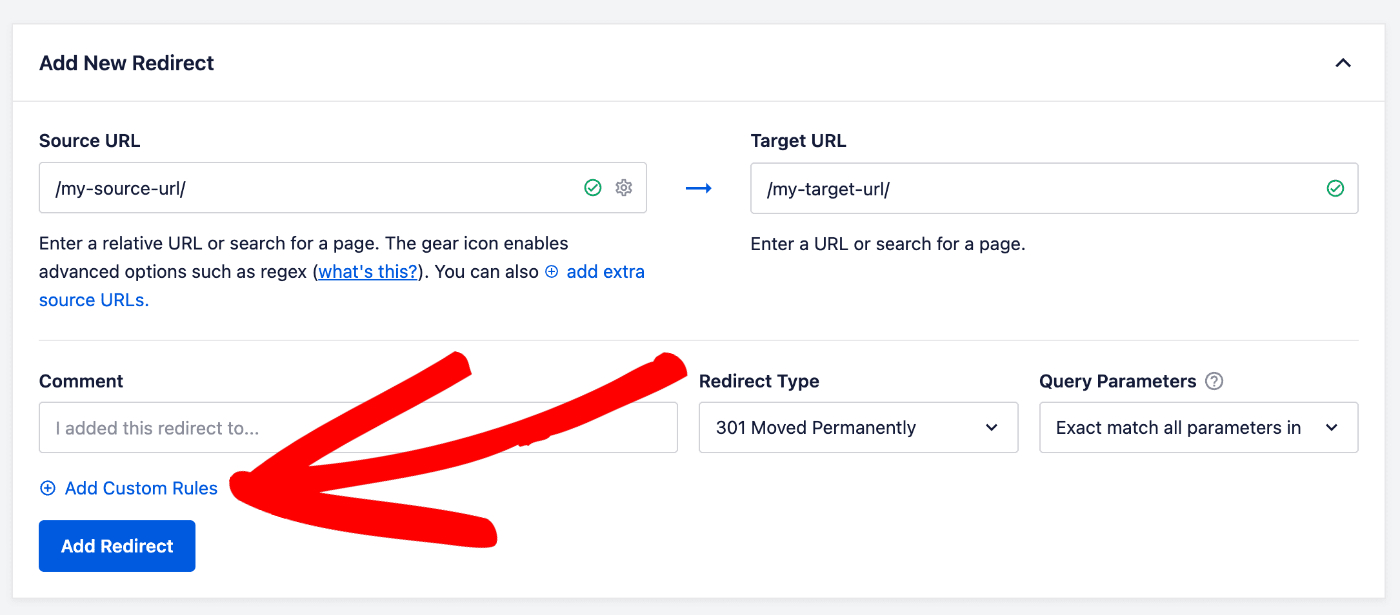
To schedule your redirect, click on the Add Custom Rules link.
Then, select Schedule in the Select Rule drop down.
You'll see Start Date and End Date fields where you can select a date and set a time. Use these to select the date and time you want the redirect to start and end.
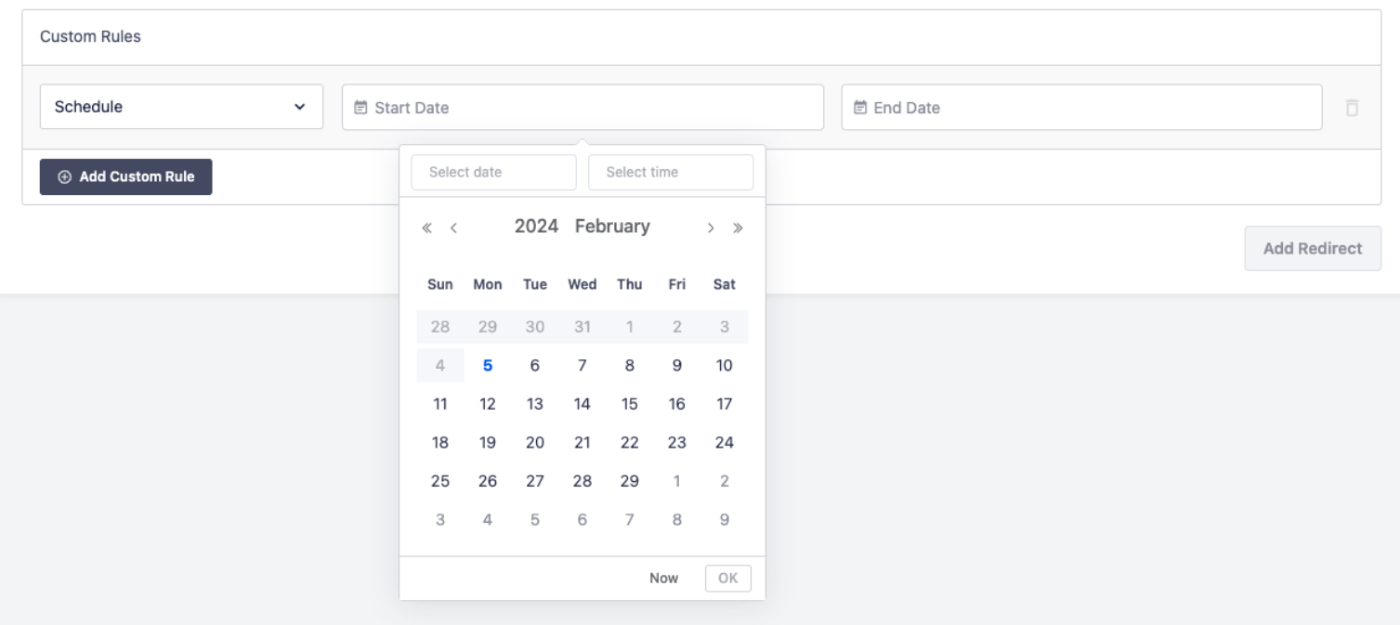
If you leave the End Date field blank, the redirect will have no end date and will continue until you disable or delete it.
Click the Add Redirect button to add your redirect.
NOTE:
You can also schedule a redirect from the Edit Post screen. The same options are available in the AIOSEO Settings section on the Redirects tab.
You can learn more about adding redirects on the Edit Post screen here.
Check out more documentation on our Redirection Manager here.