Notice: There is no legacy documentation available for this item, so you are seeing the current documentation.
Are you looking to install one or more of the addons for All in One SEO Pro? If you are, then this article will help you.
All in One SEO Pro has a number of addons that extend or add features to the base plugin, these currently include:
- Image SEO addon
- IndexNow addon
- Link Assistant addon
- Local SEO addon
- News Sitemap addon
- Redirection addon
- REST API addon
- Video Sitemap addon
These addons are included in specific plans. Our Pricing page lists which plans include each addon.
There are three ways to install an addon for All in One SEO which are detailed below.
In This Article
Installing Addons Via the Feature Manager
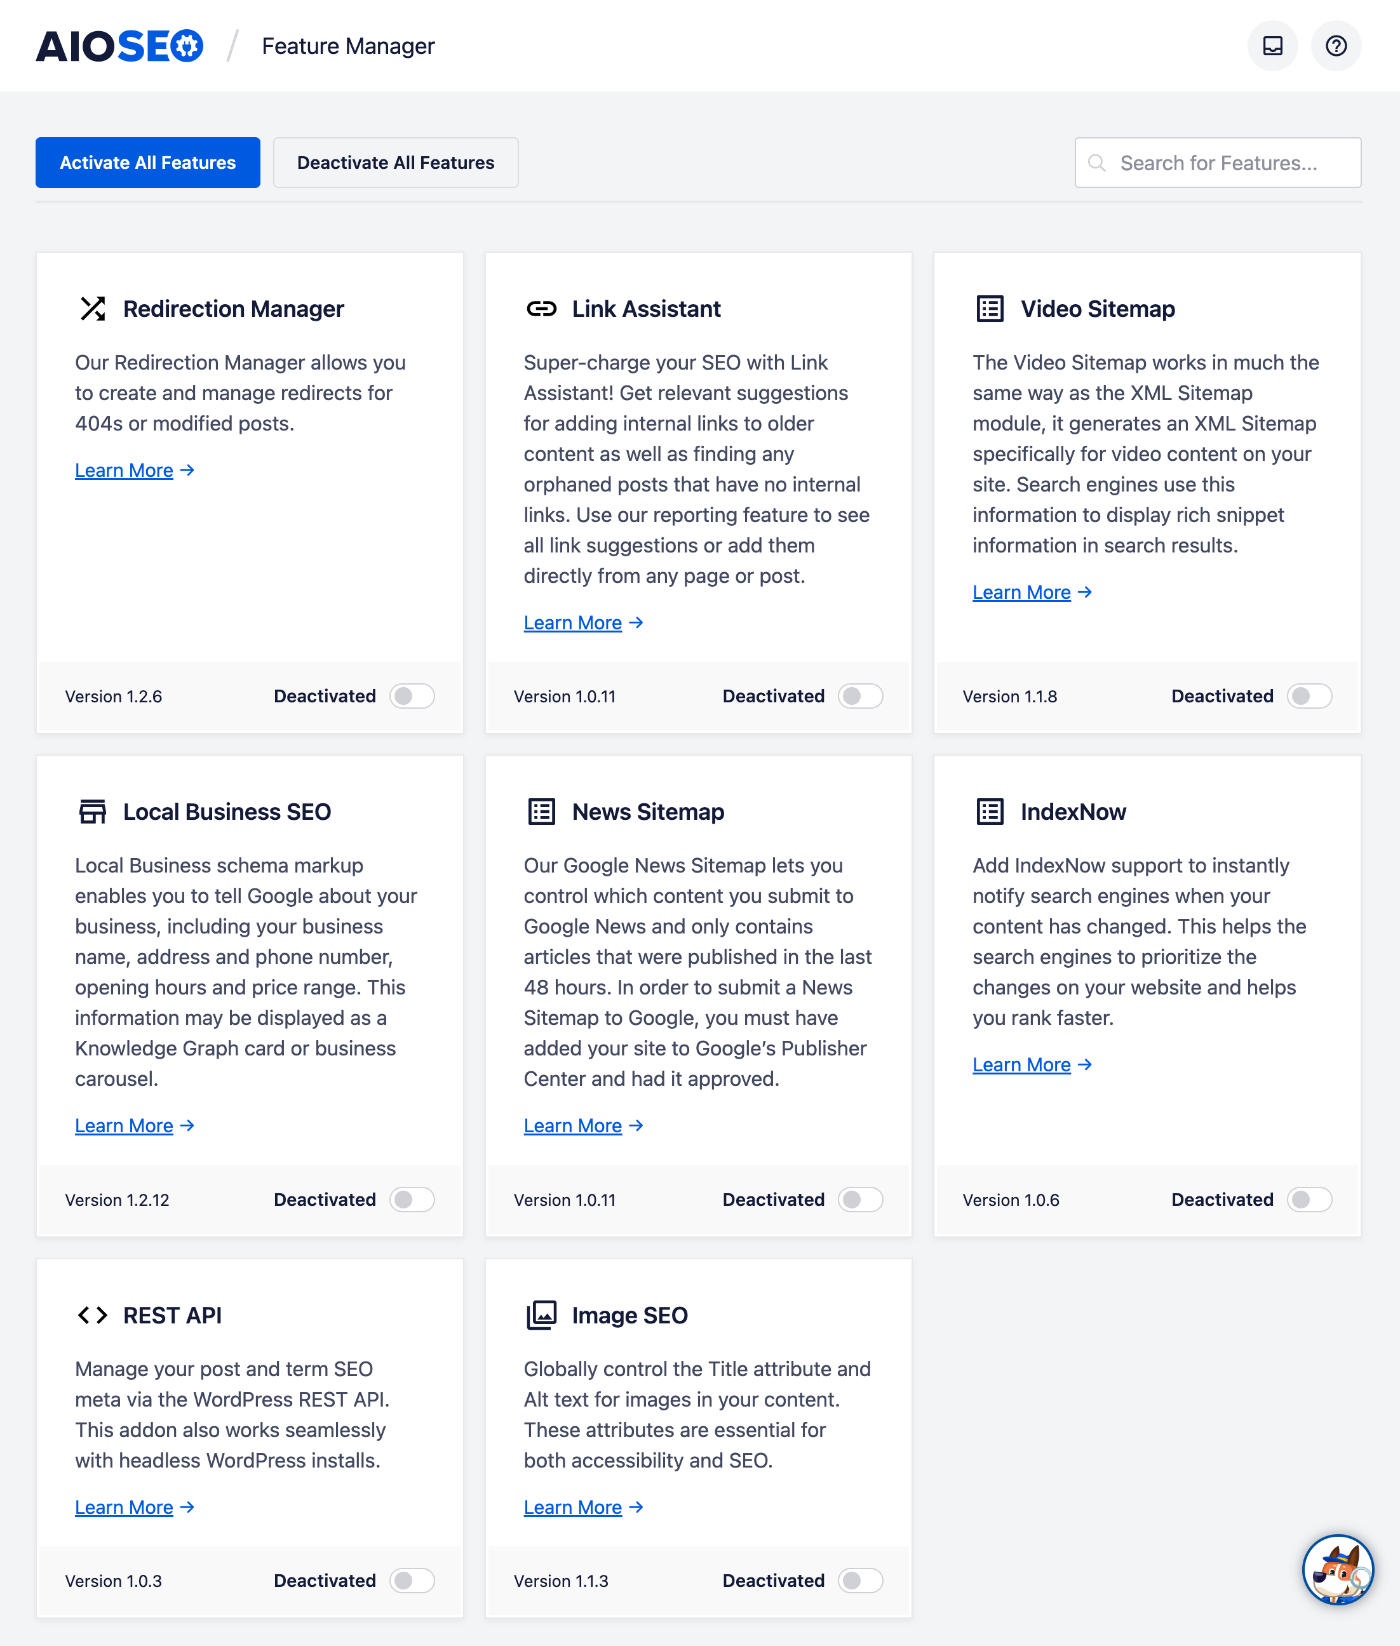
To install an addon via the Feature Manager, click on Feature Manager in the All in One SEO menu.

You’ll see each of the addons and a toggle that says Deactivated.
Click the toggle to install andactivate that addon, or click the Activate All Features to install and activate all the addons.
Installing Addons Via the Slash Screen
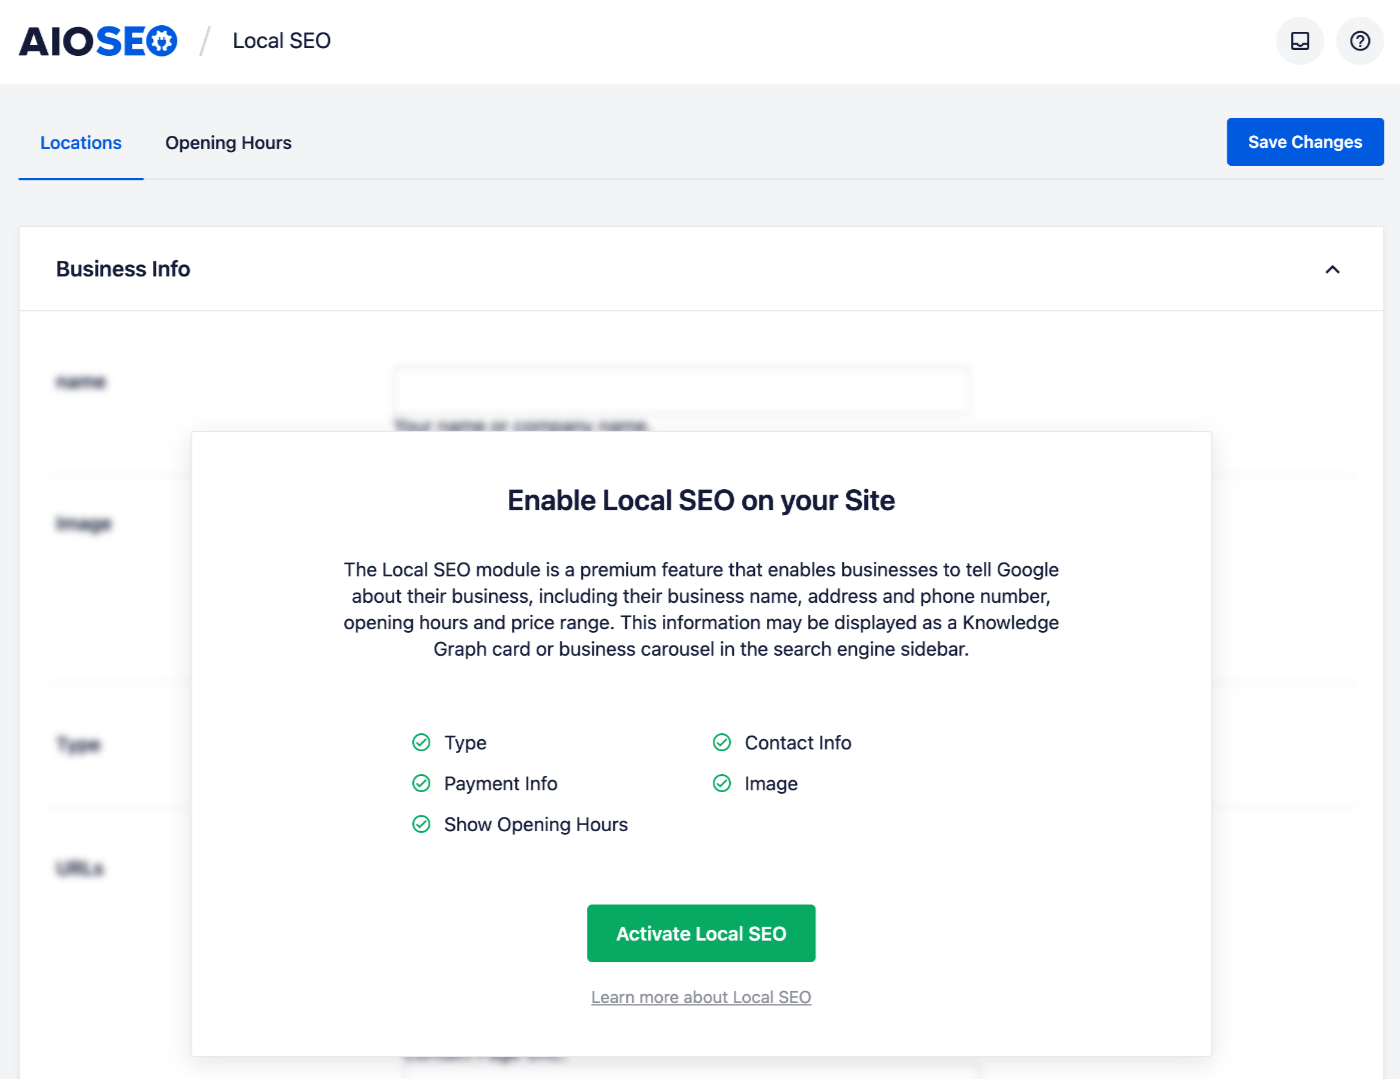
You can also install addons via the splash screens on their settings pages.
For example, to install and activate the Local SEO addon, click on Local SEO in the All in One SEO menu.
You’ll see a splash screen with an Activate button. Click the button to install and activate that addon.

You can find the splash screens for each addon at these locations:
- Image SEO addon – Go to All in One SEO » Search Appearance » Image SEO
- Local SEO addon – Go to All in One SEO » Local SEO
- News Sitemap addon – Go to All in One SEO » Sitemaps » News Sitemap
- Redirection addon – Go to All in One SEO » Redirects
- Video Sitemap addon – Go to All in One SEO » Sitemaps » Video Sitemap
Installing Addons Via the Plugins Screen
Finally, you can install addons via the Plugins screen in WordPress.
To do this, go to Plugins » Add New and click on the Upload Plugin button. Then upload the ZIP file for the addon which you can get by logging into the Account area on our site and clicking on the Downloads tab.