Você sabia que pode criar facilmente seus títulos de SEO e meta descrições usando IA?
Com os recursos de IA do All in One SEO, você pode criar o título de SEO e a meta descrição dentro do seu conteúdo para aumentar sua presença nos resultados de pesquisa.
Neste Artigo
Primeiros Passos com a IA do AIOSEO
Os recursos de IA do All in One SEO dependem de um sistema de créditos. Você pode comprar blocos de créditos ou usar os créditos que recebe como parte de sua assinatura do All in One SEO Pro.
Para começar, você precisará verificar se tem créditos de IA. Para fazer isso, clique em Configurações Gerais no menu All in One SEO e role para baixo até a seção Créditos de IA na aba Licença.

Você pode clicar no botão Obter Créditos de IA para comprar um bloco de créditos Pay-As-You-Go, ou pode clicar no botão Conectar Conta se já tiver uma conta para créditos de IA.
Se você ativar uma chave de licença para o All in One SEO Pro, verá que sua conta é conectada automaticamente e o número de créditos disponíveis para você.

Na captura de tela acima, você pode ver que temos 150.000 créditos restantes de 200.000 créditos.
Para mais informações sobre o sistema de créditos de IA para o All in One SEO e como gerenciar sua conta, por favor, confira nosso artigo sobre Comprar e Gerenciar Créditos para os Recursos de IA do AIOSEO.
Agora que verificamos que temos alguns créditos de IA, vamos conferir o recurso de Perguntas Frequentes (FAQ).
IMPORTANTE:
Os mecanismos de busca não são obrigados a usar o título e a descrição de SEO que você fornece. Eles gerarão o snippet do resultado da pesquisa com base em cada pesquisa e é completamente automatizado. Eles podem usar seu título e descrição de SEO ou podem usar algo que considerem mais relevante para o termo de pesquisa.
Gerando Títulos de SEO Usando IA do AIOSEO
OBSERVAÇÃO:
Este recurso funciona com o Editor de Blocos do WordPress (também conhecido como Gutenberg), o Editor Clássico do WordPress e nossos construtores de páginas suportados.
Para criar seu título de SEO, edite qualquer post e role para baixo até a seção Configurações do AIOSEO.
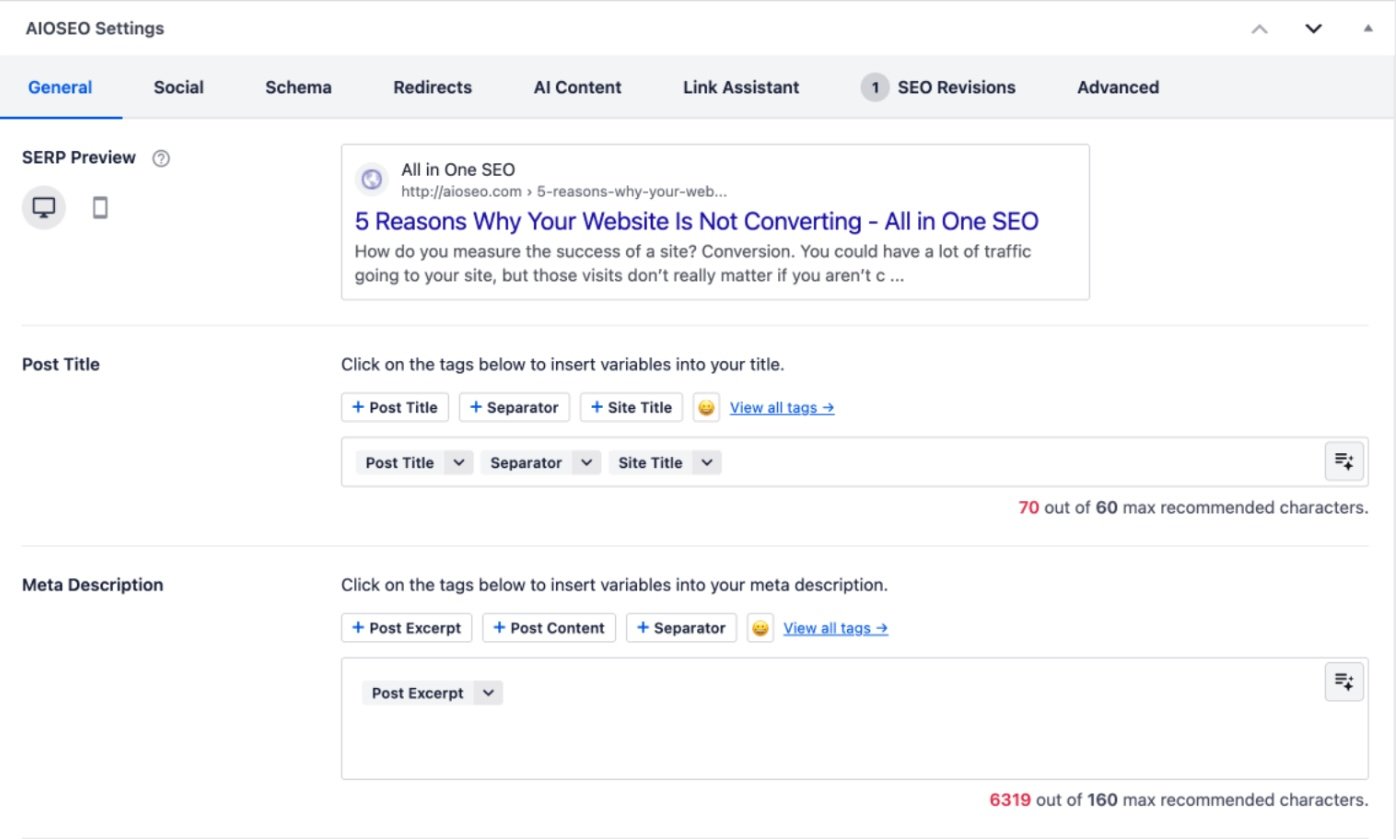
Em seguida, clique na aba Conteúdo de IA.
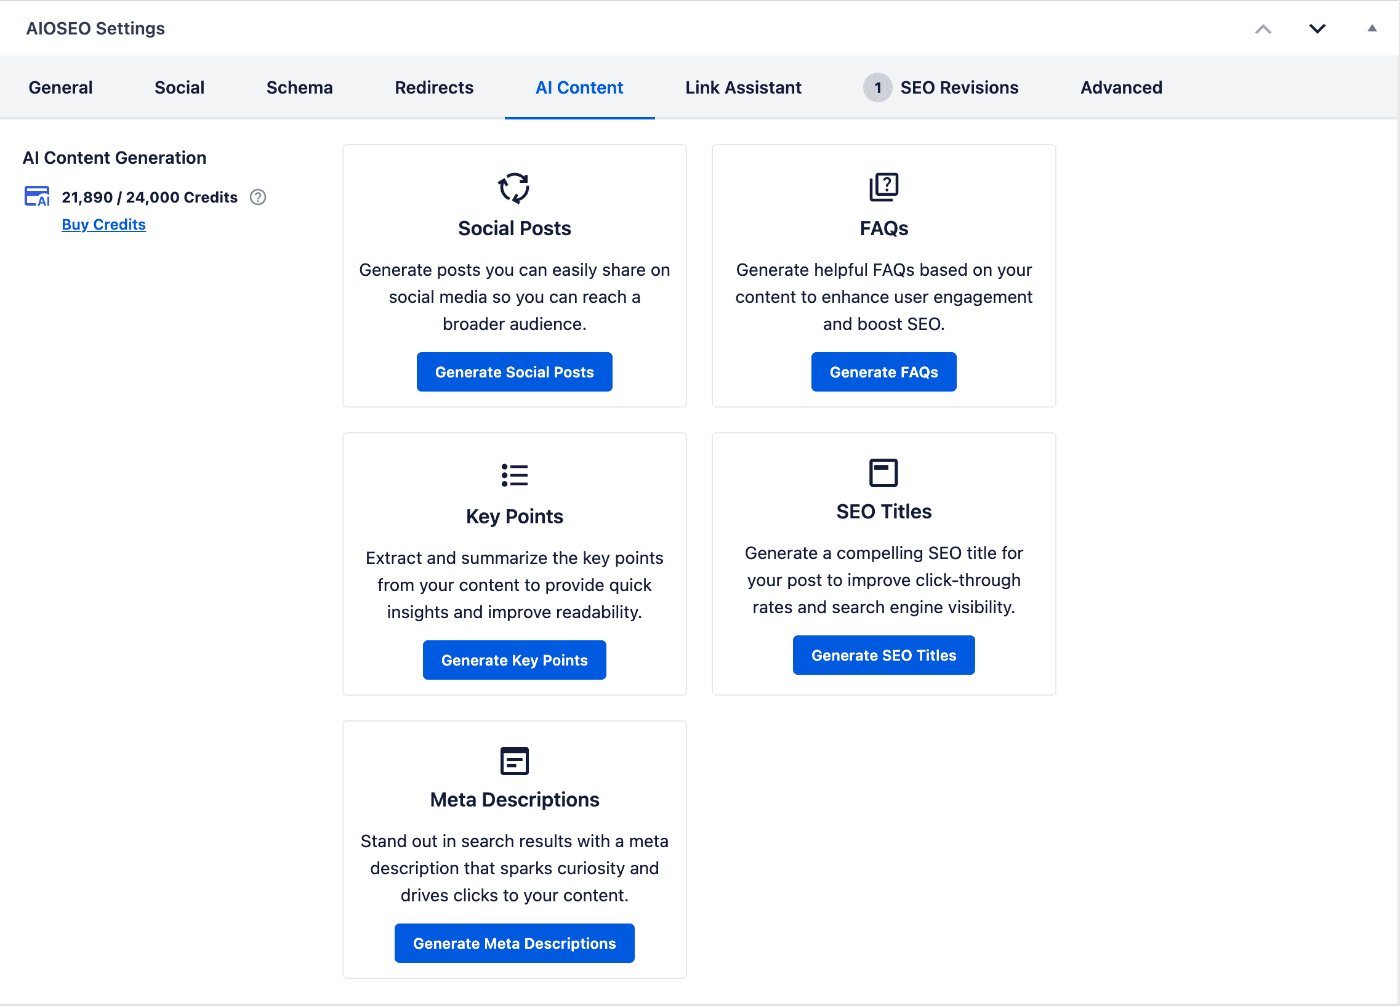
No lado esquerdo da tela, você verá o número de créditos que possui, juntamente com a quantidade restante.
Você também verá os recursos de Conteúdo de IA disponíveis para você.
Clique no botão Gerar Títulos de SEO na área Títulos de SEO. Você verá uma janela pop-up que mostra as opções.
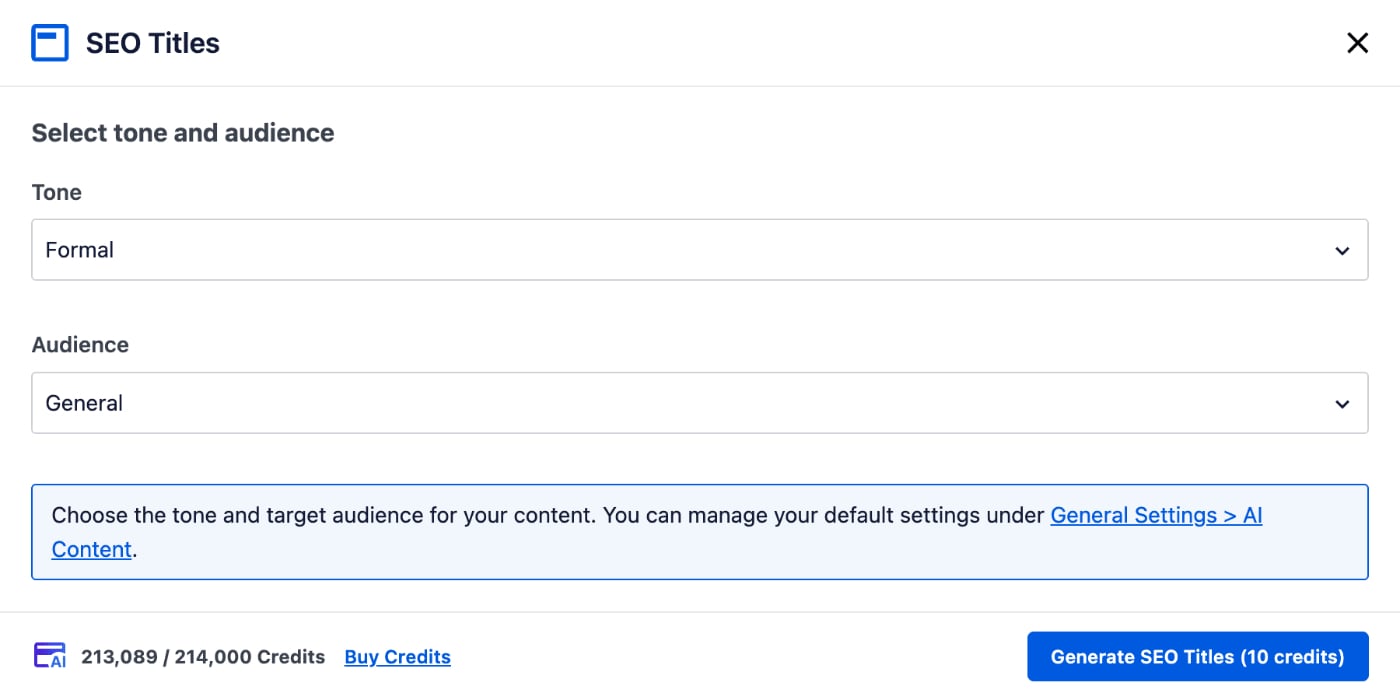
Na janela Títulos de SEO, você pode selecionar o tom do texto que será gerado, por exemplo, Amigável, Informal, Profissional.
Você também pode selecionar seu público, por exemplo, Negócios, Educacional, Técnico.
As configurações de Tom e Público controlarão o texto que é criado, garantindo que ele corresponda melhor ao tipo de visitantes do seu site. Essas configurações substituirão os padrões que podem ser definidos na guia Conteúdo de IA em All in One SEO > Suíte de IA.
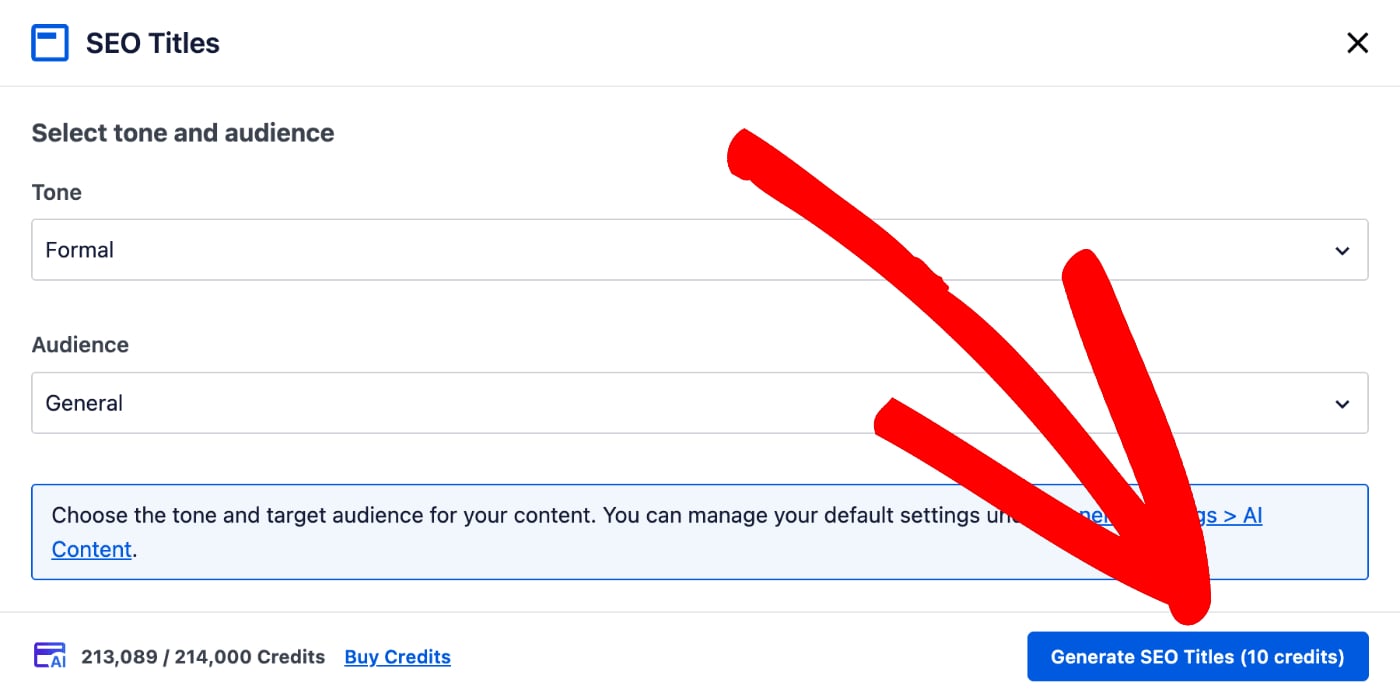
Selecione o Tom e o Público, e clique no botão Gerar Títulos de SEO.
Observe que o botão Gerar Títulos de SEO mostra o número de créditos de IA que serão usados para gerar os títulos de SEO.
Você também verá o número de créditos que possui, juntamente com a quantidade restante, no canto inferior esquerdo da janela.
A janela agora exibirá os títulos de SEO gerados, com um botão Adicionar à direita de cada um. Esses títulos de SEO serão relevantes para o conteúdo desta postagem específica, em vez de todo o seu site.
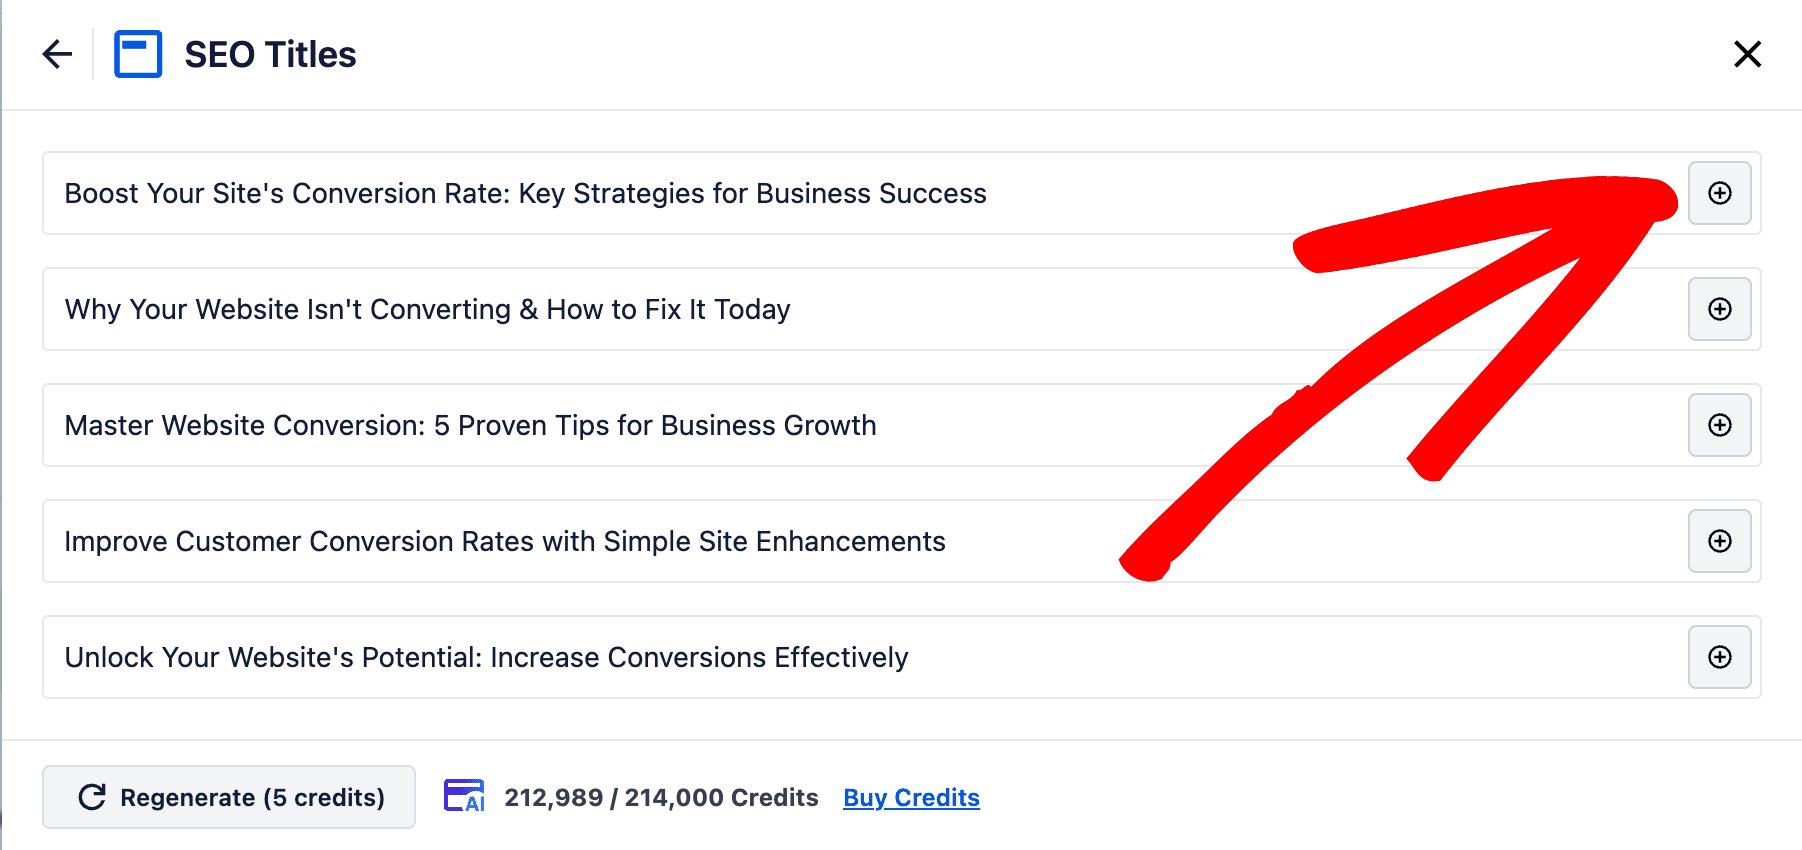
Clique no botão Adicionar ao lado do título de SEO que você deseja escolher para esta postagem.
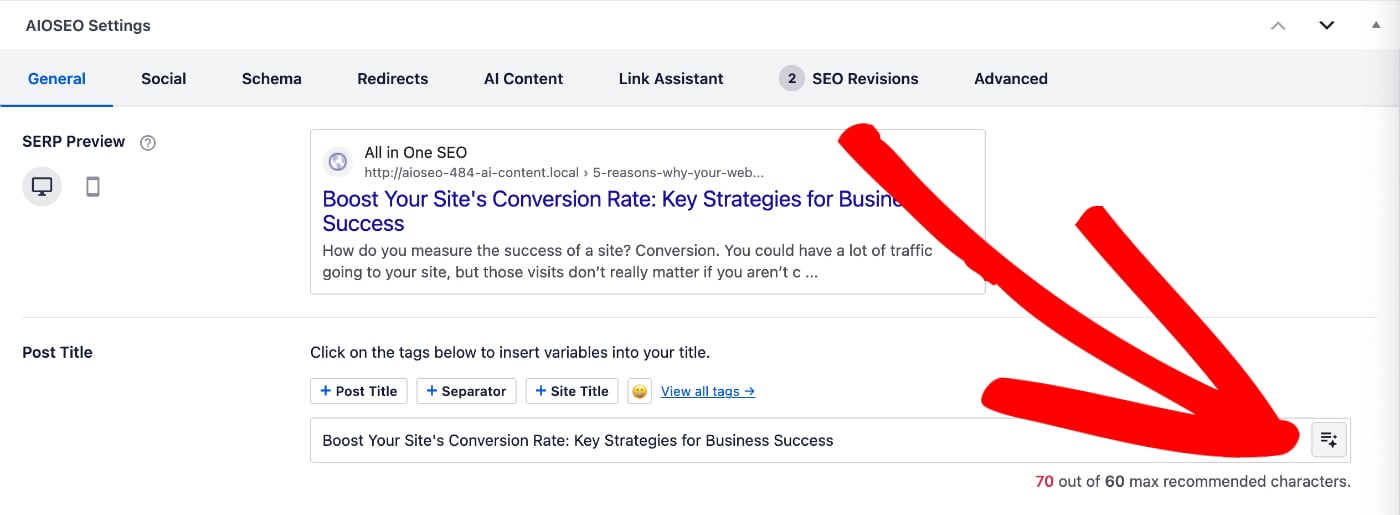
O título de SEO será inserido no campo Título da Postagem na aba Geral da seção Configurações do AIOSEO. Ele substituirá qualquer texto ou smart tags que estavam anteriormente lá.
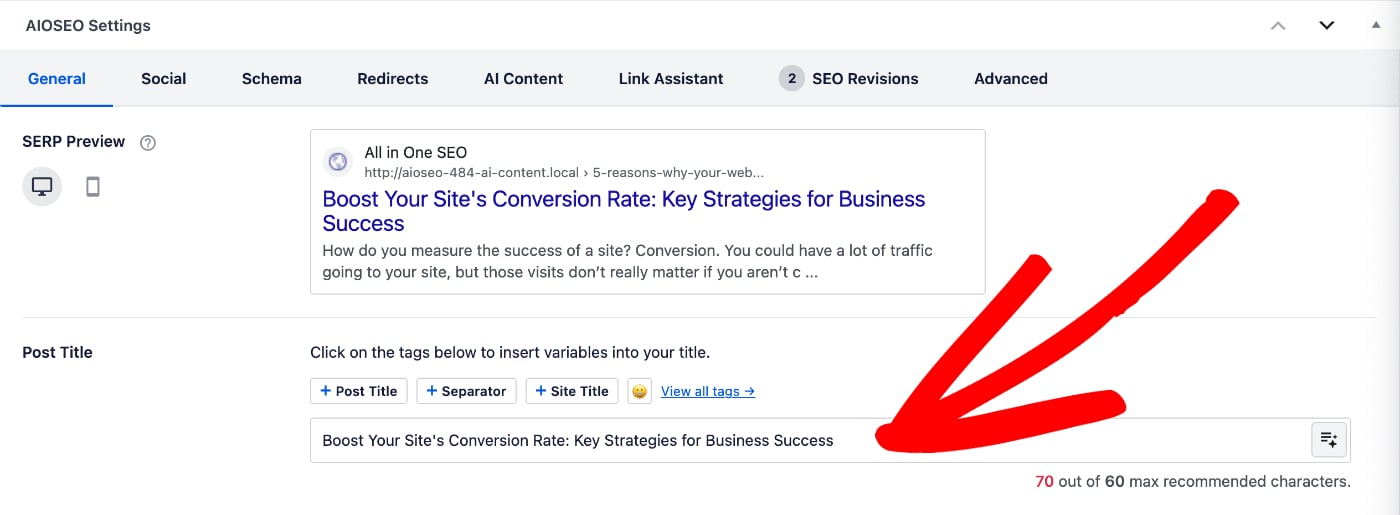
Você também pode gerar títulos de SEO clicando no botão Usar Gerador de IA à direita do campo Título da Postagem, como mostrado abaixo:
OBSERVAÇÃO:
Este novo recurso de IA do AIOSEO substitui o anterior Gerador de Títulos de SEO que usava OpenAI.
Gerando Meta Descrições Usando IA do AIOSEO
OBSERVAÇÃO:
Este recurso funciona com o Editor de Blocos do WordPress (também conhecido como Gutenberg), o Editor Clássico do WordPress e nossos construtores de páginas suportados.
Para criar sua meta descrição, edite qualquer post e role para baixo até a seção Configurações do AIOSEO.
Em seguida, clique na aba Conteúdo de IA.
No lado esquerdo da tela, você verá o número de créditos que possui, juntamente com a quantidade restante.
Você também verá os recursos de Conteúdo de IA disponíveis para você.
Clique no botão Gerar Meta Descrições na área Meta Descrições. Você verá uma janela pop-up que mostra as opções.
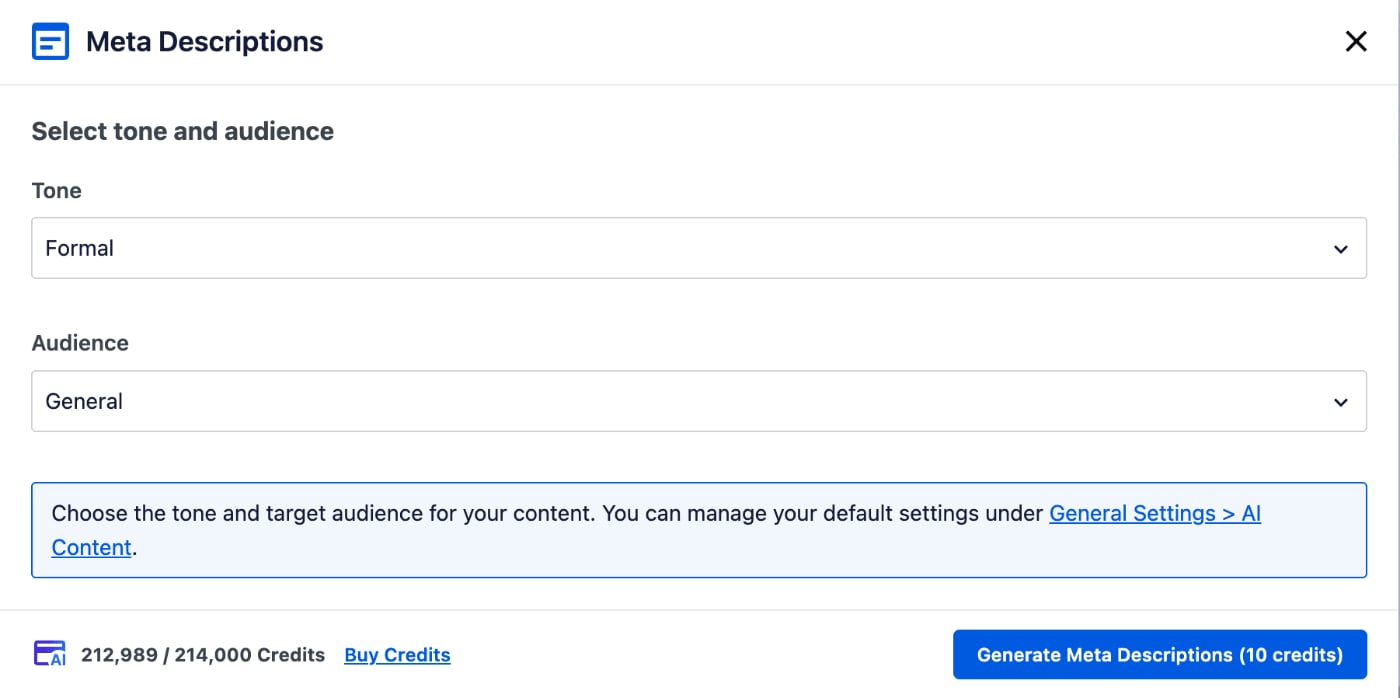
Na janela Meta Descrições, você pode selecionar o tom do texto que será gerado, por exemplo, Amigável, Informal, Profissional.
Você também pode selecionar seu público, por exemplo, Negócios, Educacional, Técnico.
As configurações de Tom e Público controlarão o texto que é criado, garantindo que ele corresponda melhor ao tipo de visitantes do seu site. Essas configurações substituirão os padrões que podem ser definidos na guia Conteúdo de IA em All in One SEO > Suíte de IA.
Selecione o Tom e o Público, e clique no botão Gerar Meta Descrições.
Observe que o botão Gerar Meta Descrições mostra o número de créditos de IA que serão usados para gerar as meta descrições.

Você também verá o número de créditos que possui, juntamente com a quantidade restante, no canto inferior esquerdo da janela.
A janela exibirá agora as meta descrições geradas, com um botão Adicionar à direita de cada uma. Essas meta descrições serão relevantes para o conteúdo desta postagem específica, em vez de todo o seu site.
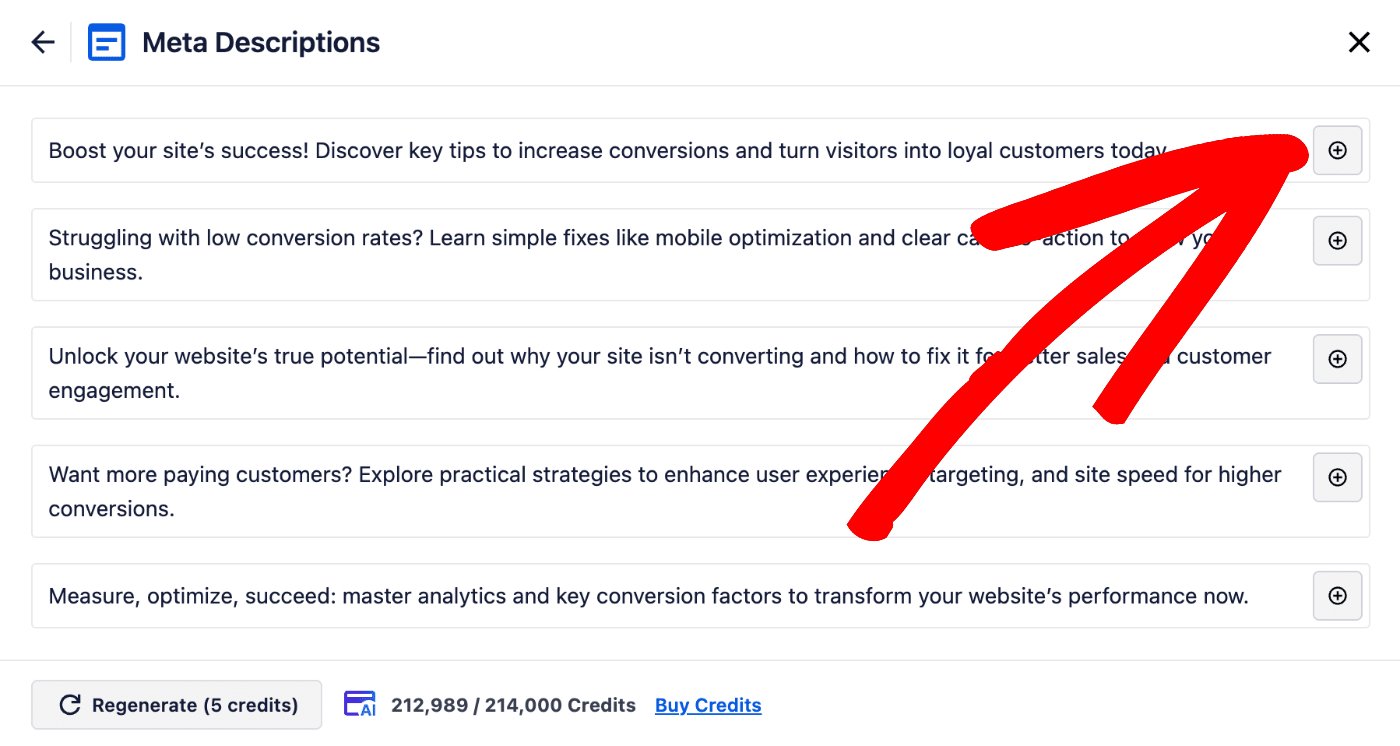
Clique no botão Adicionar ao lado da meta descrição que você deseja escolher para esta postagem.
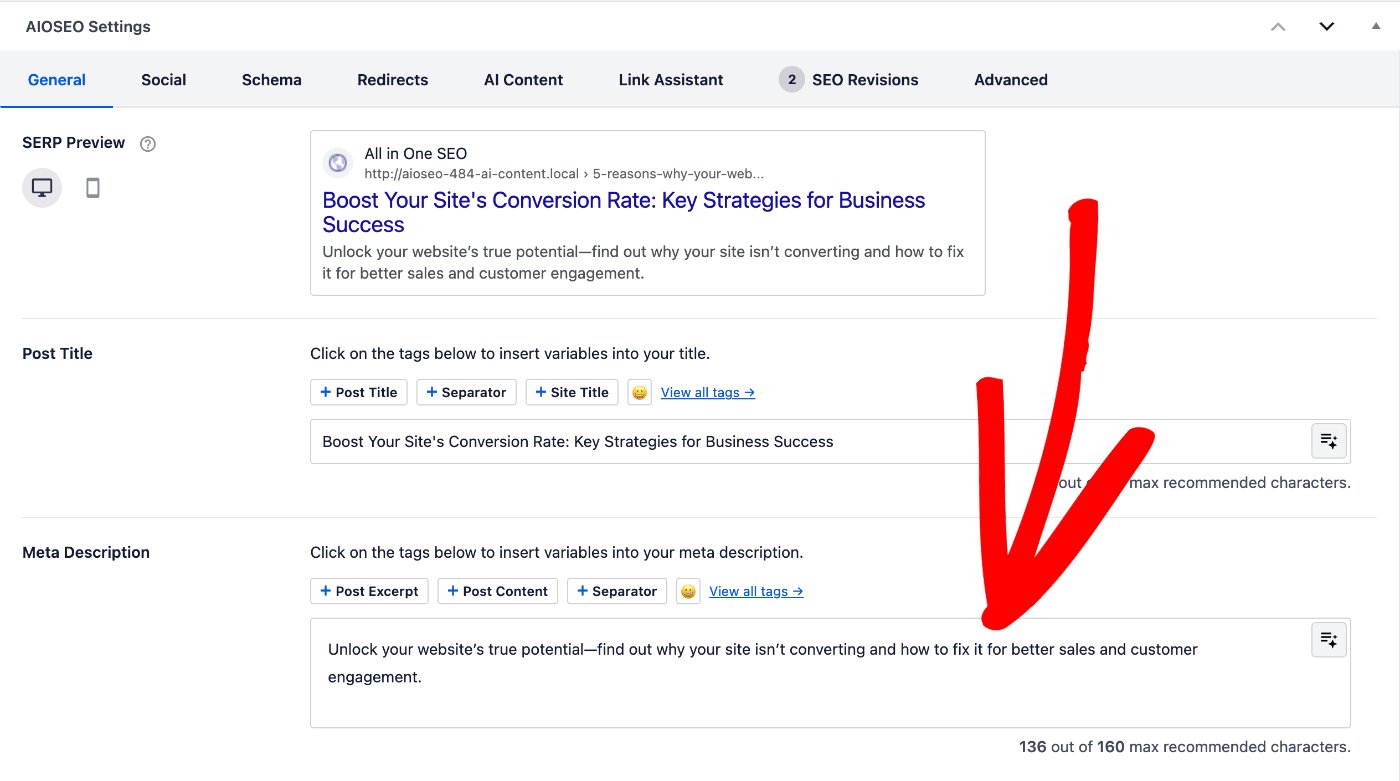
A meta descrição será inserida no campo Meta Descrição na aba Geral da seção Configurações do AIOSEO. Ela substituirá qualquer texto ou tag inteligente que estivesse lá anteriormente.
Você também pode gerar meta descrições clicando no botão Usar Gerador de IA à direita do campo Meta Descrição, como mostrado abaixo:

OBSERVAÇÃO:
Este novo recurso de IA do AIOSEO substitui o anterior Gerador de Meta Descrições que usava o OpenAI.
É isso! Agora você usou a IA do AIOSEO para gerar títulos e meta descrições de SEO para sua postagem, página ou outro conteúdo.
Aviso Legal de Conteúdo Gerado por IA
O conteúdo gerado por ferramentas de inteligência artificial pode nem sempre ser totalmente preciso ou confiável. Embora esses sistemas sejam projetados para fornecer conteúdo útil e informativo, eles são baseados em padrões de dados e podem inadvertidamente produzir informações desatualizadas, incompletas ou incorretas. Recomendamos que você verifique detalhes críticos por meio de fontes confiáveis antes de publicar conteúdo gerado por IA.
Além disso, os modelos de IA às vezes podem refletir vieses presentes em seus dados de treinamento, o que pode levar a distorções não intencionais de informações ou perspectivas. É importante que os usuários abordem o conteúdo produzido por IA com uma mentalidade crítica e considerem múltiplos pontos de vista para garantir uma compreensão completa. Os desenvolvedores do All in One SEO não garantem a precisão ou imparcialidade absolutas do resultado gerado.
Leitura Adicional
Confira mais artigos sobre como usar os recursos de IA do AIOSEO aqui.