Do you want to set up an XML Sitemap for your site to let search engines know when you publish or change content?
All in One SEO makes this really easy. In fact it's enabled by default and there's very little configuration needed.
Here we'll show you how to review the settings and check your sitemap so that you can be confident it includes all the right content.
In This Article
Tutorial Video
What is an XML Sitemap
An XML Sitemap is a special webpage that lists all of your content. It includes information such as when your content last changed.
It's an essential part of SEO because it helps search engines find your content and tells them when you've changed or removed content.
Search engines use this information to decide what needs to be included and updated in search results.
Without an XML Sitemap, it would take longer for your content to appear on, or be removed from search engines.
It's very important that you understand what's included in your XML Sitemap. You should check it frequently to be sure that you're including the right content, and excluding content you don't want search engines to see.
NOTE:
The XML Sitemap created by All in One SEO is updated whenever it's requested by a search engine crawler. This means that it's always up-to-date.
We notify Google whenever content is published or updated. Bing and some other search engines use Index Now for notifications when content is published or updated.
Viewing Your XML Sitemap
First, let's make sure you can view your XML Sitemap.
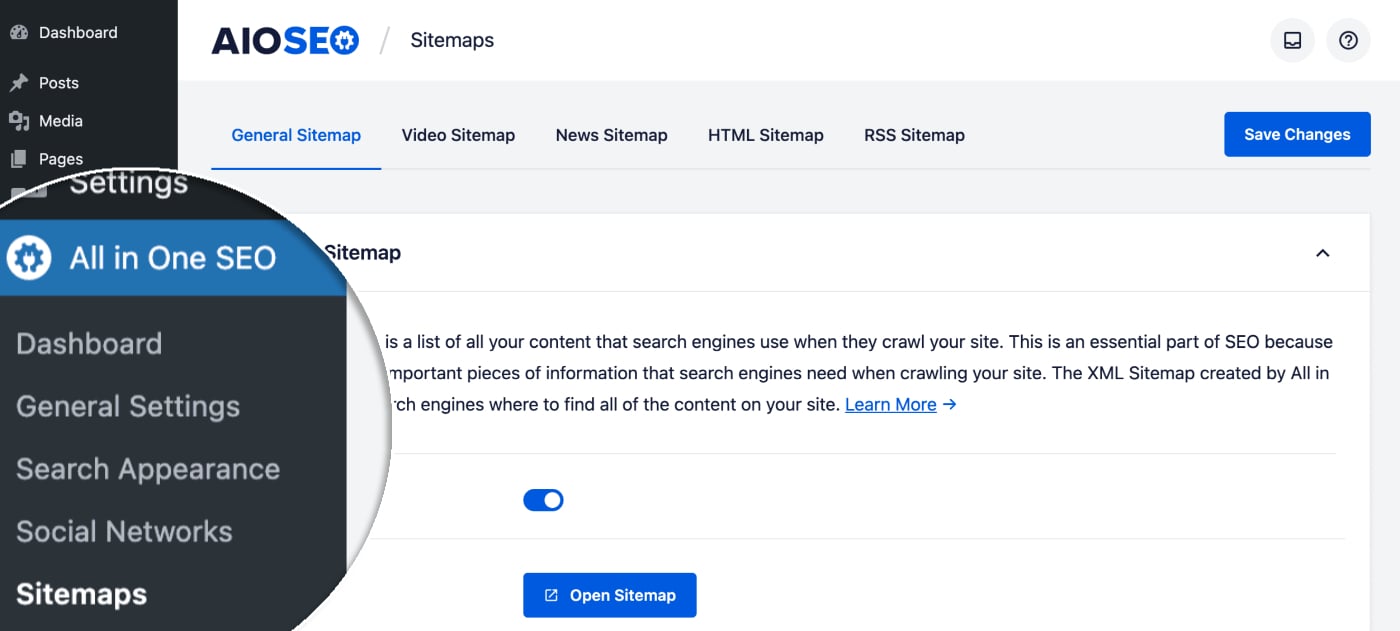
To get started, go to Sitemaps in the All in One SEO menu.

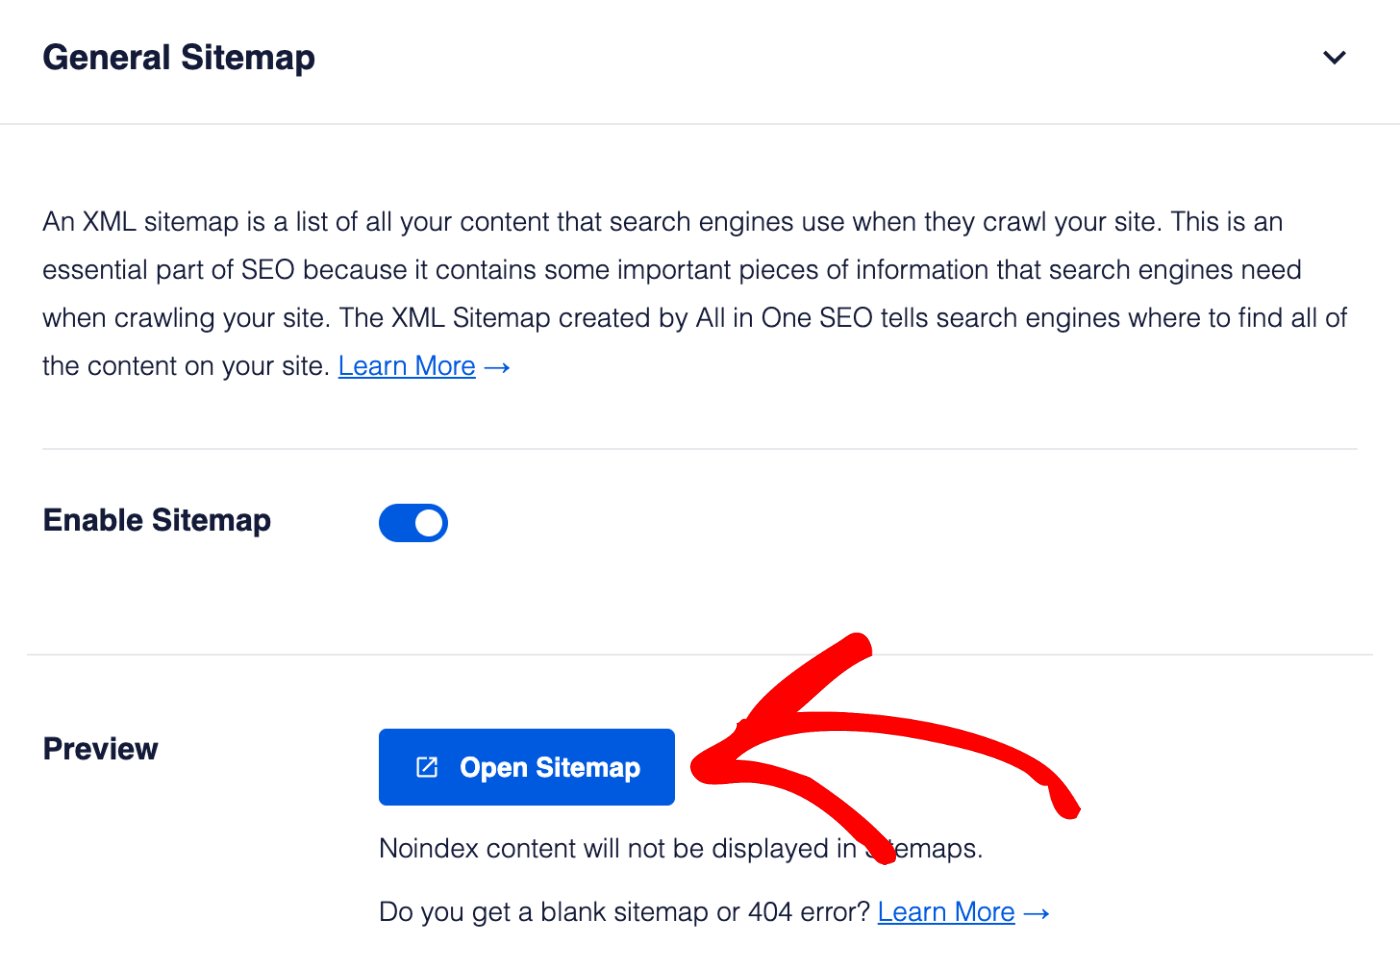
You'll see the General Sitemap screen and you should see that Enable Sitemap is on. If it's off, you'll want to turn it on.
Click the Open Sitemap button to view your XML Sitemap.

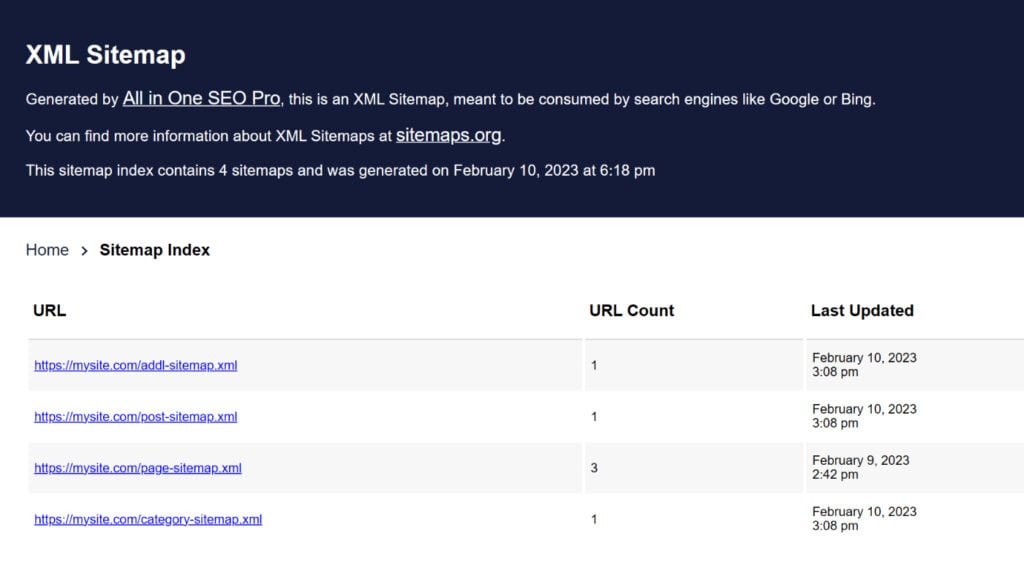
You should see an index page for your XML Sitemap that looks like this:

The index page lists all of the sitemaps for your site. Each sitemap contains a different type of content. For example, above you'll see there's one for Posts and one for Pages.
Click on each link in the index to see the list of that content.
Now that you know how to view your XML Sitemap, let's look at the basic settings.
Configuring the XML Sitemap
Let's start by deciding whether you want to have an index page for your sitemap.
If your site is very small (less than a few hundred URLs) then you may not need an index page. You can go ahead and set Enable Sitemap Indexes to Disabled.

If you're in any doubt, just leave this set to Enabled.
Next, we're going to decide how many URLs are listed in each sitemap.
When Sitemap Indexes are enabled, you'll see a setting for Links Per Sitemap.

We limit each sitemap page to 1,000 URLs. If you have more than 1,000 URLs for any type of content, we'll split the sitemap into pages, with 1,000 URLs in each page.
This helps to reduce the time it takes to create each sitemap so that search engines don't give up when it takes too long.
You can typically leave this setting alone. If it's taking too long to view your sitemap pages then lower this number.
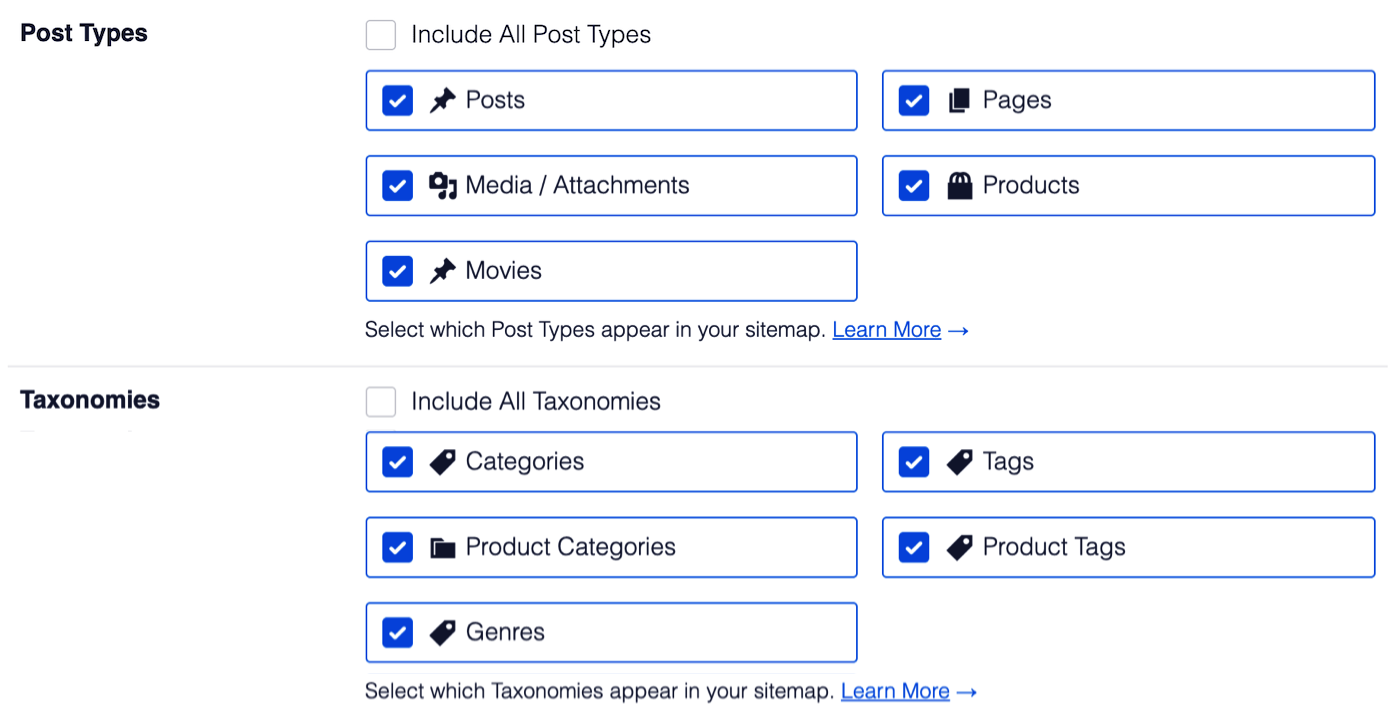
Next, we're going to decide what content we want to include in our sitemap. There are two settings here, Post Types and Taxonomies.
If you want to include all your content then you can leave the Include All Post Types and Include All Taxonomies check boxes set to checked.
If you uncheck these two check boxes you'll see a list of all your content post types and taxonomies and can select which to include in your sitemap.

IMPORTANT:
Any content that has been set to be excluded from search results or set to No index under Search Appearance will not appear in these settings.
The last two settings are for date archives and author archives that are created by WordPress when you've published posts. We normally don't include these in the sitemap because they have little value in search results. If you do want to include these in your sitemap then you can enable these settings.
NOTE:
Search engines can still index your content and display it in search results even if it's not included in your sitemap. Including content in your sitemap just means it'll be added, updated and deleted on search engines much faster than waiting until they find your content on your own.
Frequently Asked Questions
Does All in One SEO create a physical sitemap file?
No, All in One SEO does not create a physical file for your sitemap. Our sitemaps are all virtual web pages that are dynamically generated whenever a crawler visits the sitemap URL. This way it's always up-to-date, there's never an issue with it getting accidentally deleted, and you don't have to worry about server-side file permissions making it unavailable to search engines.
You can read more about why a dynamically generated sitemap is better in our article here.
What happens if I disable the Sitemap?
If you disable the sitemap by clicking on the Enable Sitemap toggle then All in One SEO will no longer generate a sitemap and the URL will return a 404 page not found error. Search engines will no longer be able to get this valuable information about your site and content, which is why we don't recommend disabling the sitemap in All in One SEO.
Next Steps: Submit Your Sitemap to Search Engines
Next, you'll want to tell Google and Bing that you have a sitemap.
Follow the instructions in these articles to submit your sitemap to each search engine: