
When you delete a post or page from your site, All in One SEO will prompt you to add a redirect.
This helps so that visitors don't try visiting a post or page that's been deleted and get a 404 Not Found error.
You can also have All in One SEO automatically redirect visitors when content is deleted. You can learn about the Automatic Redirects feature here.
In this article, we'll discuss how to manually add a redirect when you delete content.
NOTE:
The Redirection Manager feature is available to customers with a Basic plan or above for All in One SEO Pro.
Some advanced features are available with a Pro plan or above for All in One SEO Pro.
Upgrade to All in One SEO Pro today to get Redirection Manager and many more features!
When you trash any content in your WordPress Admin area, All in One SEO will display a notice at the top of the screen shown below:
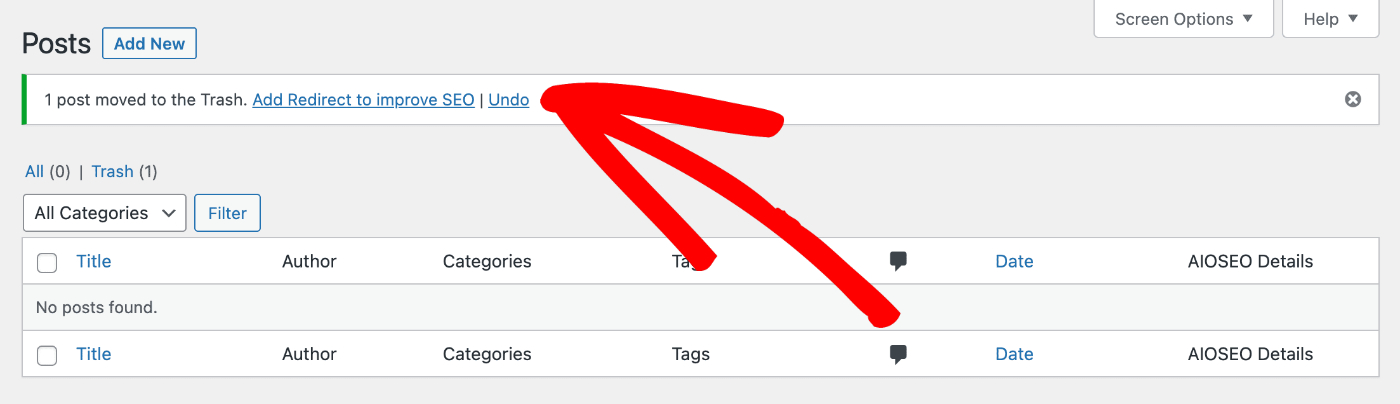
To add a redirect for the deleted content, click the Add Redirect to improve SEO link.
You'll see the Add a Redirect popup shown below:

You'll see that the Source URL is already filled out with the URL of the content you deleted.
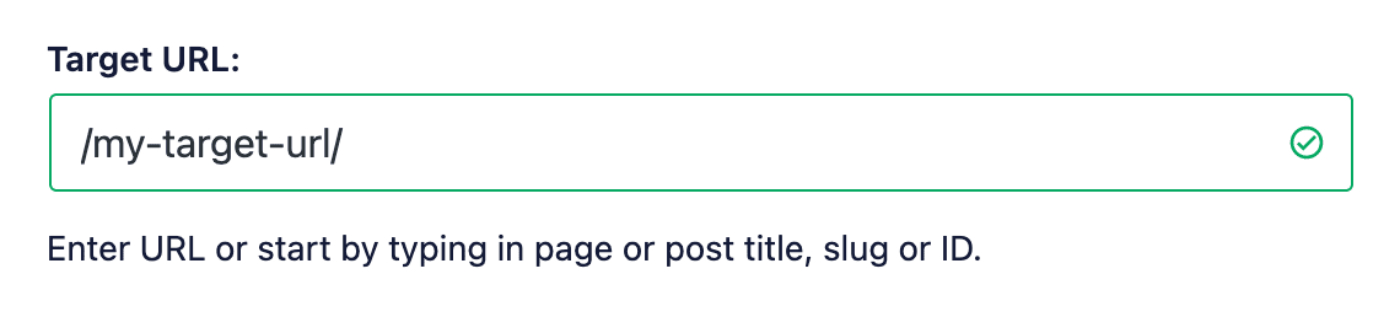
In the Target URL field, enter the URL you want to redirect to. The URL can be either a relative URL or an absolute URL.
The default is the homepage of your site which is represented as a slash ( / ).
In the optional Comment field, you can add a note as to what the redirect is for.
Setting the Redirect Type
To set the Redirect Type, click on the Redirect Type drop down to select the type of redirect you want. The most common are:
- 301 Moved Permanently: Use this if you want to permanently redirect the old URL because the content has been deleted or moved.
- 307 Temporary Redirect: Use this if you only want to temporarily redirect the old URL.
- 410 Gone Redirect: Use this if you believe the content will never come back and it's permanently deleted. Google will slowly remove the URL from search engine result pages. It's important to note that Google may consider 410 URLs as “Soft 404”. They might also appear in your Google Search Console's Index Coverage Report, and that's perfectly normal. But you don't have to worry about them. They will be removed from the Google Search Console automatically after a certain period of time.
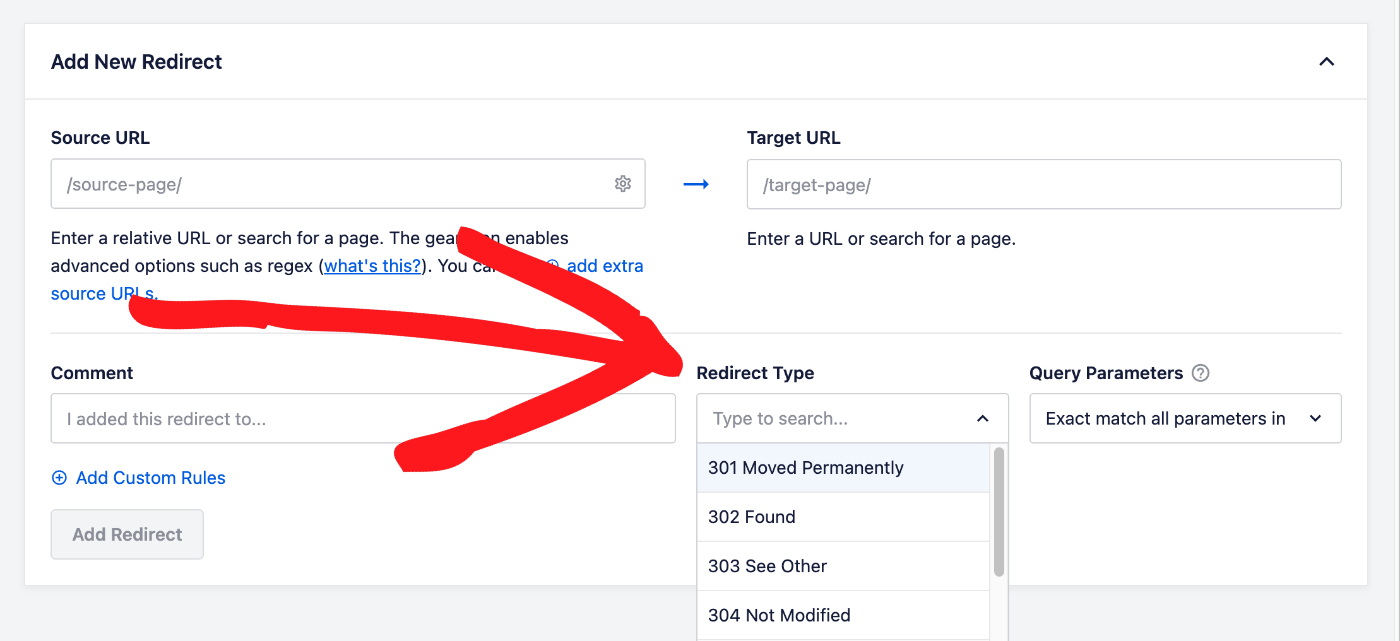
Click the Add Redirect button to add your redirect.
Click on the Add Custom Rules link to find the Custom Rules setting. You can learn about using Custom Rules here.
Once a redirect has been added, you can edit it by going to Redirects in the All in One SEO menu.
Check out more documentation on our Redirection Manager here.