

Would you like to know how to edit robots.txt files in WordPress?
I used to be intimidated by editing robots.txt files in WordPress. As someone who's built and managed over a dozen WordPress sites, I remember staring at my screen, worried that one wrong move could mess up my site's SEO.
The robots.txt file might seem scary, but it's actually a simple text file that tells search engines which parts of your site they can and can't access. After years of working with WordPress, I've learned that editing this file doesn't have to be complicated at all.
In this step-by-step guide, I'll show you the easiest and safest ways to edit your robots.txt file in WordPress. Whether you want to block certain pages from search engines or fix SEO issues, you'll learn exactly what to do.
Don't worry—I'll walk you through each step, so you won't break anything.
In This Article
What Is a Robots.txt File?
A robots.txt file tells search engines how to crawl your site—where they're allowed to go or not.
Search engines like Google use these web crawlers, sometimes called web robots, to archive and categorize websites.
Most bots are configured to search for a robots.txt file on the server before it reads any other file from your site. It does this to see if you've added special instructions on how to crawl and index your site.
The robots.txt file is typically stored in the root directory, also known as the main folder of your website.
The URL can look like this:
http://www.example.com/robots.txt
To check the robots.txt file for your website, you simply replace http://www.example.com/ with your domain and add robots.txt at the end.
Now, let's take a look at what the basic format for a robots.txt file looks like:
User-agent: [user-agent name]
Disallow: [URL string not to be crawled]

User-agent: [user-agent name]
Allow: [URL string to be crawled]

Sitemap: [URL of your XML Sitemap]
User-agent refers to the search engine bot or robot you want to block or allow to crawl your site (for example, the Googlebot crawler).
When editing your robots.txt file, you can include multiple instructions to either Allow or Disallow specific URLs, plus add multiple sitemaps. You can also exclude URL parameters using the Clean-param directive and set the frequency of visits by search bots using the Crawl-delay directive.
Default Robots.txt File in WordPress
By default, WordPress automatically creates a robots.txt file for your site. So, even if you don’t lift a finger, your site should already have the default WordPress robots.txt file.
But when you later customize it with your own rules, the default content is replaced.
Here’s how the default WordPress robots.txt file looks:
User-agent: *
Disallow: /wp-admin/
Allow: /wp-admin/admin-ajax.php
The asterisk after User-agent: * means that the robots.txt file is for all web robots that visit your site. As mentioned, the Disallow: /wp-admin/ tells robots not to visit your wp-admin page.
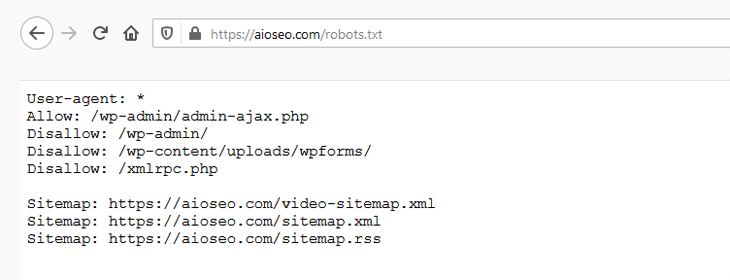
You can test your robots.txt file by adding /robots.txt at the end of your domain name. For example, if you enter “https://aioseo.com/robots.txt” in your web browser, it shows the robots.txt file for AIOSEO:
Now that you know what a robots.txt file is and how it works, let’s look at why the robots.txt file matters in the first place.
Why Is the Robots.txt File Important?
")
The robots.txt file is important if you want to:
- Optimize Your Site Load Speed — by telling bots not to waste time on pages you don’t want them to crawl and index, you can free up resources and increase your site load speed.
- Optimizing Your Server Usage — blocking bots that are wasting resources will clean up your server and reduce 404 errors.
When to Use the Meta Noindex Tag Instead of Robots.txt
If your primary goal is to stop certain pages from being included in search engine results, using a noindex meta tag is the proper approach.
This is because the robots.txt is not directly telling search engines not to index content – it’s just telling them not to crawl it.
In other words, you can use robots.txt to add specific rules for how search engines and other bots interact with your site, but it won’t explicitly control whether your content is indexed or not.
With that said, let’s show you how to easily edit your robots.txt file in WordPress step by step using AIOSEO.
Editing Your Robots.txt in WordPress Using AIOSEO
The easiest way to edit the robots.txt file is to use the best WordPress SEO plugin, All in One SEO (AIOSEO).

AIOSEO is a powerful yet easy-to-use SEO plugin that boasts over 3 million users. That means millions of smart bloggers use AIOSEO to help them boost their search engine rankings and drive qualified traffic to their blogs. That’s because the plugin has many powerful features and modules designed to help you properly configure your SEO settings. Examples include:
- Search Statistics: This powerful Google Search Console integration lets you track your keyword rankings and see important SEO metrics with 1-click, and more.
- Next-gen Schema generator: This no-code schema generator enables users to generate and output any schema markup on your site.
- Redirection Manager: Helps you manage redirects and eliminate 404 errors, making it easier for search engines to crawl and index your site.
- Link Assistant: Powerful internal linking tool that automates building links between pages on your site. It also gives you an audit of outbound links.
- SEO Preview: This gives you an overview of your search and social snippets and general SEO so you can improve your optimization.
- IndexNow: For fast indexing on search engines that support the IndexNow protocol (like Bing and Yandex).
- Sitemap generator: Automatically generate different types of sitemaps to notify all search engines of any updates on your site.
- And more.
One reason users love the plugin is that it gives you greater control over how search engines crawl your site. This is thanks to the advanced robots.txt editor that allows you to easily configure your robots.txt file, enabling you to override the default WordPress file.
Check out our list of the best robots.txt generators.
Check out our list of the best robots.txt generators.
So, let's get to editing your robots.txt file.
To Edit Your Robots.txt File, First Enable Custom Robots.txt
To edit your robots.txt file, click Tools in the All in One SEO menu, then click on the Robots.txt Editor tab.

AIOSEO will then generate a dynamic robots.txt file. Its content is stored in your WordPress database and can be viewed in your web browser, as we'll show you in a bit.
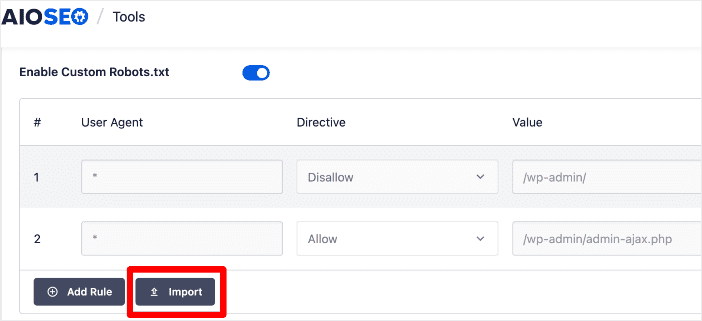
Once you've entered the Robots.txt Editor, you need to Enable Custom Robots.txt.

Click on the button so it turns blue.
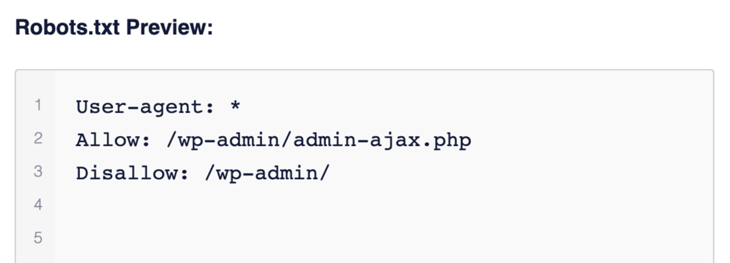
You’ll then see the Robots.txt Preview section at the bottom of the screen, which shows the WordPress default rules that you can overwrite with your own. The default rules tell robots not to crawl your core WordPress files (admin pages).
Now, let’s move on to adding your own rules. You can do it in one of 2 ways: using the rule builder or importing a robots.txt file from another site.
Method 1: Add Rules Using the Rule Builder
The rule builder is used to add your own custom rules for what pages the robots should crawl or not.
For instance, you can use the rule builder if you'd like to add a rule that blocks all robots from a temporary directory.
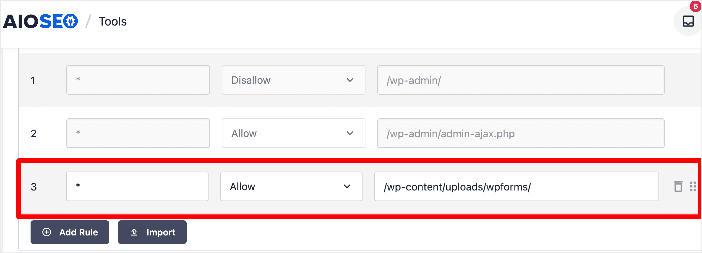
To add a custom rule, enter the User Agent (for example, Googlebot crawler) in the User Agent field. Or you can use the * symbol to apply your rule to all user agents (robots).
Next, select one of the preset robots.txt directives: Allow, Disallow, Clean-param, or Crawl-delay.
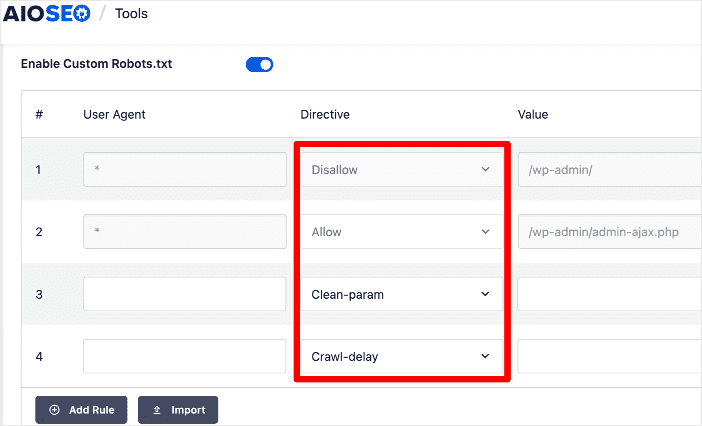
You can also add more directives by clicking on the Add Rule button.
After you've decided on the directive to apply, you need to enter the directory path or filename in the Value field.
Once this is done, you can go ahead and click the Save Changes button in the bottom right corner of the page.
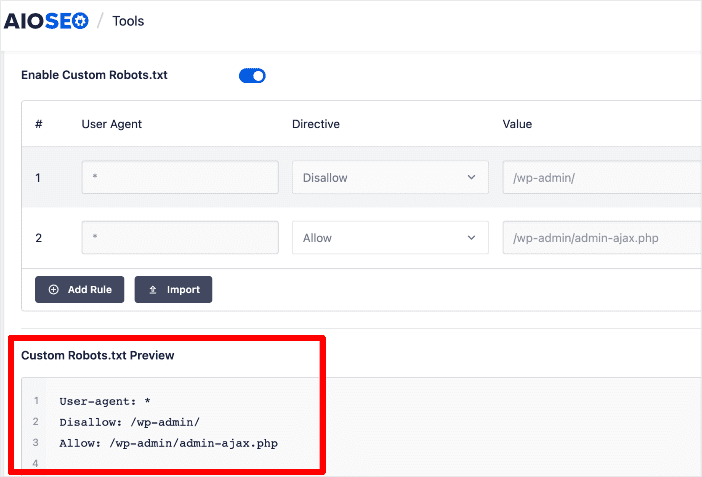
When you’ve saved your new rules, they'll appear in the Robots.txt Preview section.
To view your robots.txt file, click the Open Robots.txt button.

This will take you to the URL where your robots.txt is hosted.
Method 2: Import Rules from Another Site
Another easy way of adding directives in your robots.txt is to import them from another site. This function is handy if you've created a site or know of one with a robots.txt file you'd like to replicate.
To import a robots.txt file from another site, go to the AIOSEO menu, then Tools » Robots.txt » Enable Custom Robots.txt.
Next, click the Import option.
This will open a window where you can paste the URL of the site you want to pull the robots.txt file from.

Click Import, and you'll be prompted to reload your site. Reload and the plugin will pull the robots.txt file and implement it on your site.
Alternatively, you can copy the robots.txt file from your target site and paste it into the provided space. Again, click Import, and the robots.txt file will be added to your site.
This is probably the easiest way to add a custom robots.txt file to your WordPress site.
Editing the Robots.txt Rules Using the Rule Builder
To edit your robots.txt rules, you can change the details in the rule builder.
You can also delete a rule in the robots.txt file by clicking the trash can icon to the right of the rule.
And that's not all! AIOSEO's robots.txt editor allows you to move rules up or down to place them in order of priority. To do that, click on and hold the 6 dots next to the trash can to drag and reposition a rule.
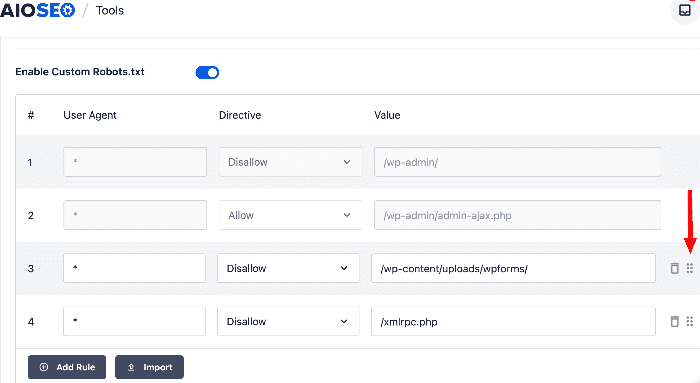
Once you're done editing your robots.txt, click the Save Changes button to save your new rules.
Bonus Robots.txt Editing Functions
Blocking Unwanted Bots or Web Crawlers [Easy Way]
Web crawlers, A.K.A. bots or spiders, are a double-edged sword. Many, like search engines, are necessary for the success of your site. However, some can just suck up your server resources, slow down your site, or even steal your content.
How do I usually deal with this?
Because I don't have a technical background, I always look for the easy way 😜. The easiest way to stop unwanted bots from crawling on your site is to use AIOSEO's Crawl Cleanup feature. This comes with settings that help you manage bot traffic on your site.

This feature enables you to select the bots you want to prevent from crawling your site. All you have to do is select the ones you want to block.

When you block an unwanted bot, AIOSEO edits the robots.txt file with the disallow directives. This feature is also built into the robots.txt editor to make this easier.

Blocking Internal Site Searches
Websites often generate unnecessary URLs from internal searches, leading to wasted crawl budgets and potential spam. Again, this can easily be solved using AIOSEO's Crawl Cleanup. All you have to do is configure the filters using toggles.

AIOSEO gives you the power to control how search engines and other bots interact with URLs created by internal site searches. You can:
- Set a maximum character limit for search queries, preventing bloated search URLs.
- Automatically filter out emojis and special characters to avoid cluttered or nonsensical search terms.
- Block common spam patterns, keeping junk searches from creating unnecessary indexable URLs.
Again, AIOSEO edits your robots.txt file in the backend. Alternatively, you can also configure these settings in your robots.txt editor:

As simple as that!
You've edited your robots.txt file.
Editing Robots.txt Files: Your FAQs Answered
What is a robots.txt file?
A robots.txt file is a text file that website owners use to communicate with web crawlers or robots about which parts of their site should be crawled and indexed by search engines.
Where is the robots.txt file located?
The robots.txt file is typically located in the root directory of a website. Its URL is usually https://www.example.com/robots.txt.
What's the best way of editing robots.txt files?
The best way to edit your robots.txt file is to use a plugin like All In One SEO (AIOSEO). It's the best WordPress SEO plugin and has an advanced robots.txt editor that makes optimizing robots.txt files super easy.
We hope this tutorial showed you how to easily edit a robots.txt file in WordPress. You may also want to check out other articles on our blog, like our tips on getting indexed on Google or our guide on using Search Statistics to boost your rankings.
If you found this article helpful, then please subscribe to our YouTube Channel. You’ll find many more helpful tutorials there. You can also follow us on X (Twitter), LinkedIn, or Facebook to stay in the loop.
Disclosure: Our content is reader-supported. This means if you click on some of our links, then we may earn a commission. We only recommend products that we believe will add value to our readers.
Want to Try AIOSEO for Free?
Enter the URL of your WordPress website to install AIOSEO Lite.


Hey there, thanks for the article.
I recently read up on your article about content decay. One of our issues is page speed and I’ve been working on reducing speed load time. However, I’m no pro at coding or anything remotely related to techy stuff. I usually deal with marketing and design.
So with that background, my question is this: when uploading images, and writing their captions and alt tags, I do want them to appear in serps for image searches, but I don’t want to cause index bloat.
Are there any tactics you recommend I use to avoid this? I’ve already disable the images sitemap (just today), after reading that it’s not necessary and won’t remove my current images from the site.
This also leads me to ask a second question-how will I know (as someone that doesn’t know how to read html, js or anything of that nature) if disabling the image sitemap has been effective in improving load speed? Thanks for the help!