Would you like to know how to embed Google maps in WordPress?
Embedding a map with your business location makes it easy for your customers to identify where your business is situated. It also helps boost your local SEO. As a result, you can drive more foot traffic from the web.
In this article, we’ll show you how to embed Google Maps in WordPress easily.
In This Article
Why Should You Add Google Maps to WordPress?
Google Maps is the most popular navigation app on all platforms. This means if you run a brick-and-mortar business, then adding Google Maps to your WordPress website makes it easy for users to locate your business quickly. This helps you attract more customers, leading to increased sales.
That’s not all! Embedding Google Maps into your WordPress site can also help improve your local SEO. According to research, 46% of all searches are local, and embedding Google Maps into your WordPress site helps boost your online and physical visibility.
How to Embed Google Maps in WordPress
Ready to embed Google Maps to your WordPress site and drive more online and offline traffic to your business?
Let’s dive right in!
Step 1. Install All In One SEO (AIOSEO)
The first step to embedding Google Maps in WordPress is to install a powerful SEO plugin like AIOSEO.

AIOSEO is the best WordPress SEO plugin on the market. It is trusted by over 3 million savvy website owners and marketers to help them dominate search engine results pages (SERPs) and drive relevant traffic to their sites. This is because the plugin has many powerful SEO features and modules to help you optimize your website for search engines and users.
One of the features many users rave about is the Local SEO module.
This powerful module is designed to help you rank high for local searches. It helps you do that by making it easy to embed Google Maps into your site. And you don’t need technical or coding knowledge to do so.
For step-by-step instructions on how to install AIOSEO, check out our installation guide.
Step 2: Add Your Location(s)
Once you’ve installed and activated AIOSEO, the next step to embedding Google maps is to add your location data. Again, this is super easy, whether you run a single or multiple-location business.
To do that, go to the AIOSEO menu » Local SEO. This will open a page where you can input your location and business information.

One of the first things you’ll have to add is to indicate whether your business is a single or multiple-location business.
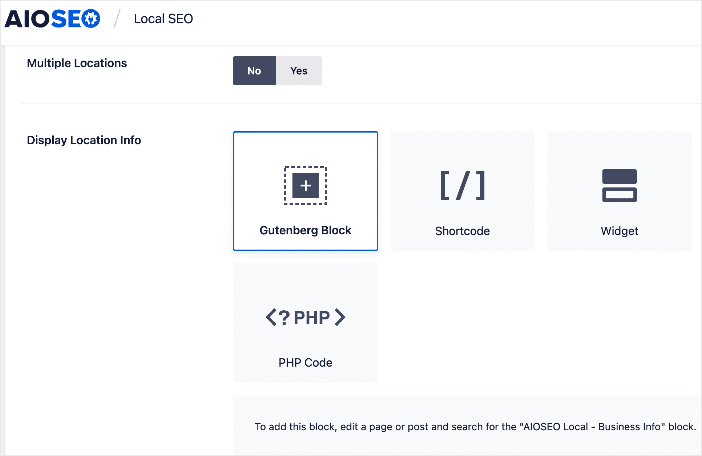
If yours is a single-location business, leave the Multiple Locations toggle set to No.
You can also choose whether you want your location information to be displayed as a:
- Gutenberg Block
- Shortcode
- Widget
- PHP code
Check out this guide for detailed instructions on adding your locations to your site’s schema.
Step 3: Generate and Add a Google Maps API Key
With your locations set, you can embed Google Maps into your WordPress site. You must first set up a Cloud Billing account, and then generate a Google Maps API key.
If you already have a Cloud Billing account, you can create your Google Maps API key by logging into the Google Maps platform using your Google account. Next, click the Get Started button. You will then see a popup with your API key.
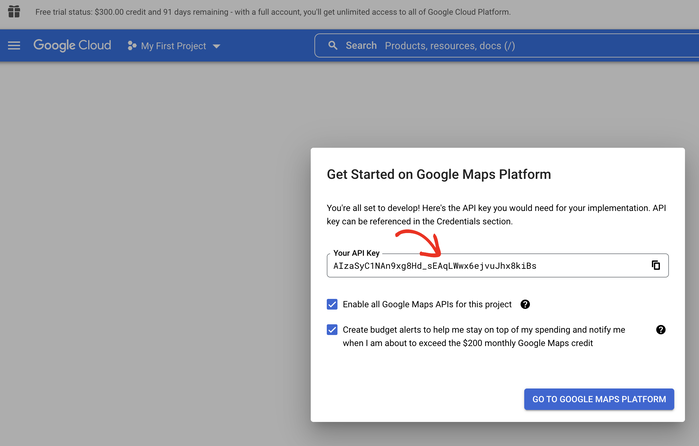
Copy this key, paste it into a text file, and keep it safe. Next, click on Go To Google Maps Platform. You’ll then be asked whether you want to protect your API key by restricting it. Click on Maybe Later, then come back and configure your restriction settings.
And that’s it! You’ve successfully created a Google Maps API key.
Step 4: Configure Your Google Maps Settings
Now you can embed your Google Maps location in WordPress with your Google Maps API key. To do so, go back to AIOSEO » Local SEO and click on the Maps tab.
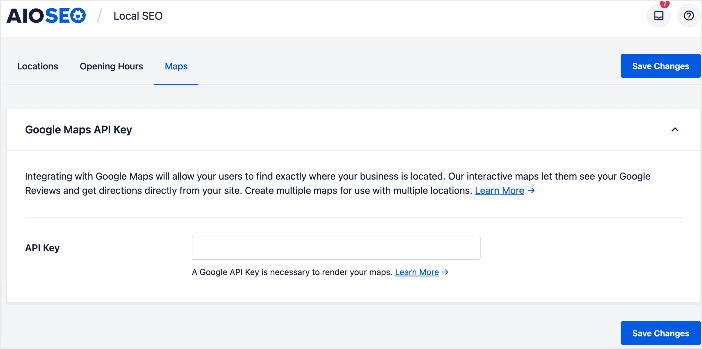
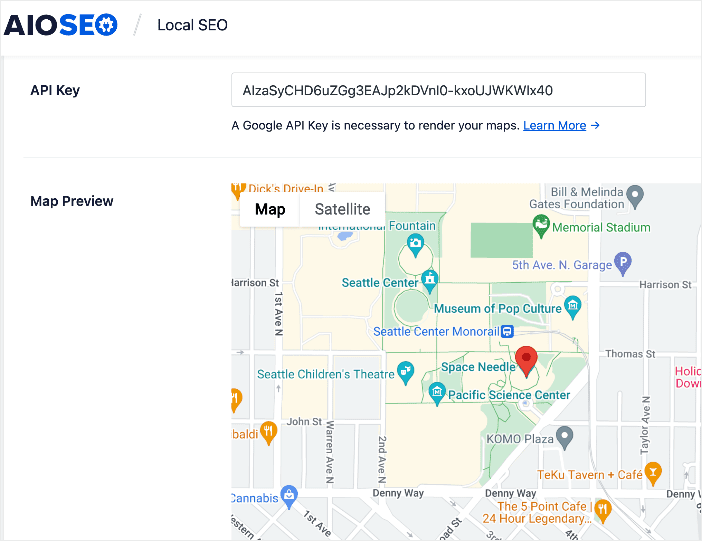
Paste in the API key you generated from Google Maps. You’ll immediately see a preview of the map once you do that.
Next, you can scroll down to edit the map setting. Here you can configure your map settings and how you want your map to be displayed. With AIOSEO, you can embed Google Maps using a Gutenberg block, shortcode, widget, or PHP code.
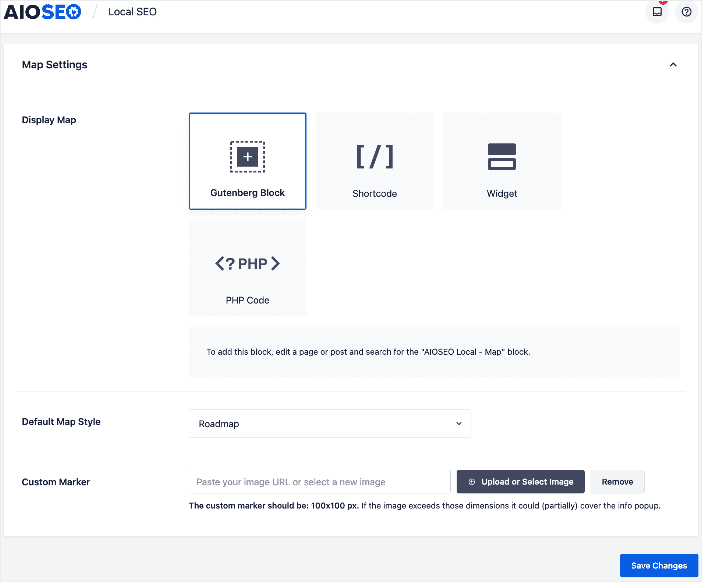
You can also choose from different map styles and even add a custom marker to your map.
Once done, click the Save Changes button.
Step 5: Display Google Maps in WordPress
We’ve now reached the step you’ve been waiting for, displaying Google Maps on your site. You can do so on any page or post by simply editing it.
Displaying Google Maps Using a Gutenberg Block
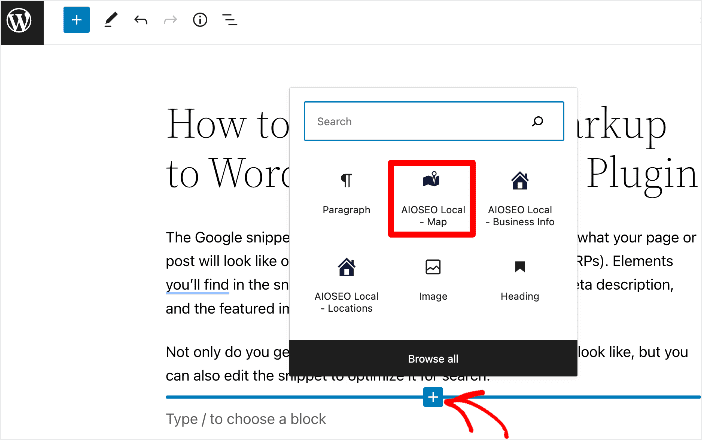
Once you’ve opened your page in editor mode, click the + button to add a block and select the AIOSEO Local – Map block.
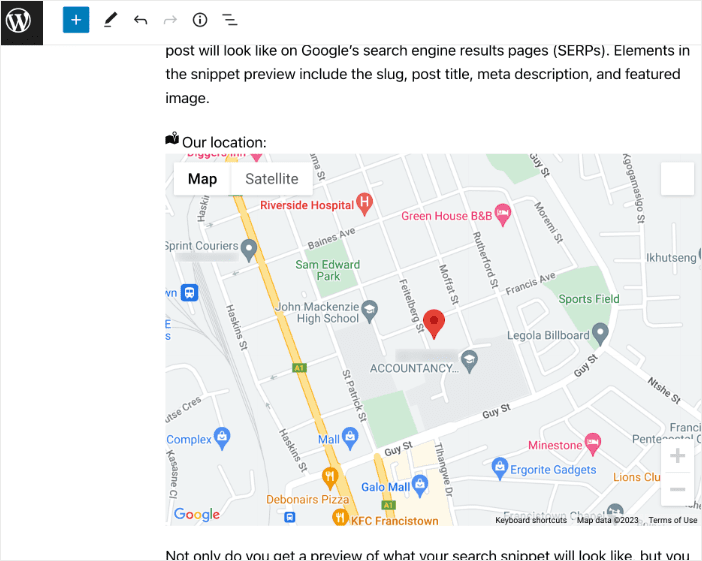
AIOSEO will then automatically add Google Maps to the page.
You can edit your map settings in the right sidebar of your page.
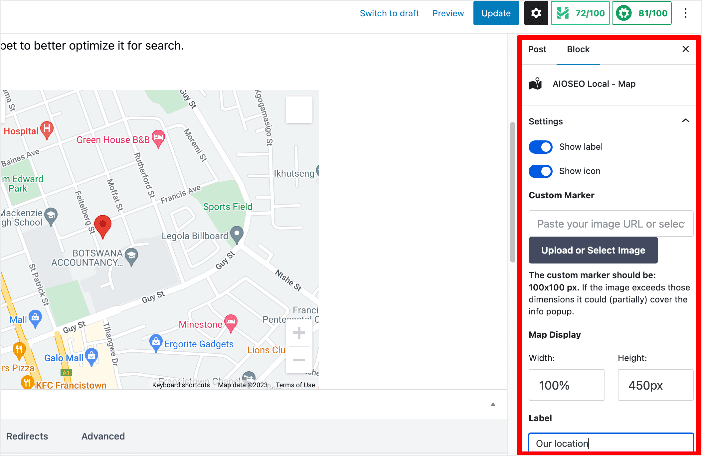
For instance, you can show labels and icons, add a custom marker, and edit the map’s width and height.
Displaying Google Maps Using a Widget
You can also add Google Maps to your site’s widget section, like the sidebar or footer.
To do that, head to your WordPress admin panel » Appearance » Widgets. Next, click the “+” button and add the AIOSEO Local – Map widget block where you’d like to display your location (main sidebar, header, footer, etc.).
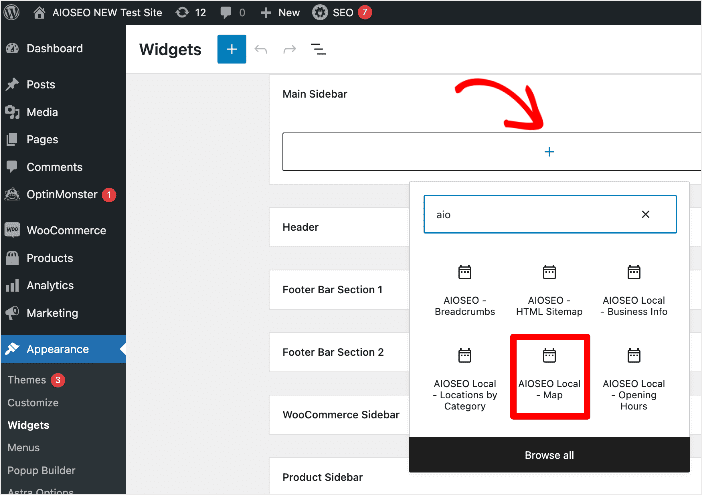
Once you publish or update your page, your Google Maps location will be added to your chosen widget area.
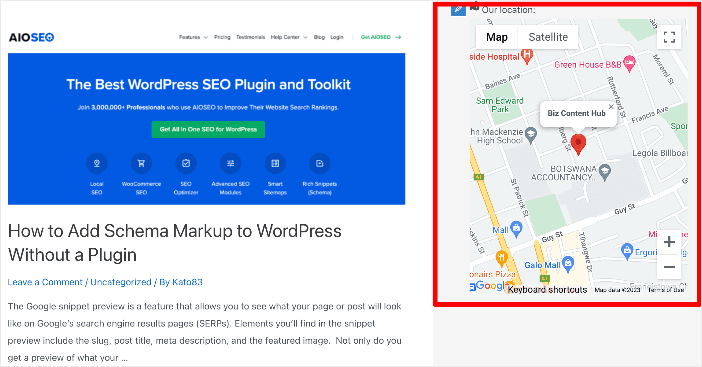
And that’s it!
You’ve embedded Google Maps into your WordPress site.
We hope this post helped you learn how to embed Google Maps into your WordPress site. You may also want to check out other articles on our blog, like how to start a small business blog or our tutorial on creating jump links in WordPress.
If you found this article helpful, then please subscribe to our YouTube Channel. You’ll find many more helpful tutorials there. You can also follow us on Twitter, LinkedIn, or Facebook to stay in the loop.
Disclosure: Our content is reader-supported. This means if you click on some of our links, then we may earn a commission. We only recommend products that we believe will add value to our readers.
