Do you want to learn how to create a landing page in WordPress to skyrocket your conversions?
With a well-designed landing page, you can drive more traffic to your site and turn visitors into leads and customers.
And don’t worry, you don’t need to hire a designer to build a high-converting landing page. You can create a landing page yourself in less than 10 minutes.
In this article, we’ll show you how to create a landing page in WordPress, step-by-step.
Use these quick links to jump to the section you want to read:
First, let’s go over exactly what a landing page is.
What is a Landing Page?
A landing page is a single web page designed to encourage visitors to take 1 specific action.
It’s different from the homepage of your website because the homepage has a lot of information on it. Your homepage could display your latest blog posts, link to your about page, showcase your most popular products, and so on.
But, a landing page is focused on generating leads for something specific.
For example, you might create a landing page to persuade users to sign up for your webinar.
Because the landing page is focused only on the webinar, with no other information to distract users, they’ll be more likely to take your desired action.
Aside from increasing webinar registrations, you can also create a landing page to:
- Increase sales for a specific product
- Grow your email list
- Get more entries for a giveaway or contest
- Boost signups for an online course
- And much more
Overall, a landing page is a powerful marketing tool that can help drive more leads and sales for your business.
What Should a Landing Page Include?
All successful landing pages include a few key elements in order to drive conversions.
Take a look at this landing page example from Taboola:
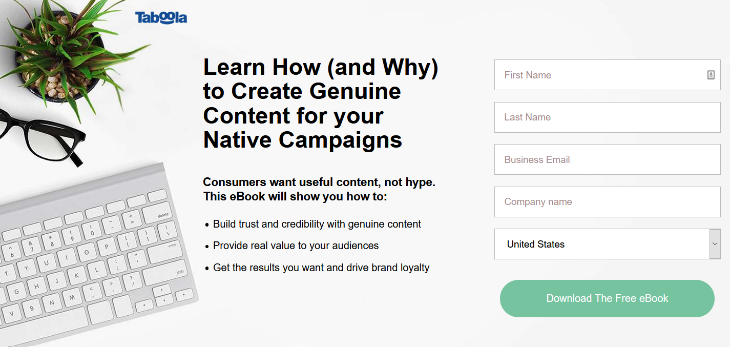
We’ll break down the elements that make this landing page successful below.
- Headlines: Use attention-grabbing headlines to draw attention to your offer.
- Images: Adding eye-catching images to your landing page makes it more engaging.
- Copy: Write convincing copy to tell visitors why they need your offer and how it will benefit them.
- Signup Form: Include a signup form to capture important contact information from visitors, like their email addresses.
- Calls-to-Action: Add a bold call-to-action (CTA) button to encourage visitors to take action on your offer.
These are just the main landing page elements you need to drive conversions.
But, of course, your landing page content can include more than these 5 elements. Keeping your target audience in mind, you can add additional elements to suit your goals.
Now you know what a landing page is and how it can help you with your conversion goals. Next, let’s dive into the tutorial on how to create a landing page in WordPress.
How to Create a WordPress Landing Page
First, to create a landing page in WordPress, you need a WordPress landing page builder. We recommend SeedProd, it’s the best WordPress landing page plugin and the fastest way to create a landing page.
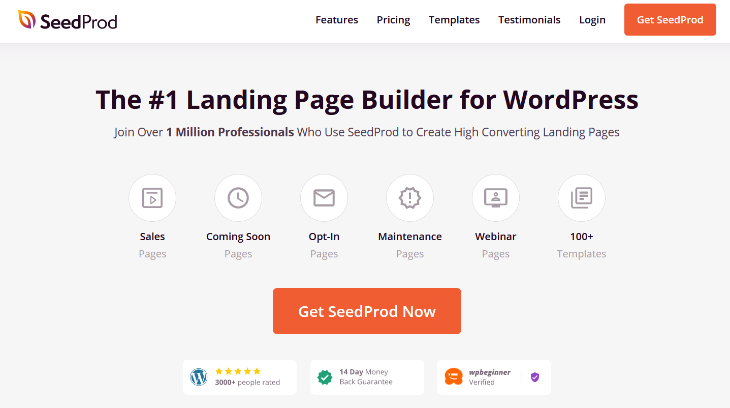
SeedProd offers over 100 professionally designed landing page templates so you can get started quickly.
It also has a visual drag and drop builder, so customizing your landing page is super easy. Simply drag SeedProd’s ready-made landing page blocks onto your page to create a custom design.
These landing page specific blocks include:
- Headlines
- Images
- Videos
- CTA buttons
- Optin forms
- Contact forms
- Countdown timers
- Social profiles
- And much more
Plus, SeedProd comes with built-in coming soon and maintenance modes, so you can generate leads before your site is live or while it’s under construction.
With SeedProd, you can create a high-converting landing page in no time, without having to touch a line of code.
So, let’s start building a landing page with SeedProd.
Install the SeedProd Plugin
First, you’ll need to visit the SeedProd website and purchase the plugin. Then, you can download the plugin to your computer and upload it to your WordPress website. Don’t forget to activate the plugin as well.
If you want detailed instructions, check out WPBeginner’s guide on how to install a WordPress plugin.
After activating the SeedProd plugin, you’ll see a welcome screen where you need to activate your license key. Enter your license key in the field provided and click the Verify Key button.
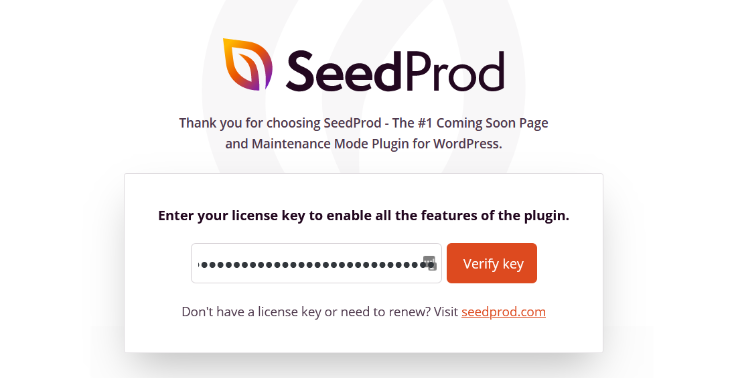
Once the license key is verified, scroll down the page and click on the Create Your First Page button.
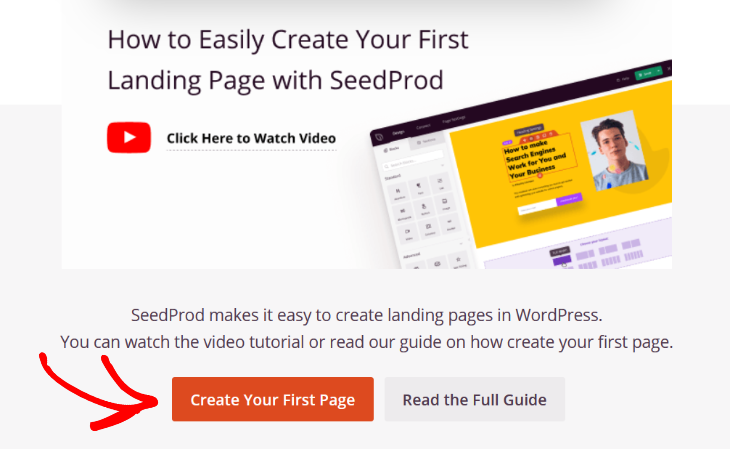
After clicking the button, you’ll be redirected to the SeedProd dashboard where you can start creating your landing page.
Create a New Landing Page with SeedProd
At the top of the SeedProd dashboard, you’ll see 4 types of pages you can create: Coming Soon Mode, Maintenance Mode, Login Page, and 404 Page.
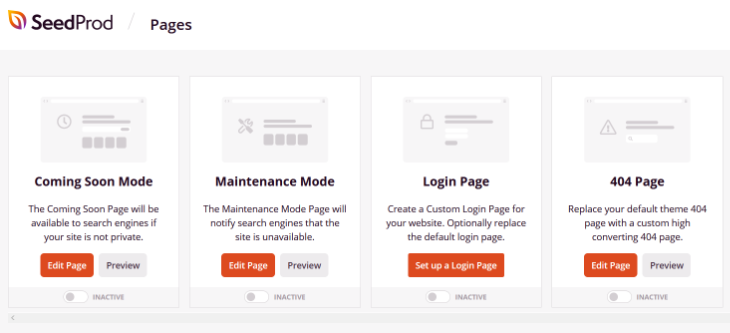
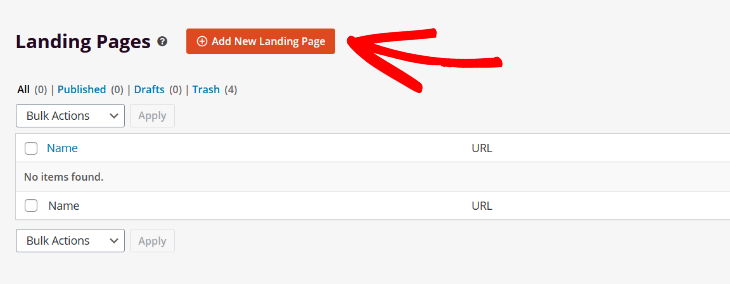
Underneath those options, you’ll see the option for creating a landing page. Click on the + Add New Landing Page button to get started.
Next, you’ll be prompted to select a landing page template. SeedProd offers a ton of beautiful templates to choose from including sales pages, webinar pages, product pages, thank you pages, and more.
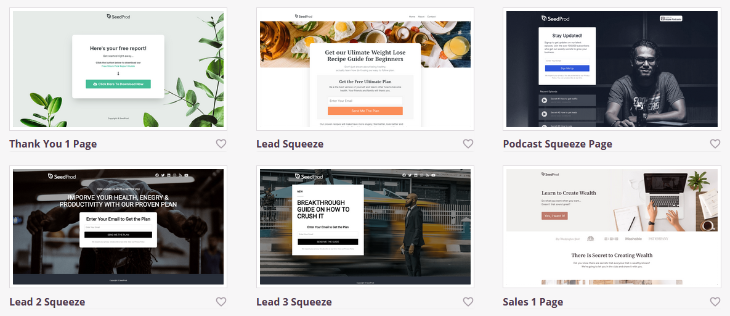
You also have the option of choosing a blank template if you want to start from scratch.
Select any template you like by hovering over it and clicking on the check mark button.
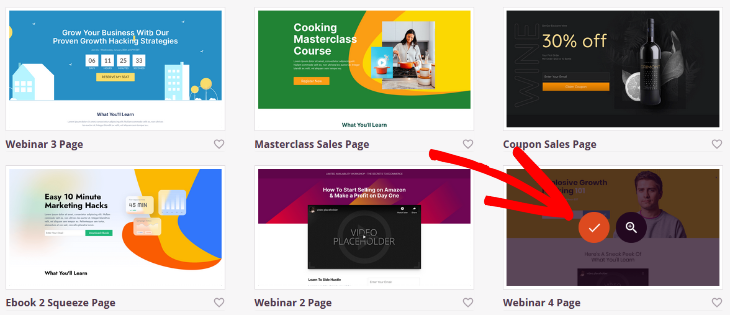
Next, you’ll be redirected to SeedProd’s landing page builder so you can customize the template.
Customize the Landing Page Template
As you can see, SeedProd’s visual landing page builder has pre-made landing page blocks you can add on the left side. On the right side, you can see a live preview of how your page looks.
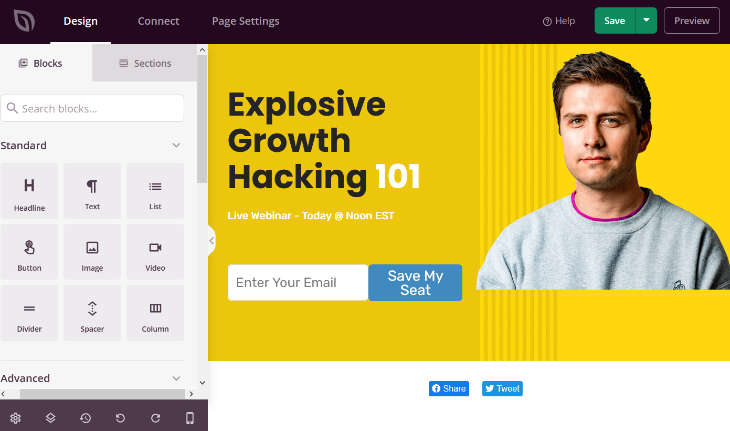
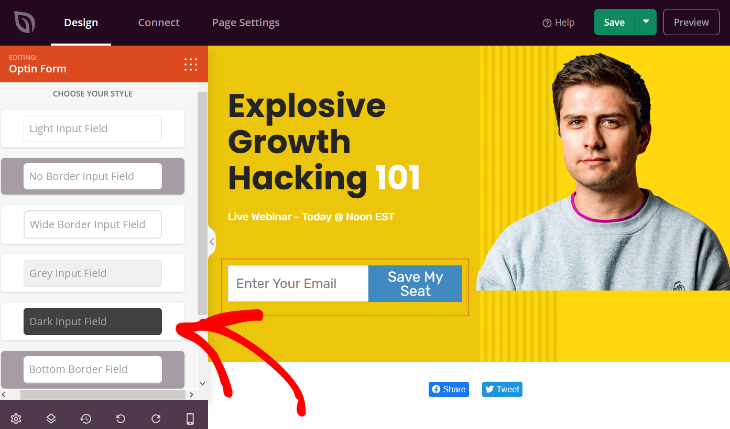
To customize any existing element on the page, simply click on it. For example, you can click on the optin form to change the style, text, size, alignment, and more.
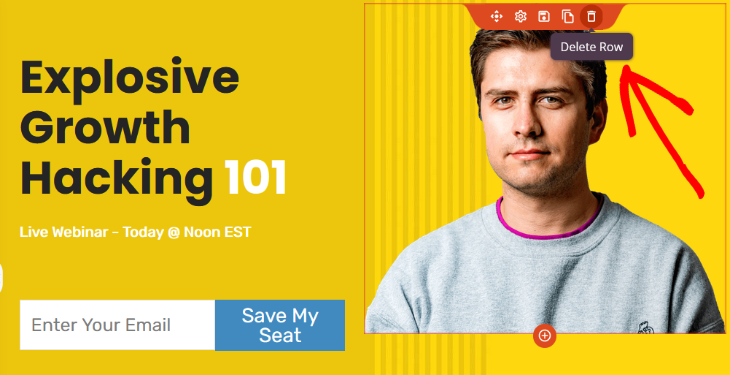
If there are any elements on the page that you don’t need, just click on the trashcan icon to delete them.
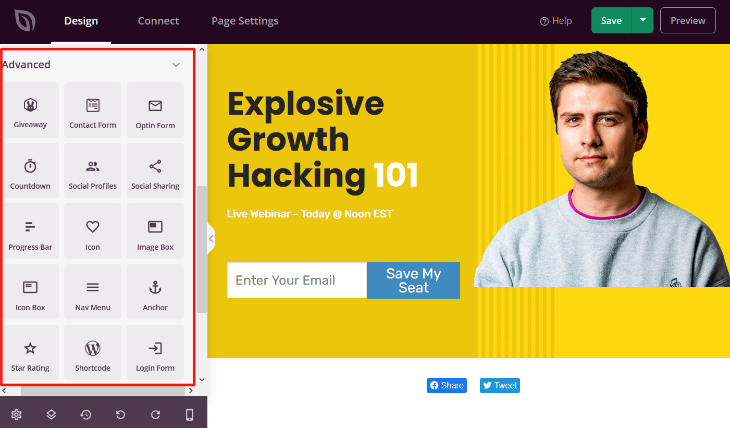
To add new elements to your landing page, you can use any of the pre-made blocks on the left side. As we mentioned, SeedProd has many conversion-focused blocks like countdown timers, contact forms, optin forms, star ratings, and so on.
Adding a countdown timer to your landing page is a great way to increase urgency and encourage visitors to act fast.
To add a countdown timer, simply drag the block from the right and drop it into place on your landing page template.
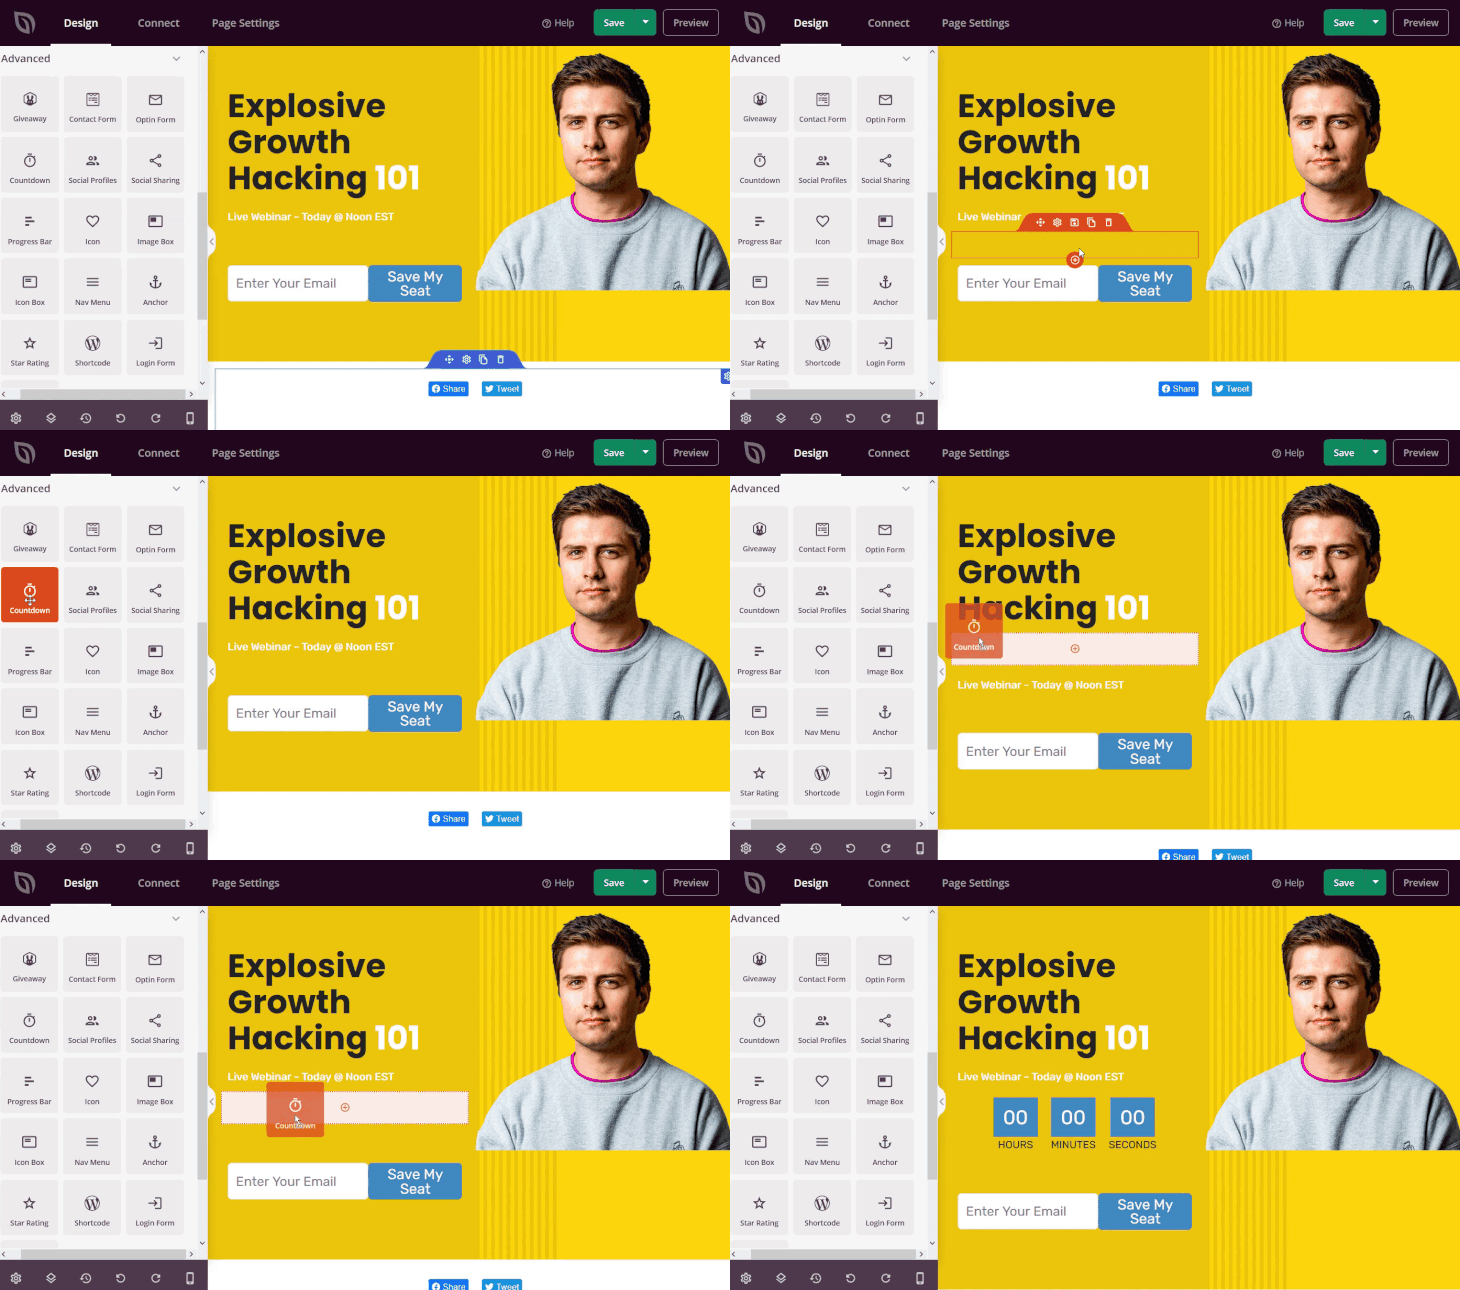
Again, click on the countdown timer to customize it. You can set the end date and time and choose the style, alignment, and more.
You can also add pre-made landing page sections like calls to action, FAQ, features, footers, etc. This makes it easy to create a beautiful layout for your landing page.
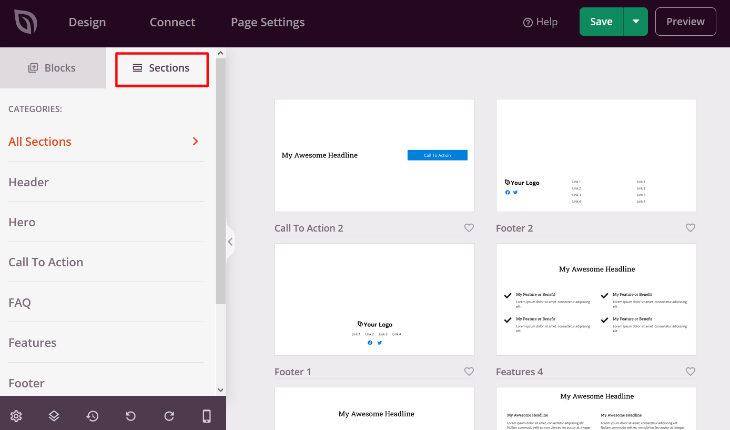
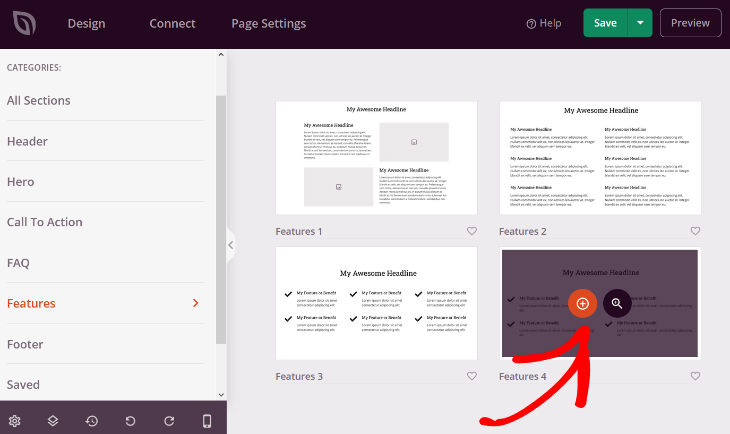
To add a section to your landing page, hover over the example you like and click on the + Add button.
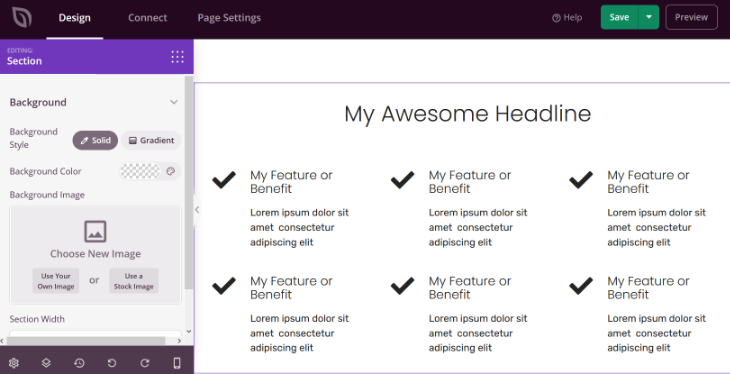
SeedProd will automatically add it to your landing page and you can click on it to customize it, just like you did with the blocks.
Once you’ve added all of the elements you want and you’re happy with how your landing page looks, click the Save button in the top right corner.
Connect Your Email Marketing Service
If you add an email optin form to your landing page, next you need to connect your email marketing provider.
To do that, click on the Connect tab at the top of the screen. On this page, you’ll see a list of popular email marketing services you can connect to including Constant Contact, Drip, ActiveCampaign, and others.
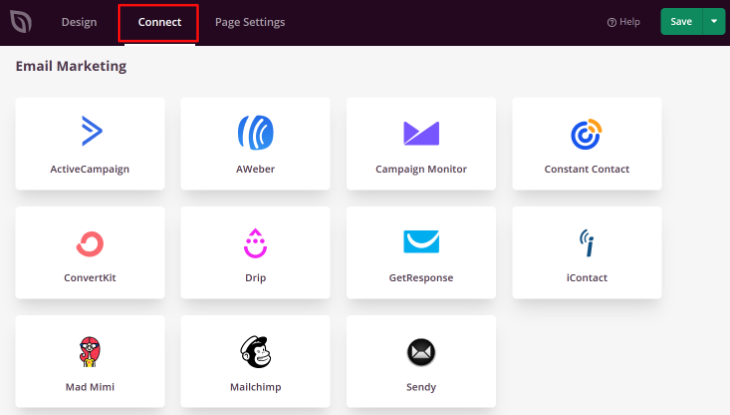
Find your email marketing provider in the list and click on the Connect New Account button.
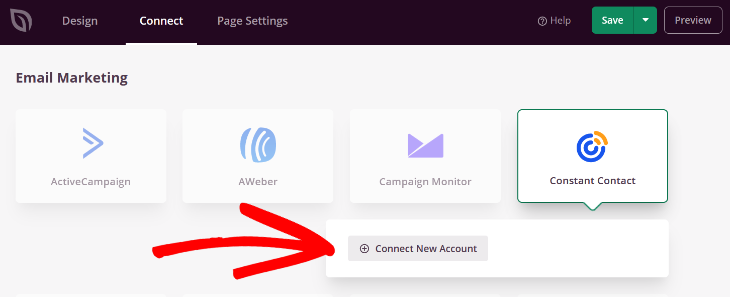
Then, follow the simple instructions to connect and verify your account.
Now when someone opts-in on your landing page, they’ll automatically be added to your email list.
Configure the Landing Page Settings
Next, click on the Page Settings tab. On this page, you can configure a number of different settings for your landing page.
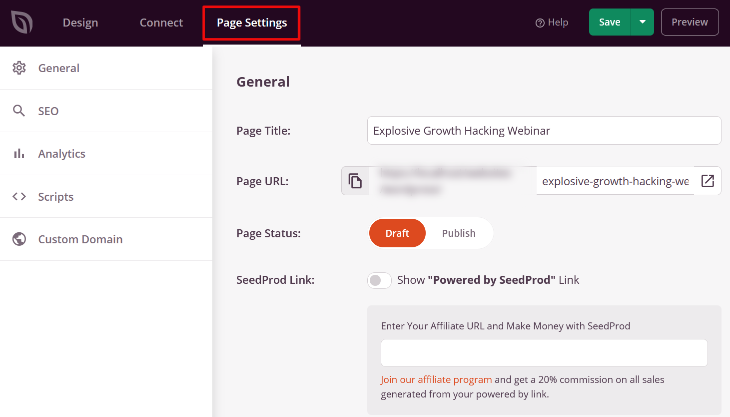
In the General section, you can edit your page’s general settings like adding a page title or changing your landing page URL.
There’s also an SEO settings section where you can configure your landing page SEO. If you’re using All in One SEO (AIOSEO), you can use this page as a shortcut to AIOSEO’s settings.
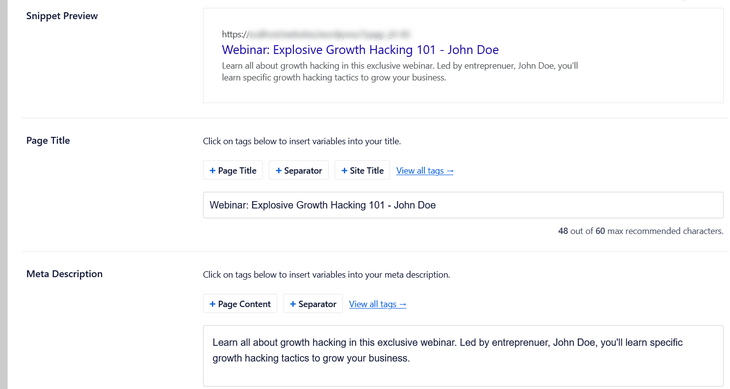
With AIOSEO, you can easily set the post title and meta description for your landing page. It also gives you a Snippet Preview so that you can see how your post title and meta description will look in search results.
And if you’re using a plugin like MonsterInsights for your website analytics, you can use the Analytics section as a shortcut to their settings as well.
Preview the Landing Page
Now you’ll want to preview your landing page to make sure that it looks good on all devices.
Luckily, SeedProd is responsive and mobile-friendly, so you can ensure that your landing page is clear no matter which size screen your visitors use to browse.
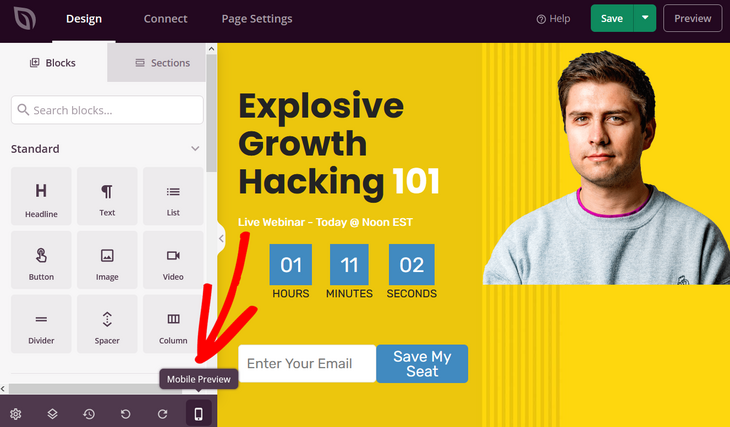
To see how your landing page looks on mobile, simply click the Mobile Preview button at the bottom of the page.
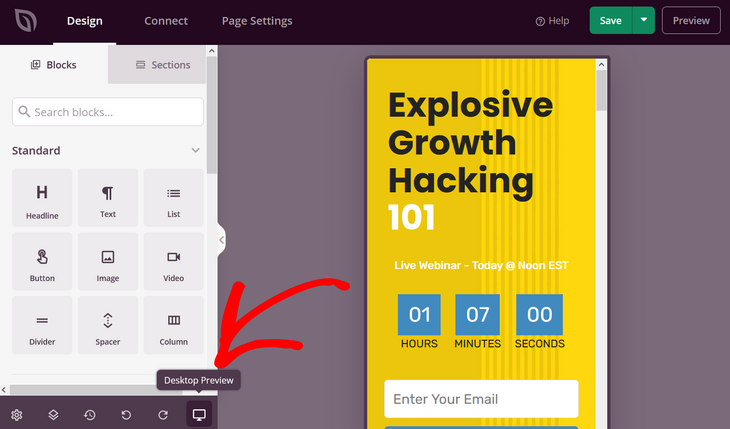
To go back to the desktop preview, click on the button again.
After checking the responsiveness of your landing page, it’s now time for the final step!
Publish the Landing Page
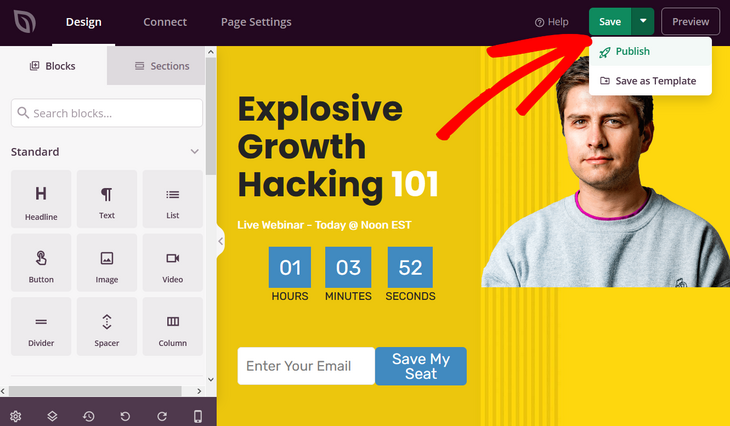
Lastly, you need to publish the landing page so that it’s live on your website. First, click on the Save button to save your settings. Next, click on the dropdown arrow beside the Save button and hit Publish.
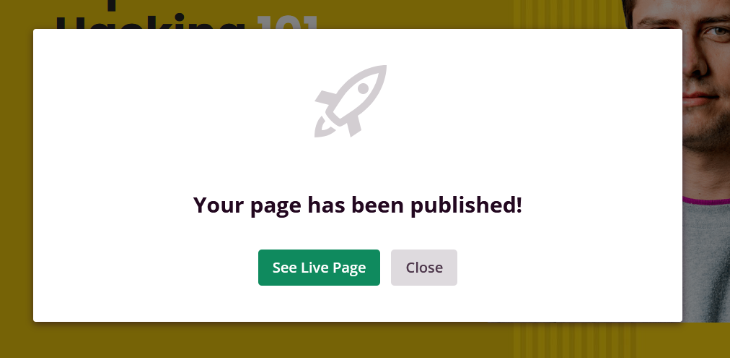
You’ll then see a success message from SeedProd, letting you know that your page is now live. You can click on the See Live Page button to view it.
Here’s an example of how your landing page will look to visitors:

That’s a wrap! You successfully created a landing page in WordPress. Wasn’t that easy? Now you can start generating more leads and sales with a high-converting landing page.
Want to learn how to drive more traffic to your landing page and your entire website? Check out our Ultimate WordPress SEO Guide for tips on how to optimize your site.
And if you’re unsure about which SEO plugin to use, take a look at this comparison of Yoast SEO vs All in One SEO, as well. It will make your decision much easier!
Not using AIOSEO yet? What are you waiting for?
Disclosure: Our content is reader-supported. This means if you click on some of our links, then we may earn a commission. We only recommend products that we believe will add value to our readers.


Thanks
This was very helpful. Ive been looking specifically for a decent wordpress plugin
Nice tutorial. I’ve been looking for a good plugin that would allow me to build decent landing pages with wordpress.
Hey, thanks for this amazing article. I always wanted to make a landing page for my blog. Keep doing great work.
Nice information. Now i am using the plugin to make landing pages.
I like your simplicity of your language that helps me to understand the topic very quickly. And also I started using this plugin to create the landing page for business purposes. 🙂
Thank you for an excellent blog. Where else one can find such an informative content? I really appreciate your efforts and great knowledge. Looking forward to some more interesting blogs from you!
Wow, that is very wonderful plugin for building a nice WordPress landing page, I hope it helps anyone to build a nice page by using this plugin.
Great post for building a landing page.
Thank you for the broader information regarding the landing page.
Great article, thank you for sharing!
How do I get this page to pop up after a user comes to any page on the website?