
Want to know how to move a WordPress site to a new domain?
Moving a website from one domain to another is a delicate process that could lead to a loss in rankings and traffic. But, wrongly done, it could also result in a broken website.
However, despite the risks involved in migrating your WordPress website to a new domain, it sometimes can't be avoided.
4 Reasons You May Want to Move Your WordPress Site to a New Domain?
I'm sure you're wondering — if there are risks associated with migrating a website to a new domain, why do it?
There are several reasons moving a website to a different domain would be beneficial. Here are the most common ones:
- When you rebrand: Changed the name of your business? Then you may want to change your website's domain name, so it aligns with your new brand.
- You purchase a better domain: Moving domains is also a good idea when you find a domain that better matches your business and vision.
- You want to upgrade from a free domain or subdomain: Perhaps you started your website on a free domain, and now it has grown to the point that you need to upgrade.
- Moving a development site to the live URL: Most developers prefer developing a website on a separate or local server until complete. Once done, the development site will have to be moved to the main domain.
There are many reasons to move a domain — you probably have one that may not be on this list. Whatever the reason, getting it right is critical.
So, let's get to it, shall we?
How to Move a WordPress Site to a New Domain — 4 Easy Steps
Ready to move your WordPress website to a new domain?
Here are four simple steps you can follow to ensure your move is a success:
Step 1: Backup Your WordPress Site
The first step to moving your WordPress website to a new domain is probably one of the most important — backing up your site.
Anything can go wrong when moving your website, and finding and correcting a mistake can be like finding a needle in a haystack. That's why you must always back up your website before moving it.
Besides ensuring that you have a copy to fall back on if anything goes wrong, you can also use your backup copy as your file upload at the new domain. In addition, it will help create the website to which you can set up redirects from your old domain.
How do you create a duplicate of your website?
Thankfully, this is super easy as you can easily do it with a WordPress website migration plugin like Duplicator.
Installing Duplicator and Building a Backup of Your Website
To get started, you'll first want to install and activate the Duplicator plugin by going to your WordPress dashboard and clicking on “Add New Plugin.” Once activated, Duplicator will add a menu in your WordPress dashboard. To access it and create a backup of your website, Click on “Duplicator” in your WordPress dashboard, head over to the “Packages” option, and select “Create New.” This will start the process of creating a new “package” or copy of your website.

This will bring you to the package setup page.
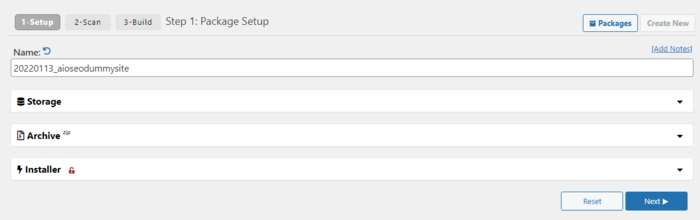
Click the “Next” button, and the Duplicator wizard will take you to the scan stage, where it will run some tests to see if everything on your website is in order. If there are any issues detected, the plugin will alert you.
However, if everything is marked “Good,” click the “Build” button to start building a copy of your website.
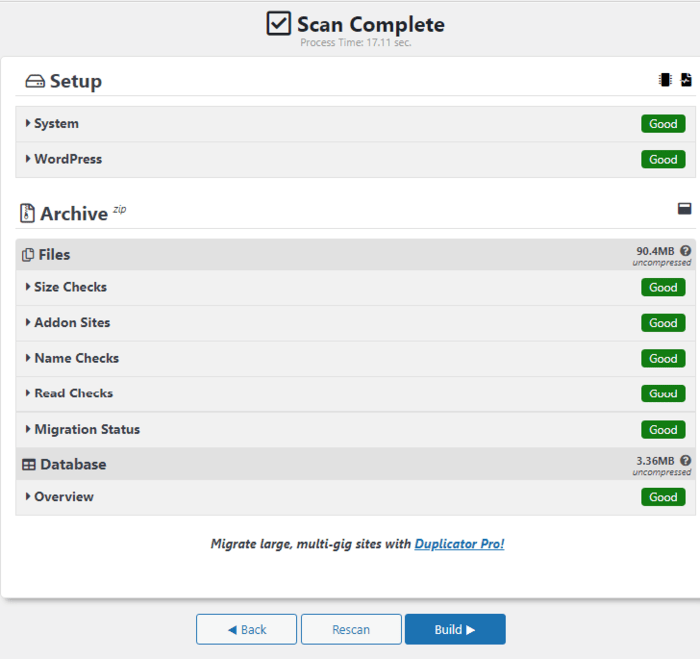
Duplicator will then start building a duplicate package of all your website files. Once the process is finished, you'll be presented with download options for the installer and the archive package.
To easily download both files to your computer, click on the ‘One-click download' link.

The downloaded archive file is a complete copy of your WordPress website's files. This includes all your WordPress themes, permalinks settings, plugins, uploads, and any other files created by WordPress plugins. As for the installer script, it's a PHP file that will automate and run your WordPress website's migration by unpacking the archive file.
Now you have a copy of your website on your computer. It's now time to move on to the second step of moving your WordPress website to a new domain.
Step 2. Create a New MySQL Database for Your New Domain Name
Now that you've got your website's backup files ready, you can now upload them, right?
Not so fast.
You first need to create a new MySQL database for your new domain. To create one, you'll have to visit your hosting account's cPanel dashboard. Next, scroll down ‘Databases', and click on the ‘MySQL Databases' icon.
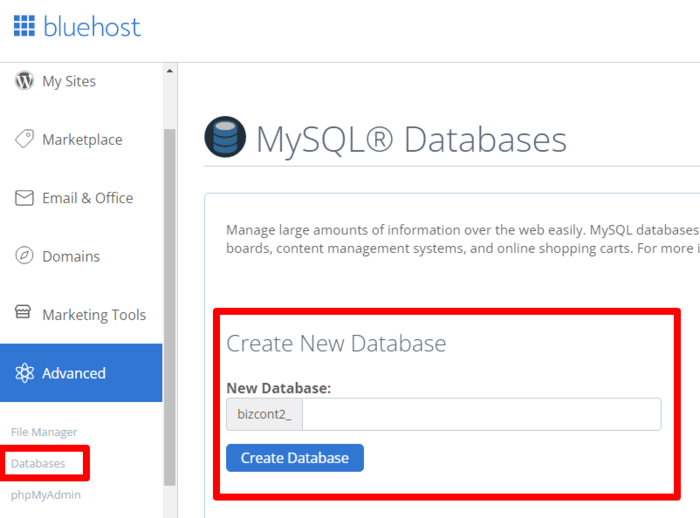
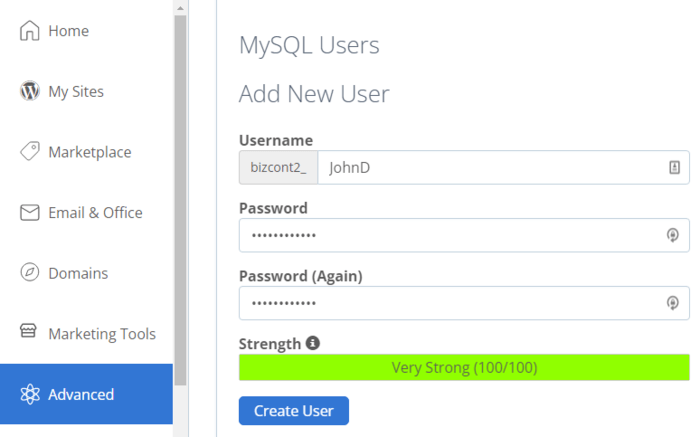
To create a new database, simply fill in the “New Database” by providing a name for your database. Next, click on the ‘Create Database' button. cPanel will then create a new database for you. After that, scroll down to the MySQL Users section and create a new user when that's done. This involves providing a username and password, then clicking on the ‘Create User' button.
Once you've created your new user, you'll have to grant the new account permission to work on your database. You'll have to go down to the ‘Add User to Database' section to do this.

Select the database user you've just created in the dropdown menu next to the user name field. Next, choose the new database you just created. Then, click on the “Add” button to add the user.
Now you can edit the new database.
Step 3. Unpack WordPress on Your New Domain Name
Once you've created the database for your new website, it's time to unpack your website on your new domain name. This is where the Duplicator package you built in the first step comes into play. Remember, it includes your WordPress installation, meaning you don't need to install WordPress on your new domain.
To unpack your website, you must first connect to your new domain name using an FTP client. When that's done, make sure the root directory of your website is completely empty. Once you've ensured the root directory is empty, you can then upload the archive and installer files (from Duplicator) to the root directory.
Note: the root directory is usually public_html.
Unpacking Your WordPress Website
Once your archive and installer files have finished uploading, you can now unpack WordPress. To do that, open a new browser tab and go to http://newdomainname.com/installer.php (with newdomainname being your new domain name). Doing so will launch the Duplicator website migration wizard.
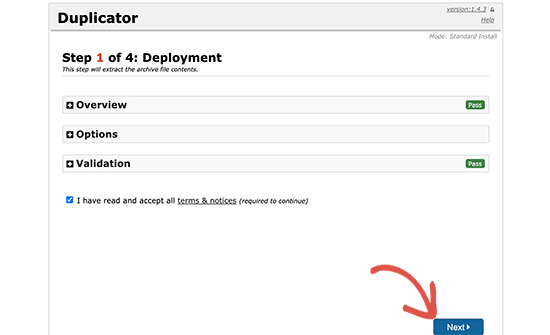
The installer will look for and extract the archive file. The wizard will then ask you to check the terms checkbox to accept the terms of usage. Once you've checked the box, click on the “Next” button to continue.
The installer will ask you to set up and configure your new WordPress database information on the next page. This is where you'll enter the details (name and password) of the database you created earlier.
Once done, you can then test your database or click “Next” to continue with the setup. Duplicator will unpack your WordPress database backup file from the archive into your new database when you click the “Next” button.
You will then be asked to update your new site's URL. You don't have to change anything here, as the plugin will automatically detect your new domain name and its path.

However, you can change the URL to your new domain if it doesn't. Once done, click “Next” to continue. Duplicator will now finish the migration, and you can then click on the “Admin Login” button to enter your new WordPress website's admin area.
There you have it. You've just moved your WordPress site to a new domain.
But before you pop the champagne bottles in celebration, there's still a bit of work to do.
Step 4: Set Up Permanent (301) Redirects
Fortunately, step 4 isn't as complicated as the previous three, especially if you use a powerful plugin like AIOSEO. This is where you set up 301 redirects to point users who land on your old domain.
But first, what's a 301 redirect?
A 301 redirect is an instruction that tells search engines that you have permanently moved your content or website to a new address.
Sounds complicated?
It is if you don't have any coding knowledge. That's because you'll have to edit your old website's .htaccess file.
However, with AIOSEO (Pro or Elite plans), you don't need to touch a single line of code to implement 301 redirects. So, if you haven't installed AIOSEO on your website yet, this would be a great time to do so. It's best you do so on both your old and new websites. Don't worry, though, as a single license covers multiple websites.
Once you've installed AIOSEO, go to the AIOSEO settings, click on the Redirects option, and click on the “Activate Redirects” button.

Next, switch to the “Full Site Redirect” tab and turn on the “Relocate Site” toggle.
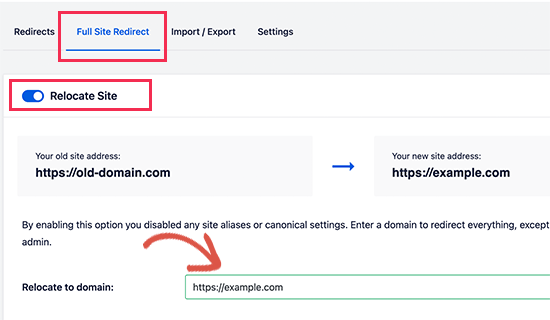
You'll then be asked to enter your new domain name in the “Relocate to domain” field. Once done, click “Save,” and that's it — your website's 301 redirects will be implemented.
How to Move a WordPress Site to a New Domain without Losing Traffic
Moving your website to a new domain could lead you to lose traffic.
However, that shouldn't necessarily be the case.
To avoid this, you must notify Google about your new domain as quickly as possible.
Notifying Google about your address change will quickly help the search engine find your new website. As a result, you don't miss out on organic traffic from search engines.
How do you alert Google of your new domain?
First, ensure your new and old domains are added to Google Search Console (GSC) as two different properties. Here's a detailed guide on doing that from our friends at WPBeginner.
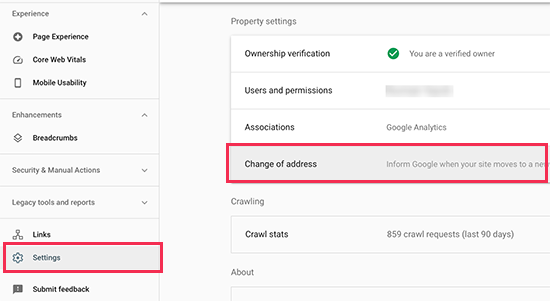
Once you've added your new domain, select the old domain as the active property in your GSC dashboard.
Next, click on the “Settings” icon on the left column and select the” Change of Address” option.
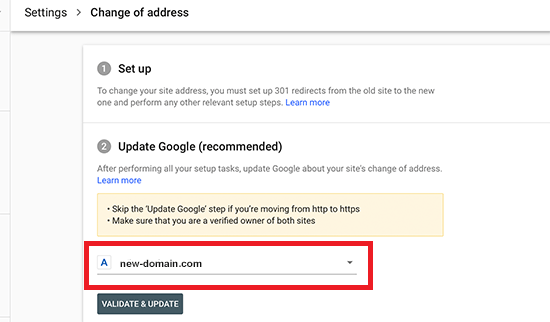
Here, you'll be asked to select your new domain under the Update Google section. Once you've put in your new domain, click on the ‘Validate & Update' button.

Google will then validate that your old domain redirects to the new domain. You'll then be taken through the steps of submitting your change of address request.
How to Move a WordPress Site to a New Domain — The Finishing Touches
Congratulations!
You've successfully moved your WordPress site to a new domain.
However, before you relax and wait for traffic to come to your new domain, here are a few things you must do:
- Test your site: Ensure everything was migrated correctly and is working well. You can also check your site health using WordPress's in-built tool.
- Alert your audience: As a courtesy, let your visitors know that you've moved to a new domain. All you have to do is send your subscribers an email about the move. You can also write a blog post about the move or even post it on social media.
Another essential step you should take is continuing with your SEO efforts on your new domain. One easy way to do this is to get one of the best WordPress SEO plugins on the market.
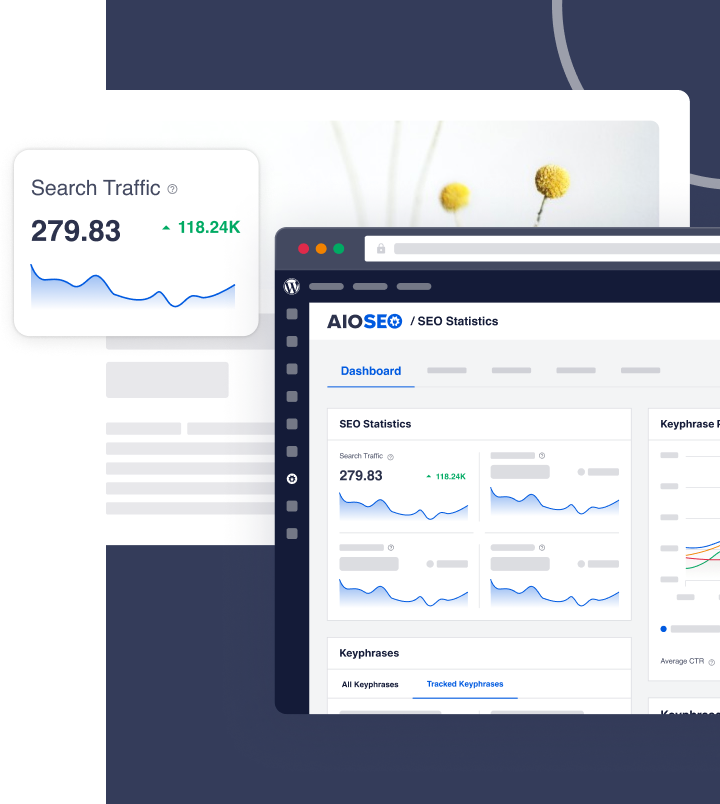
This is where AIOSEO comes into the WordPress site migration equation.
AIOSEO is a powerful SEO plugin and toolkit that helps with on-page and technical SEO optimization — without you having to touch a single line of code.
So, once you've migrated your WordPress website to a new domain, make sure to download AIOSEO to help boost your rankings.
Disclosure: Our content is reader-supported. This means if you click on some of our links, then we may earn a commission. We only recommend products that we believe will add value to our readers.
Want to Try AIOSEO for Free?
Enter the URL of your WordPress website to install AIOSEO Lite.