
Do you want to know how to add 301 redirects in WordPress?
When managing your website’s content, you sometimes have to delete or move it. It’s then important to redirect your old URLs to avoid 404 errors and dead-ends since it can hurt your SEO rankings, make you lose hard-earned backlinks, and give users a bad experience.
In this post, we’ll show you how to add 301 redirects in WordPress step by step. We’ll also cover what a WordPress 301 redirect is, when you should use it, and how to check if it works.
You can use our table of contents to jump straight to any section:
In This Article
What Is a WordPress 301 Redirect?
A WordPress 301 redirect is a redirect type that sends your website visitors to a URL different from the one they landed on. It's a simple line of code that tells a web browser that the page it's trying to load is permanently not available and tells it to navigate to a different page of your choice instead.
When a redirect is set up properly, it happens instantly, and your visitors often won't even notice they've been redirected to a different page.
Not Redirecting Broken URLs Can Hurt Your SEO
It’s important to redirect your old URLs to avoid 404 errors and dead-ends.
If you don't, those 404 errors can hurt your rankings and traffic:
- Your Deleted Pages Are Still Indexed — Your deleted pages will remain in the search engine index and users can still find and click on them. But when they do, they’ll see a 404 error, which is confusing and frustrating for users.
- Your SEO Rankings Will Drop — When too many URLs are changed, it can take Google a lot of time to reprocess and rediscover them. This results in significant drops in rankings.
- You'll Lose Valuable Backlinks — If you’ve managed to get backlinks to your website, you'll lose them when the content is moved or deleted, which can hurt your SEO.
- Google Will Pay Less Attention to Your Important Content — By not fixing 404 errors and redirecting to your new pages, you can lose visibility for your important content. If Google has to spend time crawling your non-existing or unnecessary pages, it may not get to index your important pages.
Luckily, when redirecting your old or changed pages to your new ones, you’ll keep your hard-earned rankings on Google and keep visitors on your page.
So when should you use 301 redirects? Let's show you that next.
When to Use 301 Redirects?
You should use 301 redirects when:
- You’ve changed the URL of an existing post or page
- You’ve deleted your content and want to redirect visitors to a related post or page
- You’re moving your website to a new domain
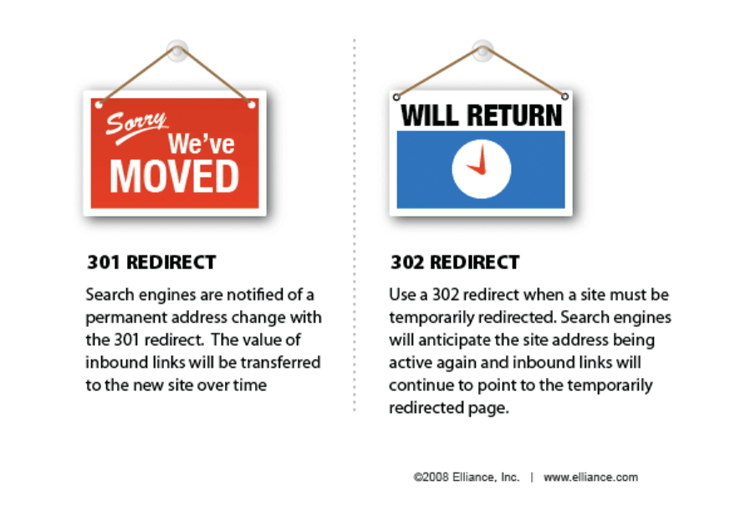
There are various different types of redirects, such as 301 redirect, 302 redirect, 307 redirect, etc. But to keep this post simple, we’ll only cover 301 redirects, as these are by far the most common when deleting or moving content on your website.
Alright, let’s take a look at how to easily create 301 redirects using the best WordPress 301 redirect plugin, All in One SEO (AIOSEO), next.
Add 301 Redirects in WordPress (Step by Step)

With All in One SEO's built-in Redirection Manager, you can easily manage your 301 redirects. It’s the simplest way to perform redirects and boost your SEO without needing to have any server knowledge.
With AIOSEO’s Redirection Manager, you can easily manage 301 redirects, track and monitor 404 errors, and add 301 redirects in bulk.
You can also schedule redirects, helping you avoid 404 errors when you're maintaining your site, running seasonal promotions, and more.

Scheduling redirects this way is an excellent way of eliminating errors and ensuring efficiency when redirecting pages on your site.
Plus, the Redirection Manager also enables you to upload bulk 301 redirects from a CSV file:

For step-by-step instructions on how to install AIOSEO, check out our installation guide.
AIOSEO also has many other features to help you boost your SEO from one plugin. Here are a few examples:
- Cornerstone Content: Easily build topic clusters and enhance your topical authority and semantic SEO strategy.
- Author SEO: Easily demonstrate Google's E-E-A-T in WordPress.
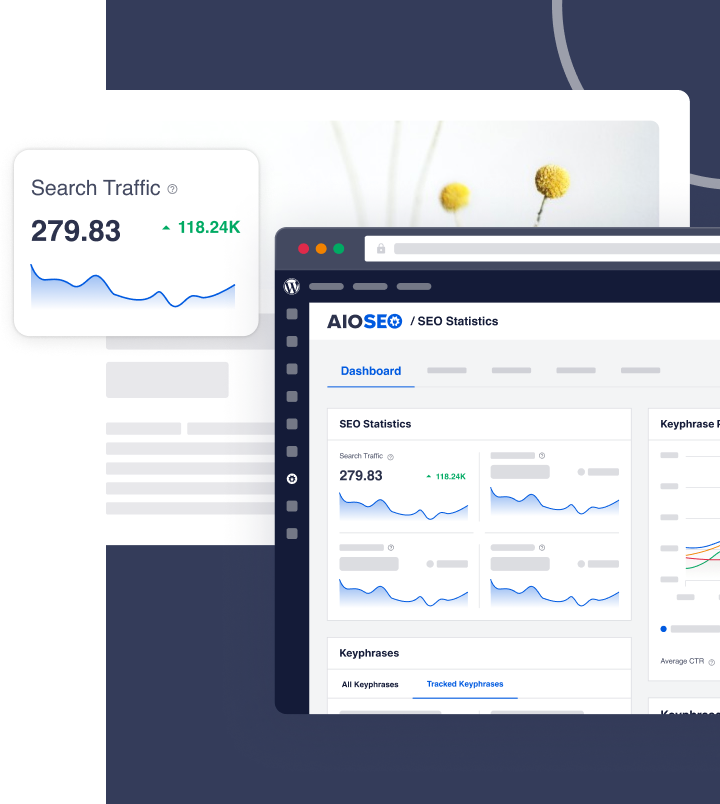
- Search Statistics: This powerful Google Search Console integration lets you track your keyword rankings and see important SEO metrics with 1-click, and more.
- SEO Revisions: Track any changes you make to your site and see their impact on your SEO. Plus, you get to see on a timeline how Google updates affect your site.
- Advanced Robots.txt Generator: Easily generate and customize your robots.txt file for better crawling and indexing.
- TruSEO Highlighter: Makes it easy to spot on-page SEO issues and gives recommendations for fixing them.
- Next-gen Schema generator: This no-code schema generator enables users to generate and output any schema markup on your site.
- Link Assistant: Powerful internal linking tool that automates building links between pages on your site. It also gives you an audit of outbound links.
- SEO Preview: This gives you an overview of your search and social snippets and general SEO so you can improve your optimization.
- IndexNow: For fast indexing on search engines that support the IndexNow protocol (like Bing and Yandex).
- Sitemap generator: Automatically generate different types of sitemaps to notify all search engines of any updates on your site.
- And more.
With AIOSEO, you’ll get access to all the advanced SEO tools you need to optimize your website to rank high in search engines and drive more traffic.
With that said, let’s get started adding 301 redirects in WordPress!
Step 1: Enable Redirects on Your Site
After installing AIOSEO, the next step to adding 301 redirects is to enable redirects on your website. To do so go to Redirects in the All in One SEO menu and click the Activate Redirects button.
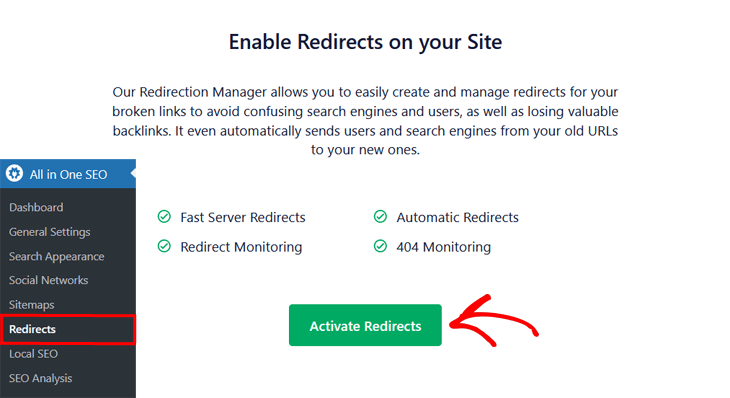
Now, you’ll see the Redirects screen and the option to Add New Redirection.
Step 2: Add a Redirect
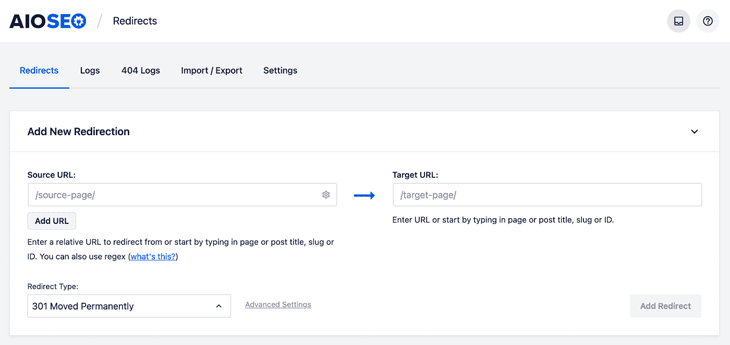
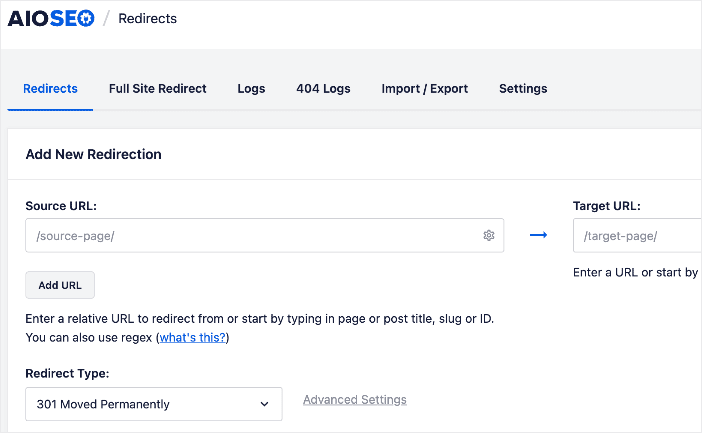
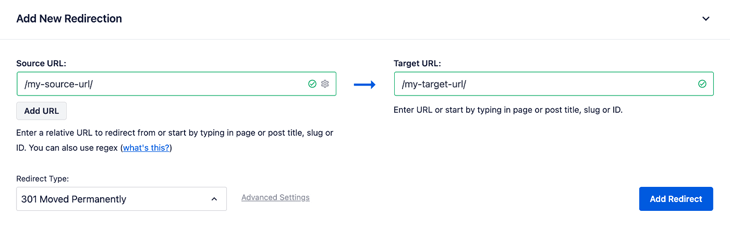
In the Source URL field, you enter the URL you want to redirect from. The URL must be a relative URL. That means the part after your domain, such as https://example.com/. For example, if the URL is https://example.com/my-page, you'd only need to include /my-page.
Here's an example:
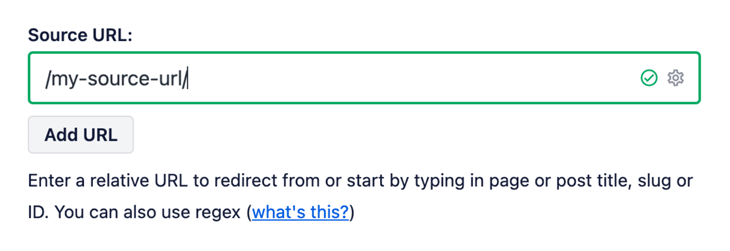
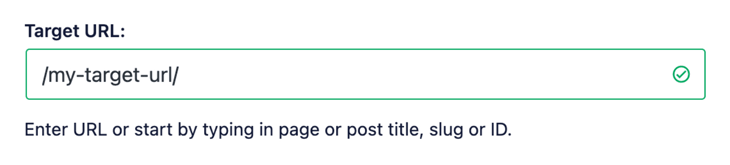
In the Target URL field, enter the URL you want to redirect to. It can be either a relative URL or an absolute URL, meaning either example.com or https://example.com.
Step 3: Choose the Redirect Type
The next step is to choose your redirect type.
In the Redirect Type drop-down, you select the type of redirect you want to use. In this case, we’re going to choose the 301 Moved Permanently type.
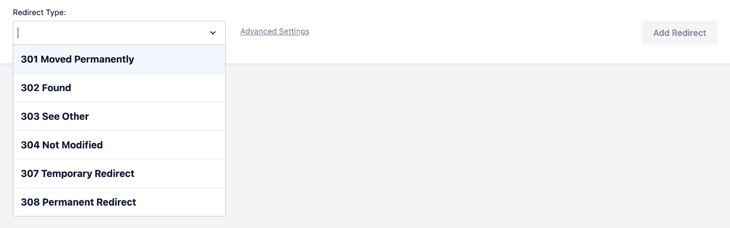
Then, click on the Add Redirect button at the bottom right corner to add your redirect.
Your new redirect will now be shown in the Redirects table.
Step 4: Schedule Your 301 Redirect (Optional)
With AIOSEO's Redirection Manager, you can schedule your 301 redirect to go into effect on a particular day.
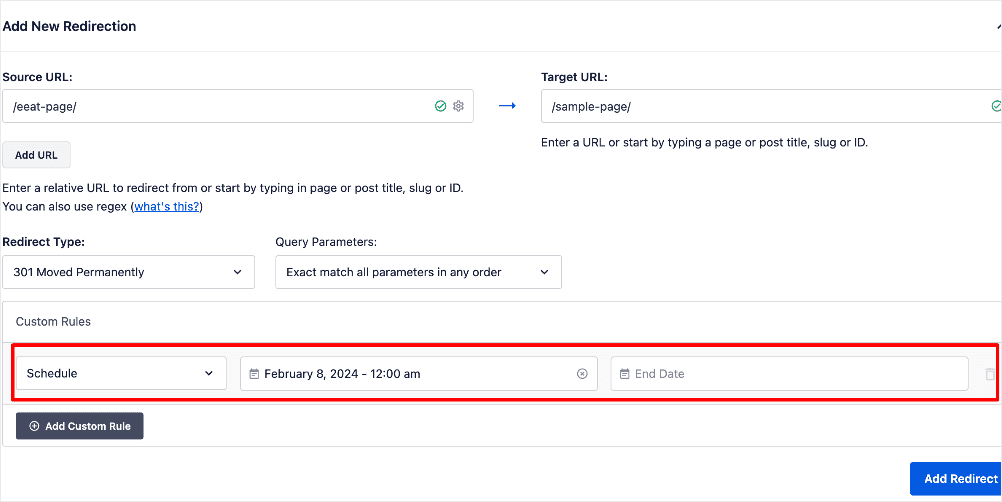
Next, click Add Redirect.
Scheduling redirects this way is an excellent way of eliminating errors and ensuring efficiency when redirecting pages on your site.
Step 5: Add Automatic Redirects (Optional)
To make things easier, AIOSEO has an Automatic Redirects function that detects any changes in your URLs and adds a redirect. To enable it, go to Redirects » Settings and scroll down to the Automatic Redirects section. Next, choose if you want to include All Post Types or certain Posts or Pages.

And if you want, it even monitors the trash for you, so no 404s will ever go unnoticed.
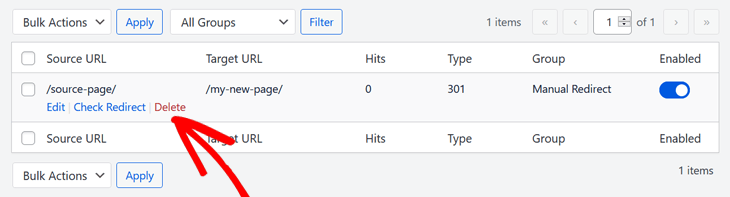
Step 6: Check If Your Redirects Are Working
You can test that your redirect works by clicking the Check Redirect link.

And if you need to edit your redirect, you can simply do so by clicking on the Edit link.
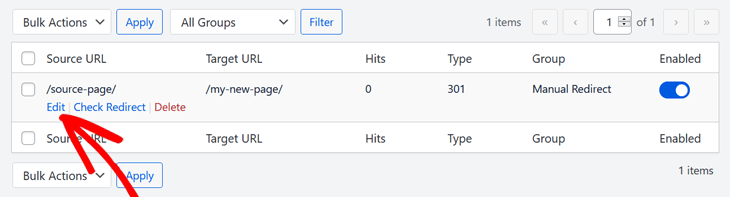
Finally, if you want to delete your redirect, you just click on the Delete link, and it gets removed.
That’s it!
You've added a 301 redirect in WordPress.
Adding 301 Redirects in WordPress: Your FAQs Answered
What is a 301 redirect?
A 301 redirect is a permanent redirection from one URL to another. When a user or search engine requests the old URL, they are automatically sent to the new URL. This is important for maintaining SEO value and user experience when a page has permanently moved.
When should I use a 301 redirect?
- Use 301 redirects when you have permanently moved a page to a new location. Do not use them for temporary redirects (use 302 for those).
- Common scenarios include:
- Website restructuring
- Merging pages
- Changing domain names
- Removing outdated content
We hope this helped you learn how to add 301 redirects in WordPress. By redirecting your old pages to your new ones, you’ll help search engines and users not to get lost while browsing your website. It’ll help keep visitors on your page, as well as your rankings on Google. You may also want to check out our post on how to easily find and fix 404 errors and how to set up bulk 301 redirects in WordPress.
If you found this article helpful, then please subscribe to our YouTube Channel. You’ll find many more helpful tutorials there. You can also follow us on Twitter, LinkedIn, or Facebook to stay in the loop.
Disclosure: Our content is reader-supported. This means if you click on some of our links, then we may earn a commission. We only recommend products that we believe will add value to our readers.
Want to Try AIOSEO for Free?
Enter the URL of your WordPress website to install AIOSEO Lite.