
Do you want to know the absolute easiest way to set up bulk 301 redirects in WordPress?
As exciting as a redesign of your website might be, we know how much work it takes behind the scenes to ensure all technical aspects are in place. And especially to make sure your links stay intact to maintain your rankings in search engines.
That’s why it’s crucial to redirect your moved or deleted pages to your new ones, which often includes multiple URLs. So, in this post, we’ll show you how to set up bulk 301 redirects in WordPress the easy way. We’ll also cover whether redirects are bad for SEO and how to test your redirects.
In This Article
Are Redirects Bad For SEO?
Redirects aren’t bad for SEO as long as they are redirected the right way. The easiest way to ensure this is by using a redirection plugin.
Why?
Because if you’re not an experienced web developer with extensive server knowledge, you may not implement your redirects the right way, which can cause your rankings to drop and make you lose website traffic, backlinks, and conversions.
That said, redirecting your old pages is a must when making any changes to your URLs. And when using a plugin like AIOSEO and its Redirection Manager addon, you don't have to apply complicated htaccess rules or have server knowledge to create 301 redirects.
It's as easy as 1-2-3!
Best Way to Bulk Setup 301 Permanent Redirects

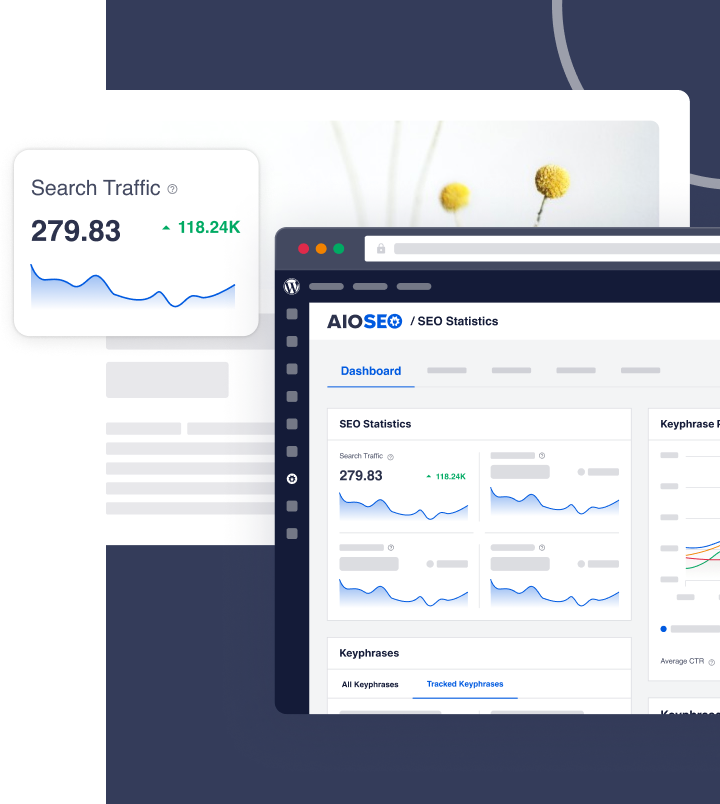
With AIOSEO’s Redirection Manager, you can easily manage 301 redirects, track and monitor 404 errors, and add 301 redirects in bulk.
You can also schedule redirects, helping you avoid 404 errors when you're maintaining your site, running seasonal promotions, and more.

Scheduling redirects this way is an excellent way of eliminating errors and ensuring efficiency when redirecting pages on your site.
For step-by-step instructions on how to install AIOSEO, check out our installation guide.
AIOSEO also comes with everything you need to boost your SEO from one plugin only. Here are a few of AIOSEO's powerful SEO tools:
- Cornerstone Content: Easily build topic clusters and enhance your topical authority and semantic SEO strategy.
- Author SEO: Easily demonstrate Google's E-E-A-T in WordPress.
- Search Statistics: This powerful Google Search Console integration lets you track your keyword rankings and see important SEO metrics with 1-click, and more.
- SEO Revisions: Track any changes you make to your site and see their impact on your SEO. Plus, you get to see on a timeline how Google updates affect your site.
- Advanced Robots.txt Generator: Easily generate and customize your robots.txt file for better crawling and indexing.
- TruSEO Highlighter: Makes it easy to spot on-page SEO issues and gives recommendations for fixing them.
- Next-gen Schema generator: This no-code schema generator enables users to generate and output any schema markup on your site.
- Link Assistant: Powerful internal linking tool that automates building links between pages on your site. It also gives you an audit of outbound links.
- SEO Preview: This gives you an overview of your search and social snippets and general SEO so you can improve your optimization.
- IndexNow: For fast indexing on search engines that support the IndexNow protocol (like Bing and Yandex).
- Sitemap generator: Automatically generate different types of sitemaps to notify all search engines of any updates on your site.
- And more.
AIOSEO also has many other features to help you boost your local SEO, on-page SEO, and technical SEO.
Alright, let’s get into the nitty-gritty and begin showing you how to set up bulk 301 redirects in WordPress using AIOSEO’s Redirection Manager. It allows you to easily redirect multiple URLs to the same destination URL.
1. Installing AIOSEO's Redirection Manager
To get started, you first need to get an AIOSEO Pro or Elite license, then download and install the plugin. For detailed instructions, see our guide on installing All in One SEO.
If you’ve never installed a plugin before, you can check out WPBeginner’s guide on how to install a WordPress plugin.
2. Enabling Redirects on Your Site
Once you’ve installed AIOSEO, you need to enable redirects on your site. Simply go to Redirects in the All in One SEO menu and click on the Activate Redirects button.
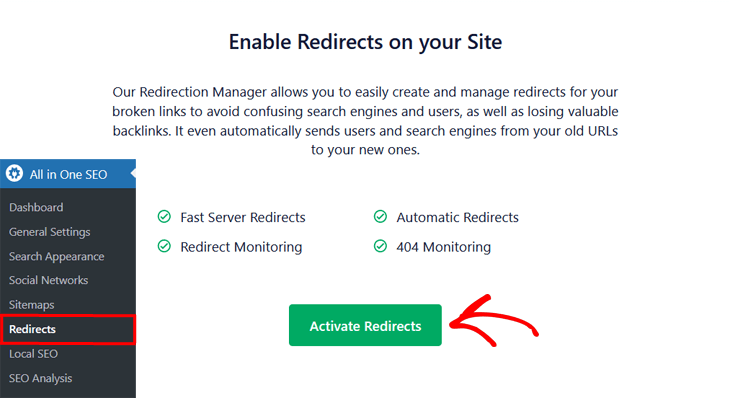
You're now ready to start adding your first redirection!
3. Adding New Redirection
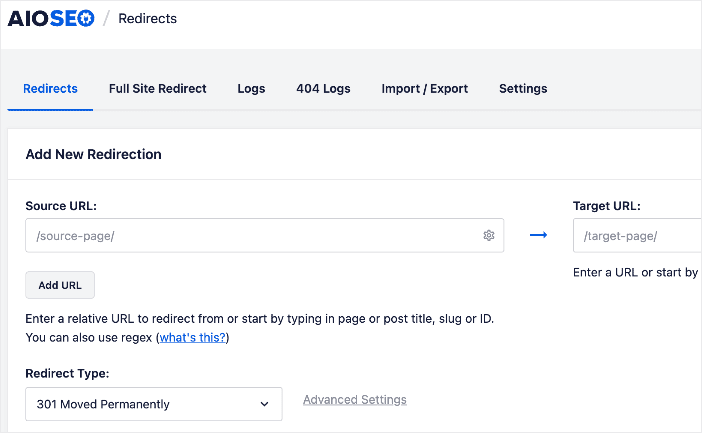
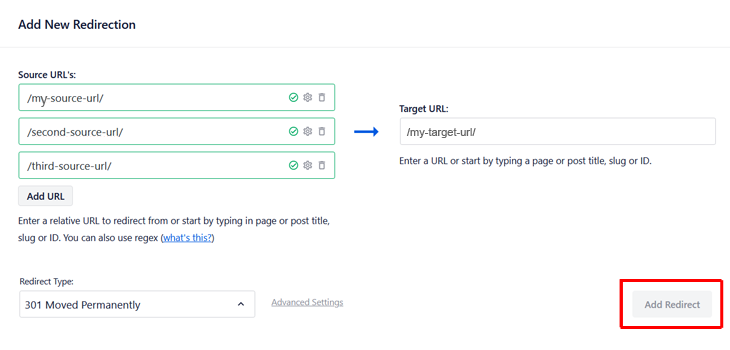
Once you've activated redirects on your website, a new window will open where you’ll see the Redirects screen, and the Add New Redirection form.

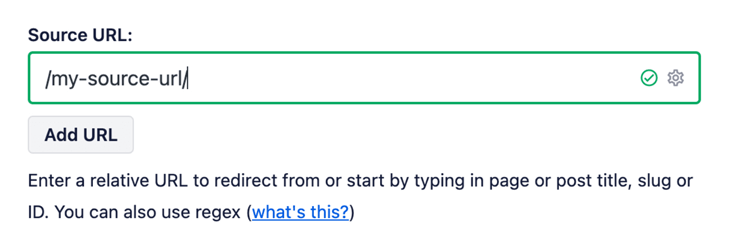
To start adding a new redirect, you need to enter the URL you want to redirect from in the Source URL field.
Note: The URL must be a relative URL, which means that it shouldn't include the full https://mydomain.com part of your URL. Only the /mydomain.com/ part.
In this example:
That was easy peasy, right!?
Now, let’s take a look at how to add multiple redirects. It’s the same simple process.
4. Adding Multiple/Bulk Redirects
To add multiple or bulk redirects, you click on the Add URL button, and another Source URL field will be displayed.
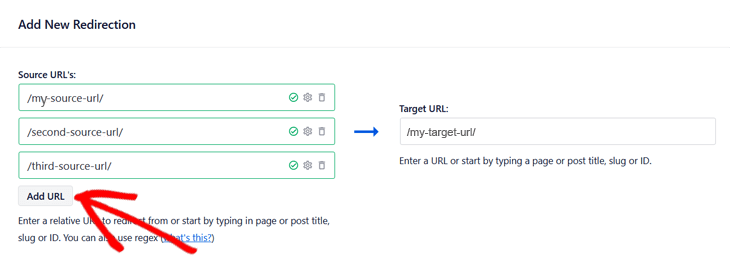
Simply repeat this process to add more source URLs until you’re done.
Next, in the Target URL field, you need to enter the URL you want to redirect your website visitors to.
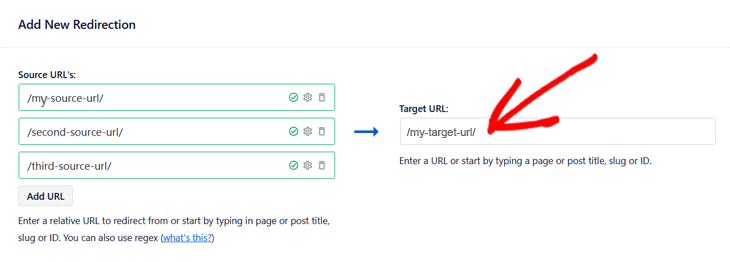
In this case, the URL can be either a relative URL or an absolute URL.
You can also start typing the title of any post, page, or other content on your site, or the slug or ID in the Target URL field, and the matching content will show up. All you need to do is click on the post or page you want to select as your target.
Now, it’s time to choose your redirect type. Simply select the type you want to use in the Redirect Type drop-down.
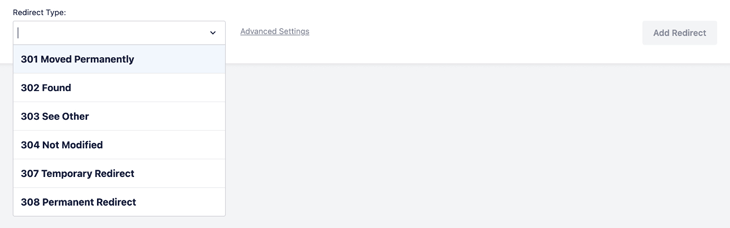
The 2 most common redirect types are:
- 301 Moved Permanently (Simple 301 Redirects): You should use this option if you want to permanently redirect your old URL because the content has been deleted or moved.
- 307 Temporary Redirect: And you should use this option if you only want to temporarily redirect your old URL.
Then, click on the Add Redirects button to add your redirects.
Once you’ve clicked the button, your redirects will be shown in the Redirects table, and you’re all set!
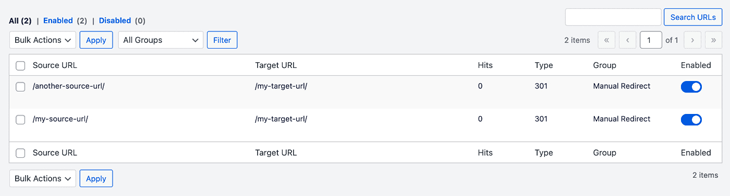
As simple as that!
5. Adding Bulk Redirects from a CSV File (Optional)
Besides manually adding redirects in bulk, you can also upload redirects from a CSV file.

Once you’ve downloaded the CSV file with your redirect links, the next step is to upload it. To do so, go to the AIOSEO menu » Redirects » Import/Export. Click Choose a File and select your CSV file from your computer.

Next, click Import, and all your redirects will be pulled from the CSV file.
For step-by-step instructions, check out our tutorial on redirecting links in bulk from a CSV file.
6. Testing Your Redirects
After adding your redirects, it’s always good to test a few of them to make sure the redirects are working.
You can check this directly from the Redirects table in AIOSEO's Redirection Manager. Just hover with the mouse over your redirect link, and the Check Redirect option will appear. Then, simply click on it to check if your redirect is working.
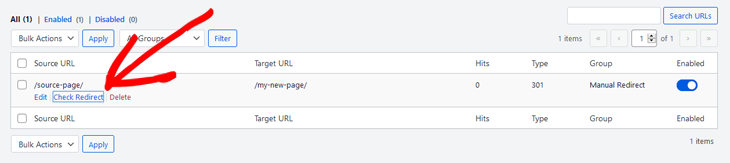
And if they do, you’re good to go!
If they still display a 404 error, you can try deleting your browser cache or visiting your old URLs in an incognito tab.
We hope this post has helped you know how to set up bulk redirects in WordPress. You may also want to check out other articles on our blog, like our tutorial on importing and exporting redirects or our ultimate guide to redirecting a WordPress site.
If you found this article helpful, then please subscribe to our YouTube Channel. You’ll find many more helpful tutorials there. You can also follow us on X (Twitter), LinkedIn, or Facebook to stay in the loop.
Disclosure: Our content is reader-supported. This means if you click on some of our links, then we may earn a commission. We only recommend products that we believe will add value to our readers.
Want to Try AIOSEO for Free?
Enter the URL of your WordPress website to install AIOSEO Lite.