
Möchten Sie Ihre Website zu Pinterest hinzufügen, um Berichte über Ihre gepinnten Inhalte anzuzeigen?
All in One SEO macht dies sehr einfach, damit Sie sehen können, wie gut Ihre Inhalte funktionieren.
Hier zeigen wir Ihnen, wie Sie Ihre Website mit der HTML-Tag-Methode bei Pinterest authentifizieren.
In diesem Artikel
HINWEIS:
Wenn Sie Ihre Website bereits bei Pinterest verifiziert haben, müssen Sie dies nicht erneut tun. Sie müssen Ihre Website nur einmal verifizieren, wenn Sie sie zum ersten Mal in Pinterest hinzufügen.
Voraussetzungen
Sie benötigen ein Pinterest-Konto.
Wenn dies für Ihr Unternehmen ist, sollten Sie überlegen, ein separates Konto für Ihr Unternehmen zu verwenden, anstatt Ihr persönliches Konto zu nutzen.
HINWEIS:
Pinterest gibt an: „Obwohl es nicht erforderlich ist, empfehlen wir Ihnen, sich für ein Pinterest-Geschäftskonto anzumelden, um das Beste aus Ihrer beanspruchten Website herauszuholen. Erfahren Sie mehr über die Vorteile eines Pinterest-Geschäftskontos“.
Hinzufügen Ihrer Website zu Pinterest
Um zu beginnen, müssen Sie sich bei Pinterest anmelden (falls Sie noch nicht angemeldet sind).
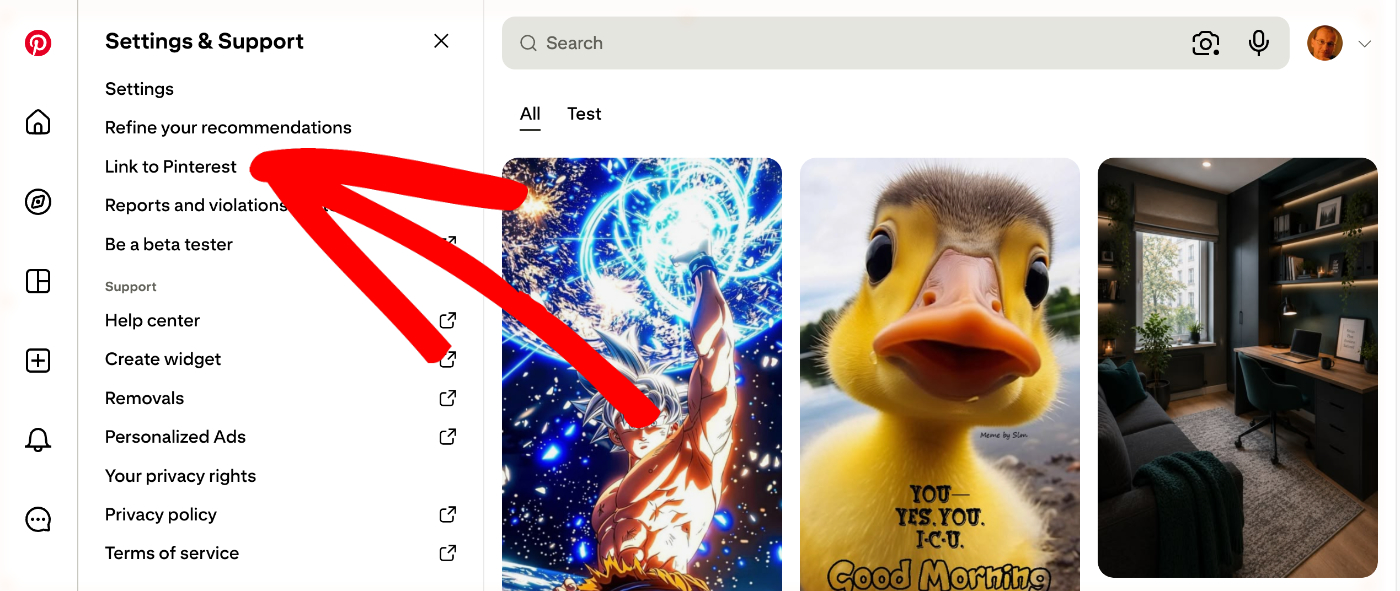
Nachdem Sie sich angemeldet haben, klicken Sie auf das Symbol Einstellungen in der unteren linken Ecke des Bildschirms, um das Menü Einstellungen & Support anzuzeigen, und klicken Sie dann auf Mit Pinterest verknüpfen.
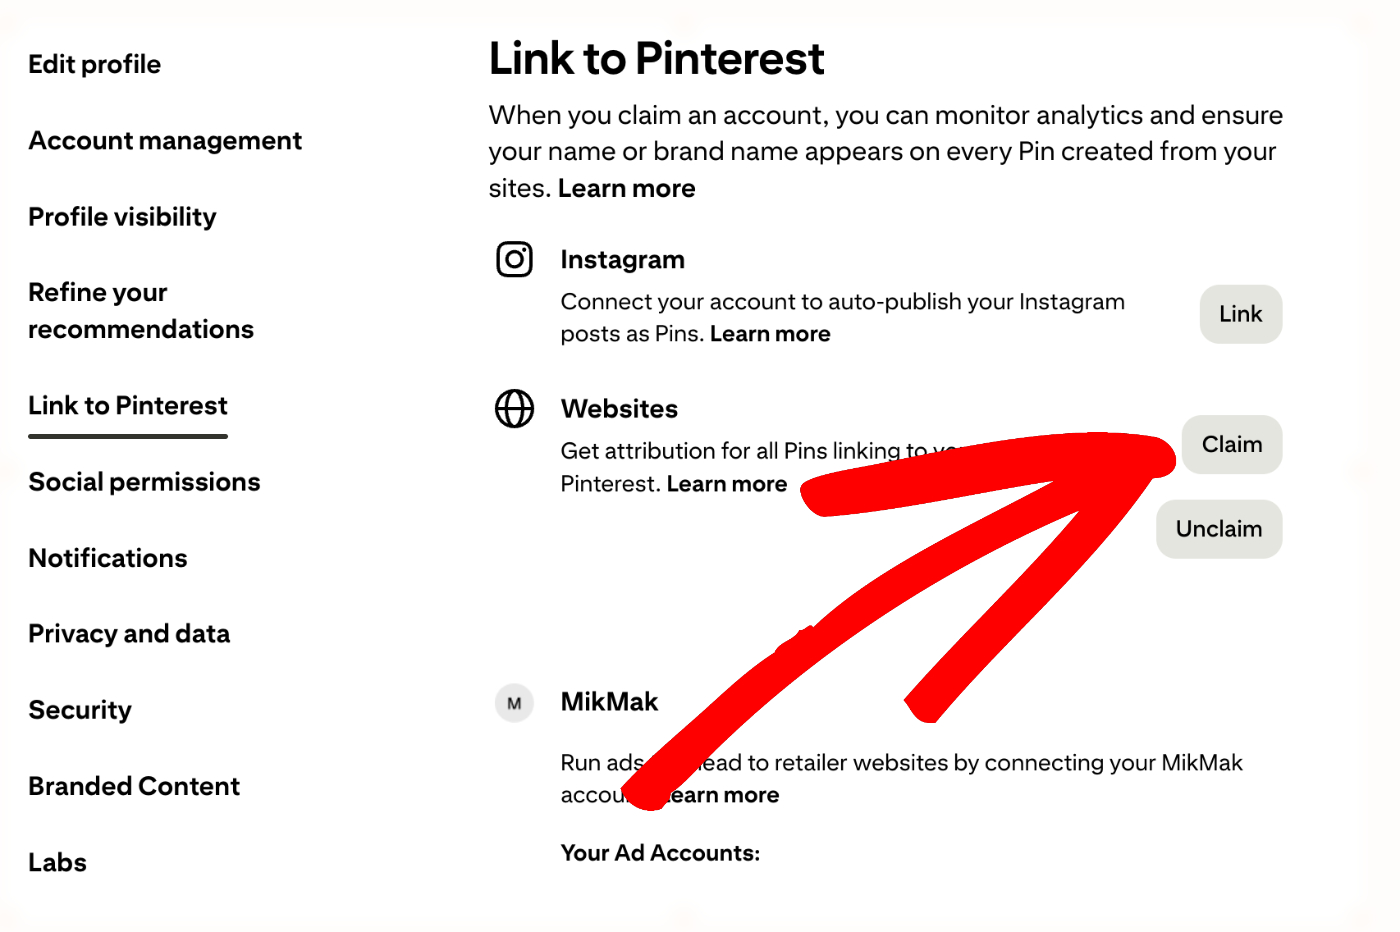
Klicken Sie anschließend im Abschnitt Websites auf Beanspruchen.
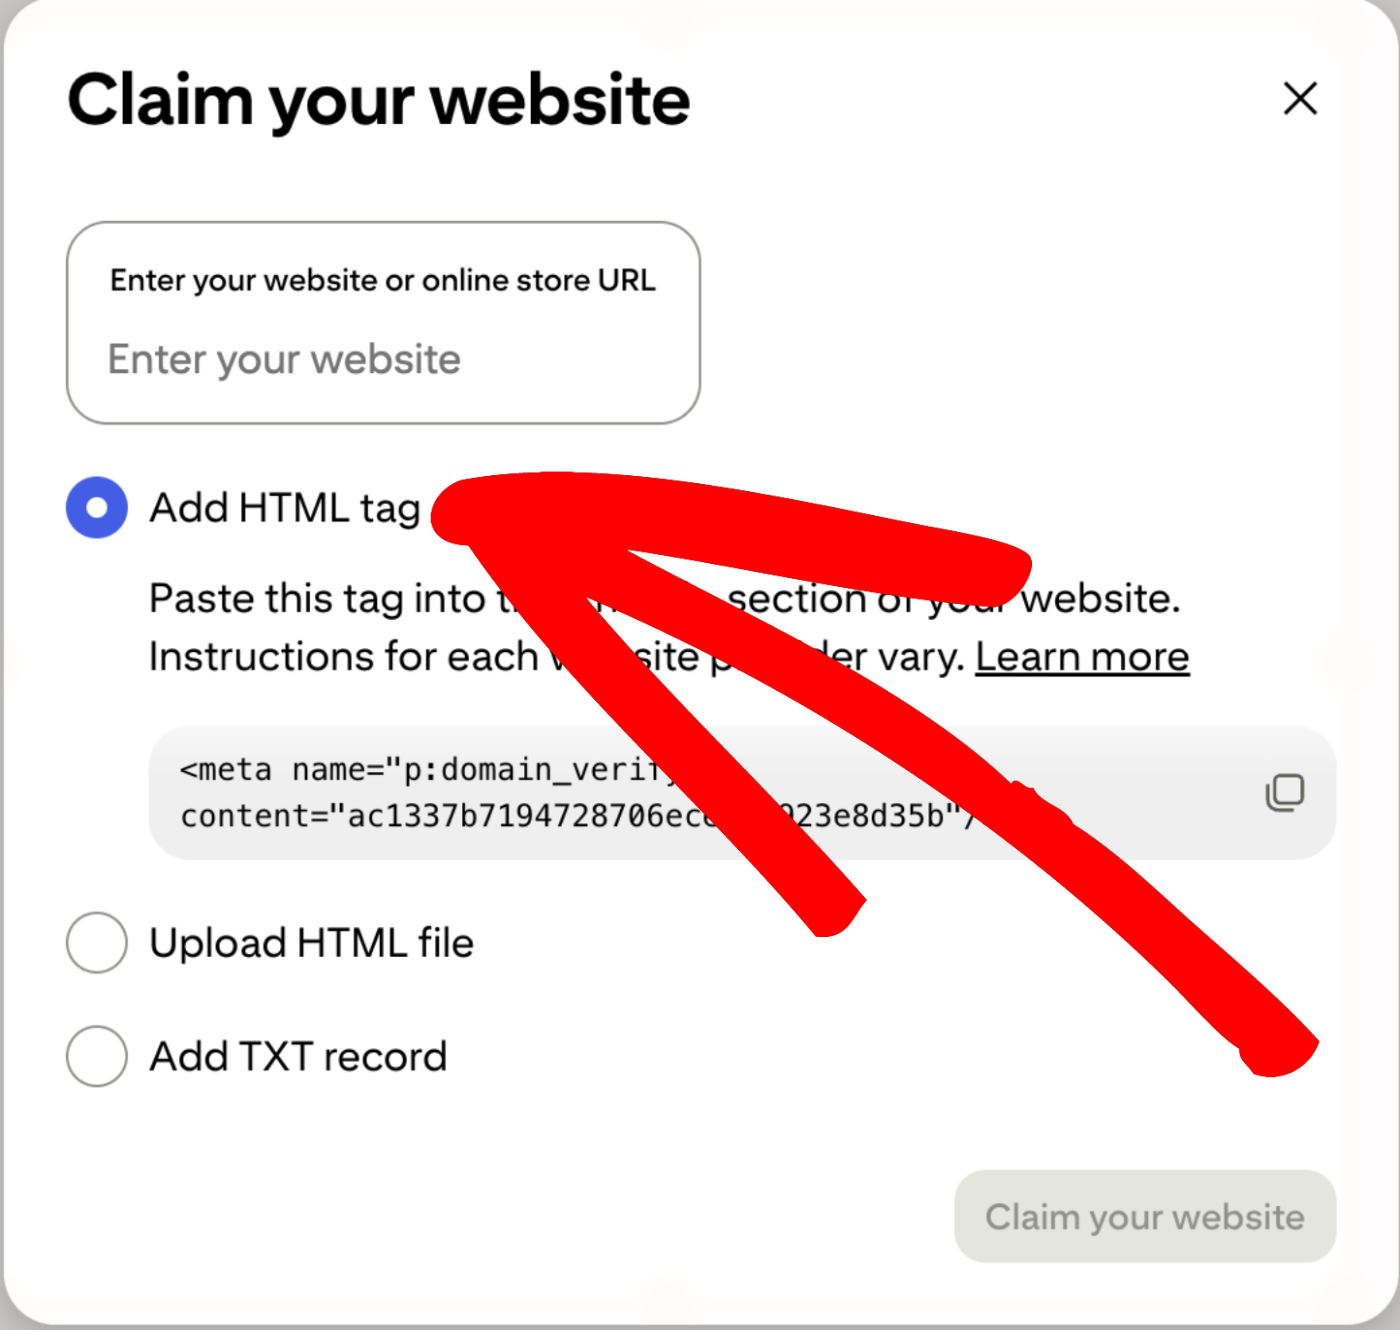
Geben Sie die URL Ihrer Website in das Feld ein und wählen Sie die Option HTML-Tag hinzufügen.
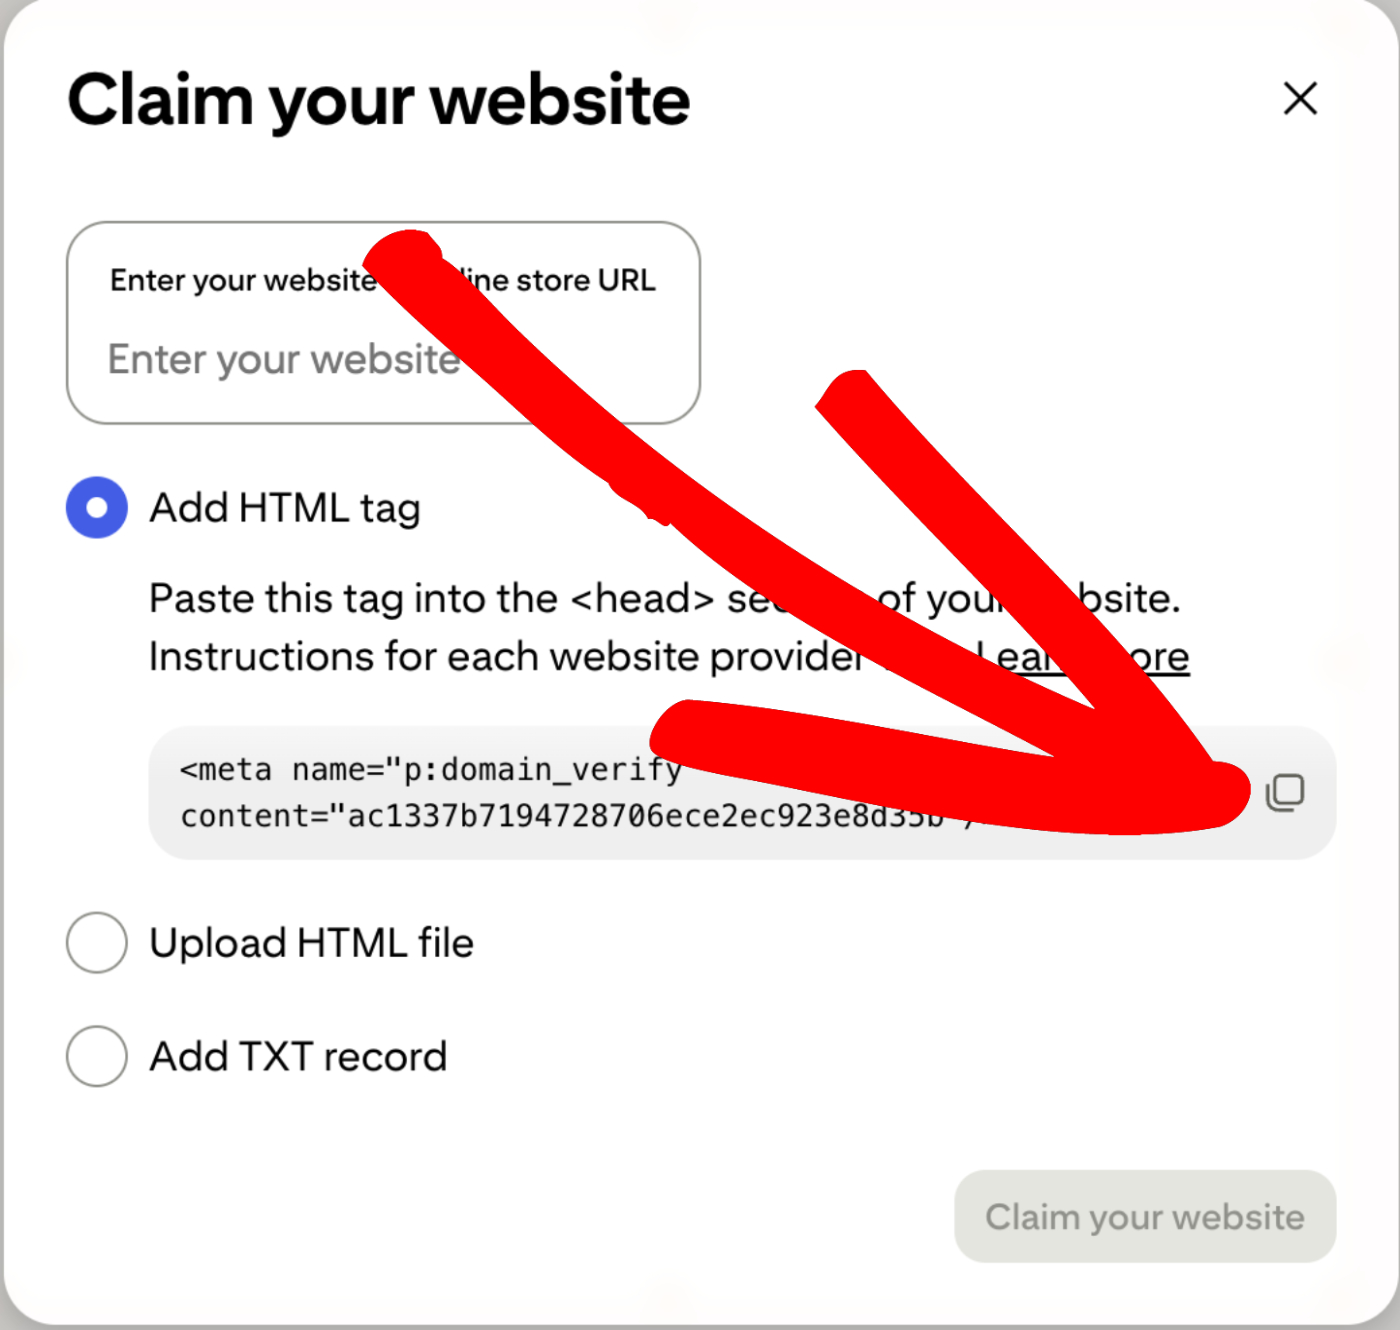
Kopieren Sie den Code im Feld HTML-Tag hinzufügen, indem Sie auf die Schaltfläche Kopieren klicken.
Öffnen Sie ein neues Browserfenster und melden Sie sich bei Ihrer WordPress-Website an. Klicken Sie im Menü All in One SEO auf Allgemeine Einstellungen und dann auf die Registerkarte Webmaster Tools.
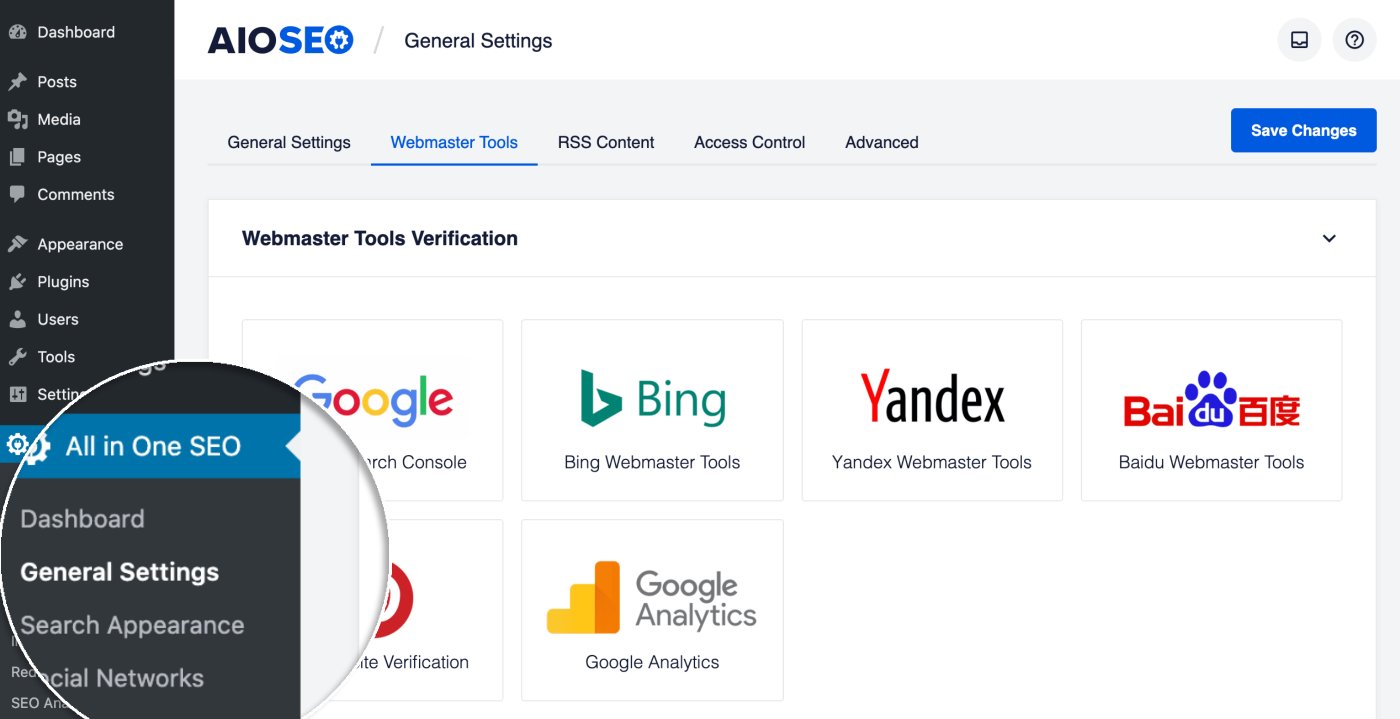
Klicken Sie nun auf den Pinterest Website-Verifizierung -Block und fügen Sie den kopierten Code in das Feld Pinterest-Verifizierungscode ein.
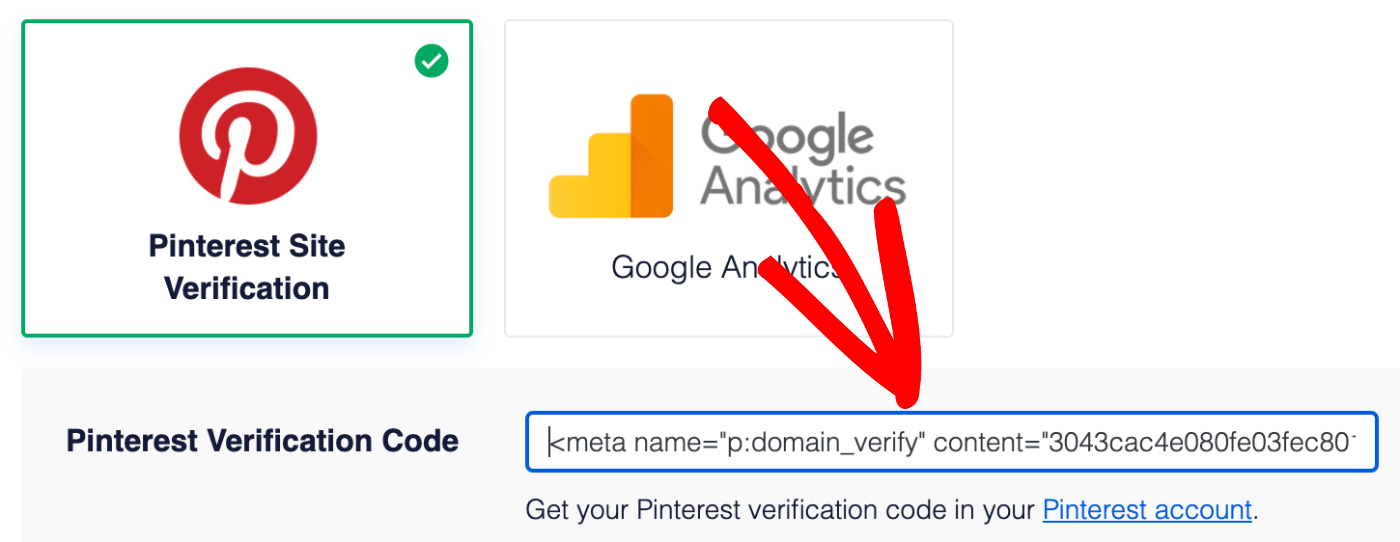
Klicken Sie auf die Schaltfläche Änderungen speichern.
Nun müssen Sie nur noch in Ihrem anderen Browserfenster zu Pinterest zurückkehren und auf die Schaltfläche Website beanspruchen klicken.
Sie sollten eine Benachrichtigung erhalten, sobald Pinterest Ihre Anfrage zur Verifizierung Ihrer Website genehmigt hat.