Do you want to know how and when to add 307 temporary redirects in WordPress?
When you delete a page, it's important that you set up a proper redirection method. Otherwise, people will still be able to find the deleted page and land on it, which hurts user experience and SEO.
In this post, we'll show you how to set up 307 temporary redirects on your WordPress website without any fuss.
So let's dig in.
Here are some quick links to what we'll cover in this article. If you’re in a hurry, you can jump directly to the section you want to read.
In This Article
What Is an HTTP 307 Temporary Redirect?
307 Temporary Redirect is a redirect type that indicates the requested page is temporarily available in the original location. When this status is generated, the requested content is served from the new temporary location.
When 307 redirection is enabled, search engines get to know that the redirection is temporary, which helps you keep the ranking intact.
When to Use 307 Temporary Redirect
A common way of using 307 temporary redirects is when your site is undergoing maintenance. By setting up 307 redirects, you can temporarily redirect users to another resource on your website.
Another great way of using the redirect is when you are updating seasonal campaign pages. While you’re updating those pages, you can set up a 307 temporary redirect to send the visitors coming from the search engine to a related page.
Easily Set Up 307 Redirects in WordPress
You can easily configure 307 redirects to your WordPress websites with the AIOSEO plugin.
With the plugin, you can set up several types of redirects, including:
- 301 Moved Permanently
- 302 Found
- 303 See Other
- 304 Not Modified
- 307 Temporary Redirect
- 308 Permanent Redirect
The redirect setup is pretty simple… You just need to carry out a few steps, and you’re done.
Now let’s see how to add 307 temporary redirects to your WordPress website with the AIOSEO plugin.
1. Install AIOSEO Plugin
The first step to setting up 307 redirects is downloading and installing All In One SEO (AIOSEO).

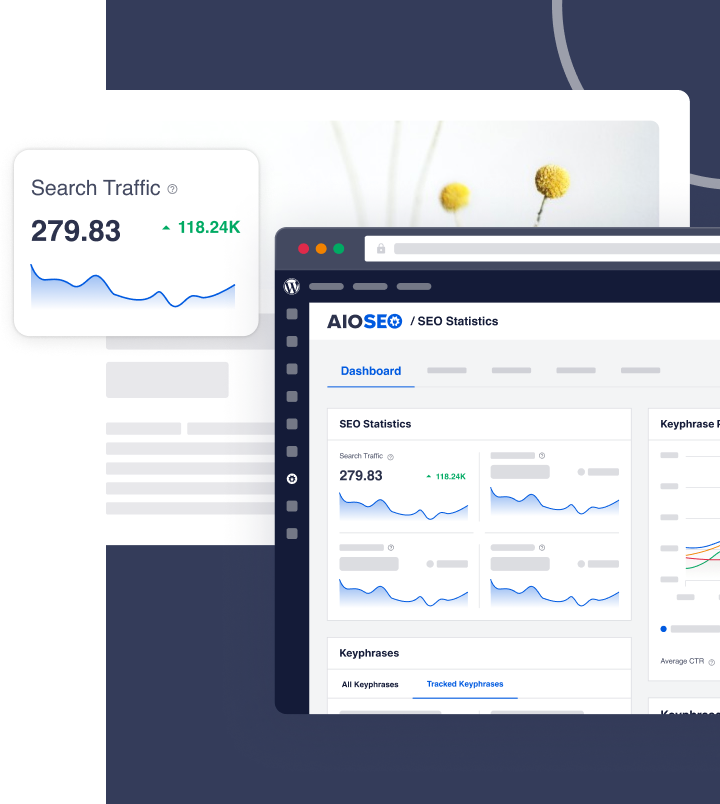
AIOSEO is a powerful, easy-to-use SEO plugin boasting over 3 million active installs. That means millions of smart bloggers and marketers use AIOSEO to help them boost their search engine rankings and drive qualified traffic to their blogs. The plugin has many powerful features and modules designed to help you properly configure your SEO settings.
Regarding setting up automatic redirects, AIOSEO has a powerful Redirection Manager. This game-changing tool helps you manage redirects and eliminate 404 errors, making it easier for search engines to crawl and index your site. It also helps ensure a positive UX for your site visitors.
AIOSEO’s Redirection Manager also has the functionality to help you set up automatic redirects.
Other SEO features and modules include:
- Cornerstone Content: Easily build topic clusters and enhance your topical authority and semantic SEO strategy.
- Author SEO: Easily demonstrate Google's E-E-A-T in WordPress.
- Search Statistics: This powerful Google Search Console integration lets you track your keyword rankings and see important SEO metrics with 1-click, and more.
- SEO Revisions: Track any changes you make to your site and see their impact on your SEO. Plus, you get to see on a timeline how Google updates affect your site.
- Advanced Robots.txt Generator: Easily generate and customize your robots.txt file for better crawling and indexing.
- TruSEO Highlighter: Makes it easy to spot on-page SEO issues and gives recommendations for fixing them.
- Next-gen Schema generator: This no-code schema generator enables users to generate and output any schema markup on your site.
- Link Assistant: Powerful internal linking tool that automates building links between pages on your site. It also gives you an audit of outbound links.
- SEO Preview: This gives you an overview of your search and social snippets and general SEO so you can improve your optimization.
- IndexNow: For fast indexing on search engines that support the IndexNow protocol (like Bing and Yandex).
- Sitemap generator: Automatically generate different types of sitemaps to notify all search engines of any updates on your site.
- And more.
AIOSEO also has many other features to help you boost your local SEO, on-page SEO, and technical SEO.
For step-by-step instructions on how to install AIOSEO, check out our installation guide.
2. Enable Redirect on Your Website
Once installed and activated the plugin, navigate to All in One SEO » Redirects.
Note: You need to use at least the PRO version to enable the Redirection Manager.
Next, enable redirection by clicking Activate Redirects.

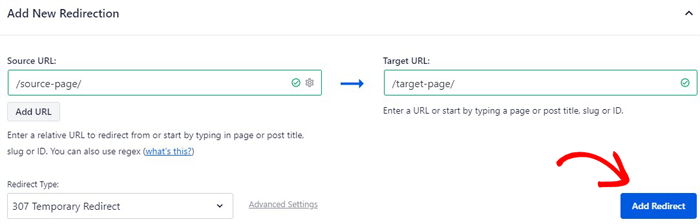
You can now go to the Redirect screen. Here you need to Add a New Redirection by filling out the three main components:
- Source URL
- Target URL
- Redirect Type

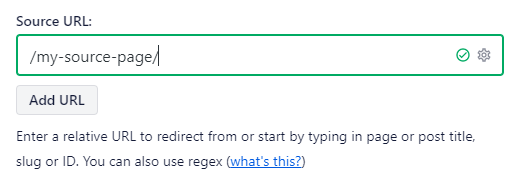
Source URL
You need to add the URL you want to redirect from. Note that the URL you’re adding should not include the domain name.
For example, if the URL is https://example.com/my-source-page, you only need to add /my-source-page/
See this example:
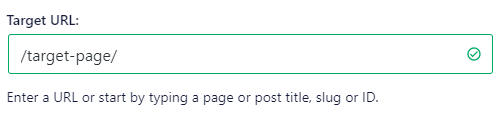
Target URL
In the Target URL field, enter the URL you want the visitors to visit instead of the Source URL. This requires the same input without the domain (see above for the example).
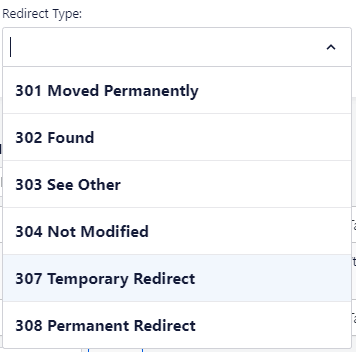
Redirect Type
AlOSEO comes with multiple redirection options, including the 307 Temporary Redirect.
Select 307 Temporary Redirect from the dropdown menu.
Add Redirect
Once done with your selection, simply click Add Redirect.
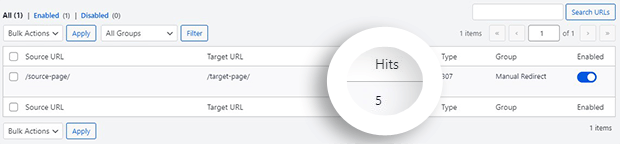
Once added, the redirection will be visible in the table on the same screen, where you can easily manage all your redirects.

This is an excellent way of seeing how many Hits your URL gets, the Source URL, and the Target URL.
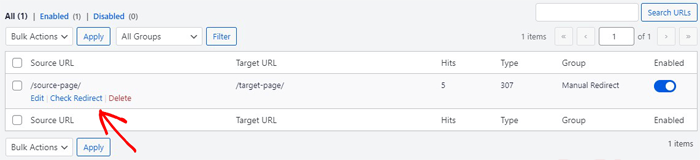
Checking The Redirects
AIOSEO lets you easily check whether the redirect(s) you have set up is working.
For this check, all you need to do is to hover the mouse pointer over the Source URL and click Check Redirect.
Scheduling Your 307 Redirects
If you already know when your 307 redirects will be going into effect and its duration, you can schedule your redirects.

Scheduling 307 redirects this way is an excellent way of setting up automatic redirects. It’s efficient and time-saving.
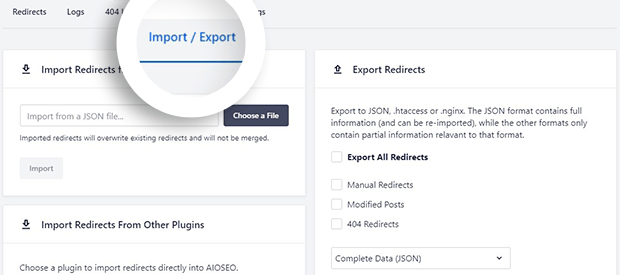
Importing and Exporting Redirects
AIOSEO is the best SEO plugin for a reason; it offers exciting features that add significant value to your SEO initiatives.
A popular option of the plugin is importing and exporting redirects from AIOSEO to other SEO plugins.
For more details, see our guide on how to import and export redirects in WordPress easily.
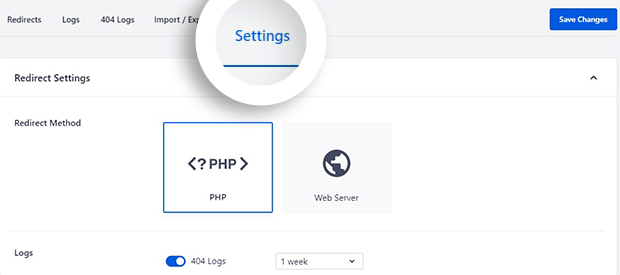
Now that you know how to set up a redirect, it’s time to go into the details of some advanced settings::
- Redirect Methods — whether to set up the redirect at the code level or server level.
- Logs — to keep a record of the redirect requests.
- IP Logging — whether full or partial logging of IP addresses is needed that access your website.
- Automatic Redirects — to set up automatic redirects for posts and pages.
- HTTP Cache Header — to enable HTTP cache header.
- Redirect Defaults — set up a default option for redirect requests.
That’s all!
We hope this post has helped you know how to implement 307 redirects in WordPress. You may also want to check out other articles on our blog, like our tutorial on redirecting links in bulk using a CSV file or how to implement a full site redirect.
If you found this article helpful, then please subscribe to our YouTube Channel. You’ll find many more helpful tutorials there. You can also follow us on X (Twitter), LinkedIn, or Facebook to stay in the loop.
Disclosure: Our content is reader-supported. This means if you click on some of our links, then we may earn a commission. We only recommend products that we believe will add value to our readers.
Want to Try AIOSEO for Free?
Enter the URL of your WordPress website to install AIOSEO Lite.