
Would you like to know what each option on the Content Optimization tab actually does?
This tab holds the site-wide settings for AIOSEO's TruSEO content analysis, so it controls what you see while you write.
In this guide, we'll walk you through every option on the tab and what each does.
Before you get started, make sure All in One SEO is installed and activated on your WordPress site.
In This Article
TruSEO & Content Settings
From your WordPress admin sidebar, go to All in One SEO » General Settings. Then select the Content Optimization tab.
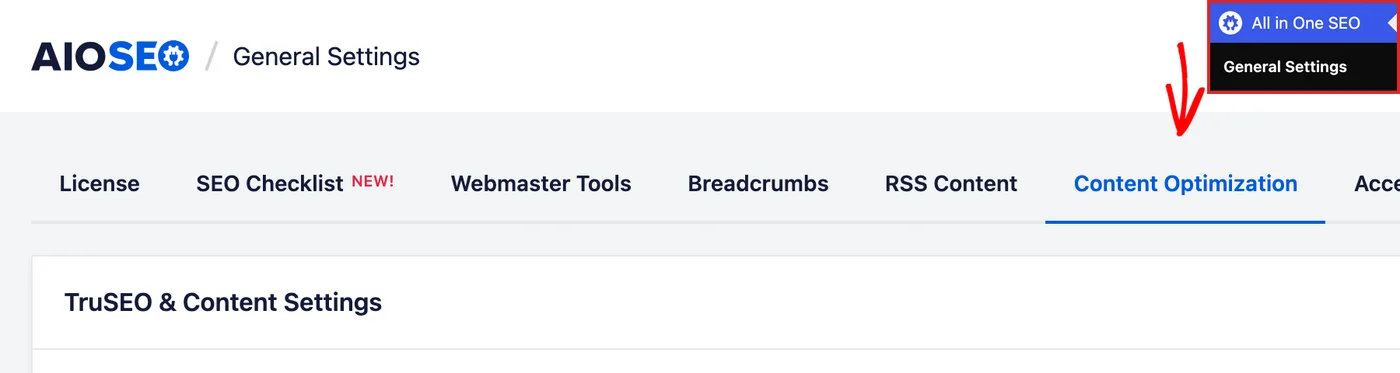
The tab holds two groups of settings. TruSEO & Content Settings controls the analysis that scores your posts as you write. Writing Assistant connects AIOSEO to the SEOBoost content optimization service.
The five options under TruSEO & Content Settings control TruSEO content analysis across your whole site. All five are on by default so that the analysis is available on every post from the start.
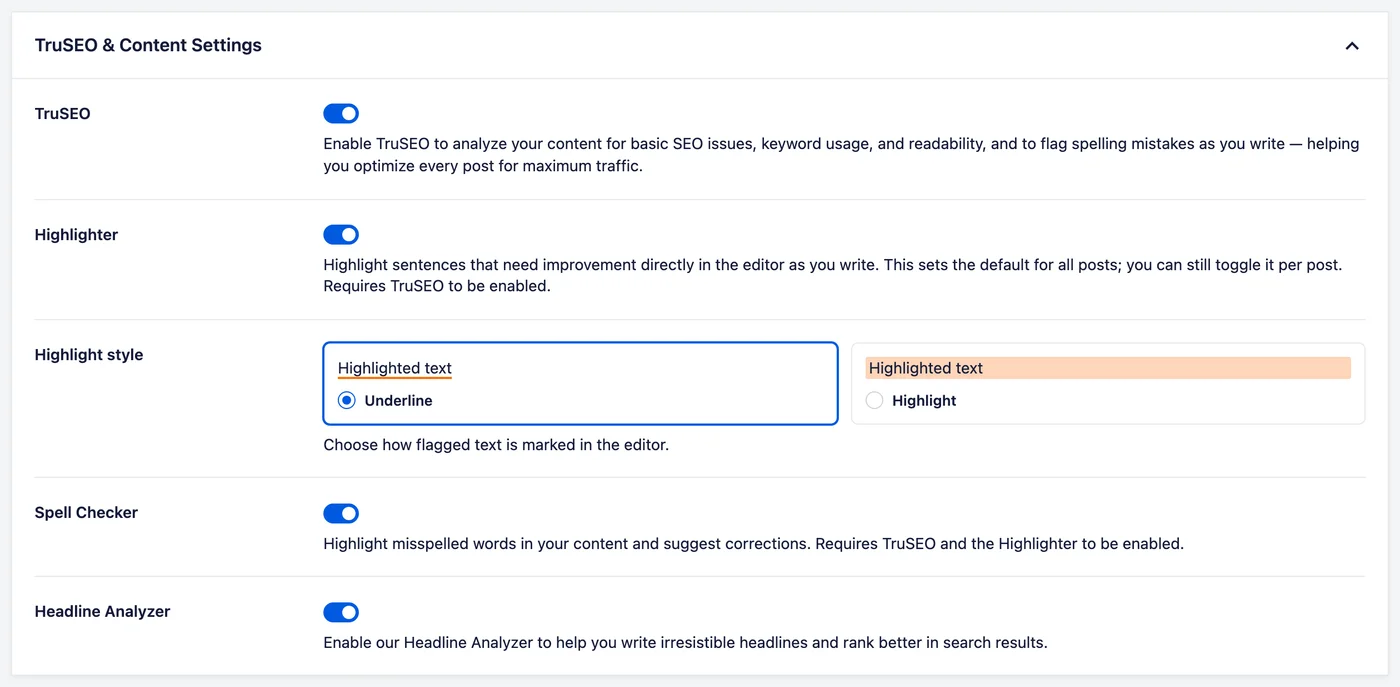
e TruSEO & Content Settings section are:
- TruSEO: This enables or disables the TruSEO features that analyze your content for basic SEO issues, keyword usage, and readability.
- Highlighter: This enables or disables the TruSEO Highlighter that marks sentences that need improvement directly in the editor. This sets the default for all posts. You can turn it on or off for a single post, using the Highlight toggle on that post's Optimization tab.
- Highlight style: This controls how text is highlighted. See Choosing a Highlight Style below.
- Spell Checker: This enables or disables the TruSEO Spell Checker that highlights misspelled words in your content and suggests corrections.
- Headline Analyzer: This enables or disables the Headline Analyzer that scores your post titles so you can write headlines that earn clicks.
The Highlighter appears once TruSEO is enabled. Highlight style and the Spell Checker appear once both TruSEO and the Highlighter are enabled.
The Spell Checker needs the Highlighter running because it marks misspelled words by highlighting them.
NOTE:
The Headline Analyzer works on its own. It keeps scoring your titles with TruSEO switched off, because it doesn’t depend on anything TruSEO to work.
Switching the Spell Checker or the Headline Analyzer off removes that area from the Optimization tab when you edit a post. That tab sits in the AIOSEO Settings section below your post content.
For more details, see our guides on disabling TruSEO content analysis and disabling the Headline Analyzer.
Choosing a Highlight Style
Highlight style is the one option here that's a choice rather than a switch. It sets how the Highlighter marks text in the editor that needs your attention.
Each choice previews its own style before you pick one.
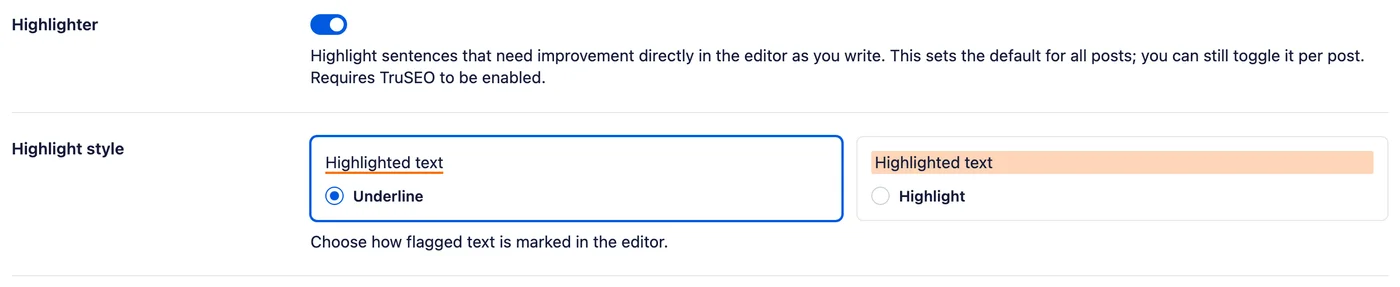
The choices are:
- Underline: draws a line under the flagged text. This is the default.
- Highlight: puts a colored background behind the flagged text.
Both options mark the same sentences. Between the two, choose whichever reads more clearly against your own content.
Writing Assistant
The Writing Assistant card connects AIOSEO to the SEOBoost content optimization service, which is a separate service. The Learn More link explains what the integration adds.
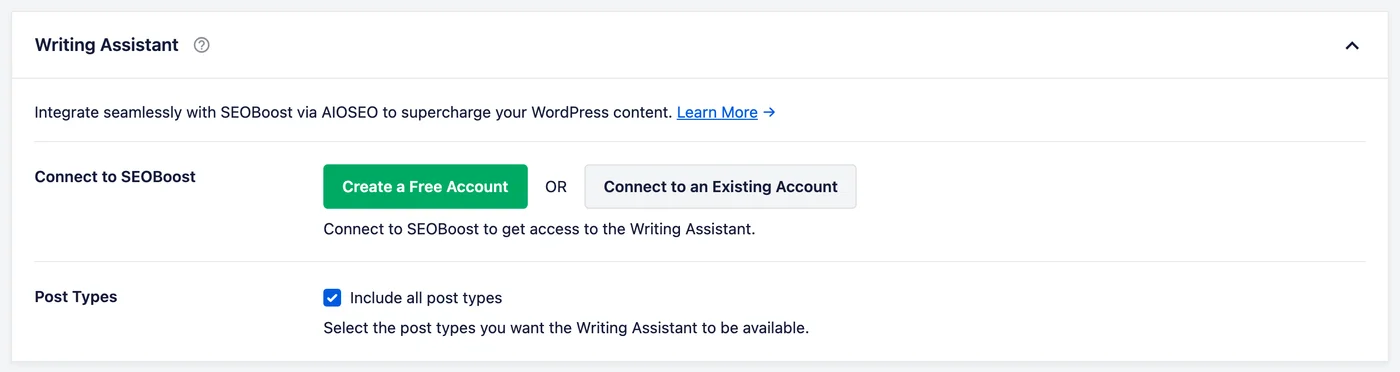
Until you connect an account, you'll see two buttons in place of the Writing Assistant:
- Connect to SEOBoost: links your site to SEOBoost.
- Create a Free Account creates a new SEOBoost account.
- Connect to an Existing Account links to an account on SEOBoost that you already have.
- Post Types: chooses where the Writing Assistant appears.
- Include all post types is selected by default, which makes it available on every type of content you write. Clearing it lets you pick individual types.
Saving Your Changes
Once you've set the options the way you want them, click the Save Changes button at the bottom of the screen.

That's it! Your content analysis settings now apply across your whole site.
Further Reading / Next Steps
To see what these settings produce while you write, read using TruSEO content analysis to optimize your content. You can also browse all of our TruSEO content analysis documentation.
Frequently Asked Questions
Below, we've answered some of the most common questions about these settings:
Do these settings apply to every post?
Yes. Everything on this tab is site-wide. The one exception is the Highlighter, where this tab sets the default and you can still change it for a single post from the editor.
Why can't I see one of these options?
The tab hides an option until what it depends on is switched on. The Highlighter appears once TruSEO is on. Highlight style and the Spell Checker appear once both TruSEO and the Highlighter are on.
See TruSEO & Content Settings above.
Which highlight style should I use?
Whichever you find easier to read. Underline is the default and is the subtler of the two, while Highlight stands out more against long passages.
See Choosing a Highlight Style above.
Why isn't the Headline Analyzer scoring my titles?
Its scoring runs on English headlines, so it skips content set to another language. It also skips WooCommerce product titles, because it scores editorial headlines rather than product names.
Do I need SEOBoost to use TruSEO?
No. The two groups on this tab are independent. TruSEO & Content Settings works without any SEOBoost connection.
Where do I see the results of these settings?
In the AIOSEO Settings section below your post content, on the Optimization tab. That's where your score and its suggestions appear while you write.