We've all been there. You click on a link expecting a certain page, only to be greeted by a frustrating “404 Page Not Found” error. But what if I told you the solution is WordPress redirects?
I understand how annoying the errors can be. But more importantly, broken links are conversion killers. They frustrate users and tell Google that your site is poorly maintained, which can tank your search engine rankings.
And the easiest solution to fix them? WordPress redirects.
So, in this guide, I’ll explain exactly what WordPress redirects are, the different types you need to know, and how to set them up without writing a single line of code.
In This Article
What Is a WordPress Redirect?
A WordPress redirect is a way for your website to send a message to a visitor’s browser saying, “The page you are looking for isn't here anymore; it has moved to this new location.“
Think of it like setting up mail forwarding with the post office when you move houses.
If you move but don't set up forwarding, all your important mail gets lost. But if you file a change of address, your mail is automatically redirected to your new home, so the sender doesn't even realize you moved.
In the digital world, redirects ensure that any “authority” (link juice) the old page had is passed on to the new one. This is crucial for maintaining your SEO rankings and organic traffic.
When Should You Use a Redirect?
You don't need to redirect every single page, but there are specific scenarios where they’re necessary:
- Deleting a post or page: Never just delete a page that has traffic. Redirect it to a relevant alternative.
- Changing a URL slug: If you update a post from yourdomain.com/2023-guide to yourdomain.com/2024-guide, you need a redirect.
- Merging content: If you combine three small articles into one “Ultimate Guide,” you should redirect the three old URLs to the new one.
- Moving domains: If you switch your brand name, redirects ensure you don't lose your existing audience.
Types of Redirects (And Which One to Use)
There are a lot of different server status codes (we cover 19 of them in our guide on redirect types you should know), but for most users, you only need to worry about a few key ones.
Here are the most common types of redirects in WordPress and when to use them.
301 Redirect (Moved Permanently)
This is the gold standard for SEO. A 301 redirect tells search engines, “This page has moved permanently. Please transfer all SEO rankings and traffic to the new URL.“
When to use it: 99% of the time. Use this when you delete a page, change a URL slug, or move your website to a new domain.
302 Redirect (Moved Temporarily)
A 302 redirect is the “classic” temporary redirect. It tells search engines, “This page has moved for now, but I'll bring it back later. Keep the original URL in your index.“
When to use it: Use this for general maintenance or quick A/B testing where visitors are simply viewing content. It’s the safest bet for most temporary situations.
307 Redirect (Temporary Redirect)
The 307 redirect is the modern, stricter successor to the 302. While they look similar, the 307 guarantees that the browser handles the request exactly the same way (preserving the HTTP method).
When to use it: Use a 307 if you’re redirecting a URL that involves a form submission (like a checkout page or a contact form), and you need to ensure the user's action completes successfully on the temporary URL. For simple content pages, stick with 302.
410 (Content Deleted)
Technically, this isn't a redirect, but it's an important status code. A 410 tells Google, “This page is gone, and it’s never coming back. Please de-index it immediately.“
When to use it: Use this for low-quality content or obsolete pages that have no equivalent replacement on your site.
How to Create a WordPress Redirect (The Safe Way)
In the past, setting up redirects required editing a server file called .htaccess. One wrong typo in that file could crash your entire website.
(I don’t recommend that method unless you're a developer.) But even if you are a developer, why spend so much time doing it manually when you can automate the whole process?
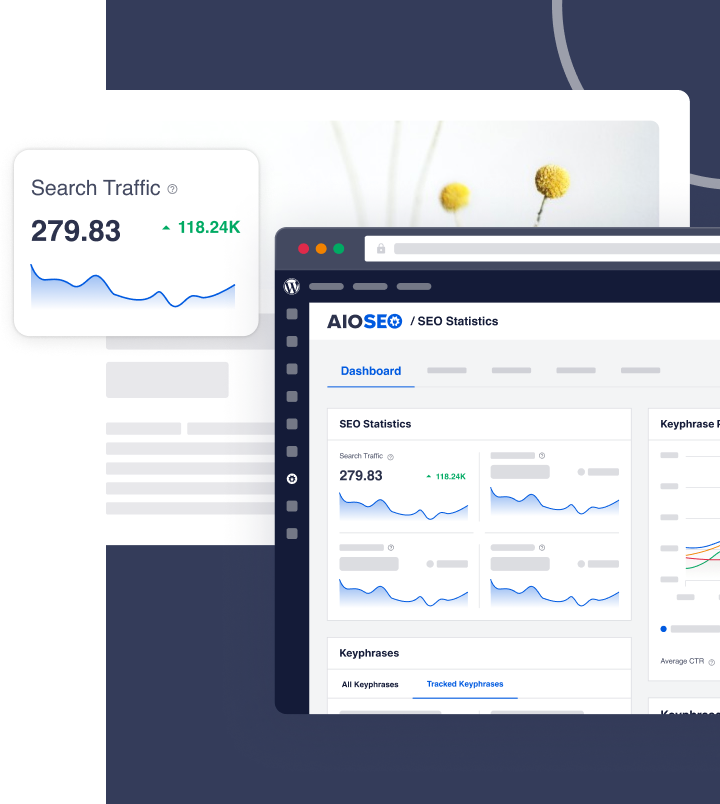
The safest and easiest way to implement WordPress redirects is to use a plugin. In this tutorial, I’ll show you how to easily create redirects with All in One SEO (AIOSEO).

AIOSEO is the best WordPress SEO plugin on the market, used by over 3 million website owners. It includes a powerful Redirection Manager that handles redirecting traffic for you.
Method 1: Automatic WordPress Redirects (The Easiest Way)
One of my favorite features in AIOSEO is that it watches your activity and helps you prevent broken links before they happen.
If you ever change the URL slug of a published post, AIOSEO will immediately detect the change and ask if you want to create a redirect.

You simply click Add Redirect to Improve SEO, and you’ll get a pop-up like the one below.

Important: When changing a URL slug, AIOSEO will prepopulate the Source and Target URLs for you. All you have to do is click Add Redirect, and the plugin will handle the rest.
This feature is a massive time-saver that prevents you from accidentally breaking a link when updating your content.
To learn more, see this article on WordPress redirects when changing a URL slug.
Method 2: Manual Redirects via the Redirection Manager
Sometimes you need to set up a redirect manually, specifically if you’re deleting an old post and want to send users to a different, relevant page.
To do this, go to All in One SEO » Redirects in your WordPress dashboard.

You’ll reach the following screen:

Here, the process is simple:
- Source URL: Paste the old URL (the one you want to redirect from).
- Target URL: Paste the new URL (the one you want to redirect to).
- Redirect Type: Choose 301 Moved Permanently (this is selected by default).
- Click Add Redirect.
That’s it! You can test it by visiting the old URL in a new tab; it should load the new page instantly.
Don’t want to use a 301 redirect? No problem. AIOSEO has several popular redirect types you can select from the dropdown menu.
Method 3: Scheduling Redirects (For Planned Updates)
What if you’re running a marketing campaign or launching a new product, and you need a redirect to go live at a specific time?
You don't want to be sitting at your computer at midnight waiting to hit “Save.” (Been there, done that. Don’t recommend.)
AIOSEO allows you to schedule WordPress redirects in advance.
In the Add New Redirection section, look for the Custom Rules option.

Enable it, and you will see fields to enter a Start Date and time.
- Start Date: The redirect will automatically turn on at this specific time.
- End Date (Optional): You can even set an end date if this is a temporary promotion (perfect for 307 temporary redirects).
This method is much more reliable for planned site updates and marketing launches than relying on someone to remember to do it on the right date at the right time.
How to Find and Fix Broken Links (404s)
You can't redirect a broken link if you don't know it exists.
I’ve worked with too many website owners to count who lose traffic and authority every day simply because they don't realize that:
- Their website has internal links to broken pages.
- They're linking to content on external websites that no longer exist.
AIOSEO’s Broken Link Checker (BLC) solves both these issues.
After installing BLC, select the Broken tab from the top menu. This list shows internal and external broken links.

From here, you have a few options.
If it’s just a typo or a new URL slug of an external website, you can simply click Edit URL and paste in the new URL. To save these changes, click Update.

Now, if you’re changing an internal link (a link on your website), select Add Redirect. You’ll put in the new URL, ensuring no traffic or rankings from the original URL are lost.

You also have the option to:
- Unlink: This removes the link from your post or page.
- Recheck: Once you’ve changed a broken link, it’s a good idea to recheck it. This tells BLC to look at your link again and see if it’s working.
Want to learn more about Broken Link Checker? Here are some helpful tips and tutorials:
Common WordPress Redirect Mistakes to Avoid
Before you start redirecting, keep these common pitfalls in mind:
- Avoid Redirect Chains: This occurs when Page A redirects to Page B, which in turn redirects to Page C. This slows down your site and confuses Google. Always try to redirect Page A directly to Page C.
- Don’t Redirect Everything to the Homepage: If you delete a specific blog post, don't just redirect users to your homepage. It’s confusing for the user. Redirect them to a similar category or related article instead.
- Don't Ignore Mobile: Ensure your redirects work on both desktop and mobile versions of your site.
Regarding the second point, there are instances when it’s okay to redirect to the homepage. This article explains when it’s okay to do it and how to set up WordPress redirects to your homepage.
Master Your WordPress Redirects Today
Setting up WordPress redirects doesn't have to be technical or scary. By using the right tools, you can automate the process and ensure your visitors always find what they’re looking for.
Properly managing your redirects will:
- Improve your user experience
- Preserve your hard-earned backlinks
- Keep your SEO rankings high
If you're ready to fix your broken links and automate your redirects, get started with AIOSEO today.
And if you’re looking to dive deeper into technical SEO, check out these other resources:
- How to Avoid 404 Errors When Updating Your WordPress Site
- How to Redirect Links in Bulk Using a CSV File
- The Ultimate Guide to WordPress Robots.txt Files
FAQs About WordPress Redirects
What is a 301 redirect in WordPress?
A 301 redirect is a permanent redirect. It tells search engines that a page has permanently moved to a new location. This is the best type of redirect for SEO because it transfers the “link authority” from the old page to the new one.
How do I create a redirect in WordPress without plugins?
To create a redirect without a plugin, you must manually edit your website's .htaccess file on your server. However, this method is risky for beginners because a small error can break your site. We recommend using a redirect plugin like All in One SEO instead.
Will redirects hurt my SEO?
No, redirects generally help your SEO. If you delete a page without redirecting it, you lose all the ranking power that page had. By using a 301 redirect, you preserve that ranking power. However, having too many “redirect chains” (A to B to C) can slow down your site, which is bad for SEO.
What is the difference between a 301 and a 302 redirect?
The main difference is permanence. A 301 redirect is permanent (the page is gone forever), while a 302 redirect is temporary (the page will be back soon). Google passes SEO ranking power through 301 redirects, but usually not through 302 redirects.
What is the best redirect plugin for WordPress?
All in One SEO is the best redirect plugin for WordPress because it automates much of the redirect process. You don’t have to edit your .htaccess file manually. Instead, you simply add the original and new URL to the user-friendly dashboard and tell it the redirect type you want to use (301, 302, etc.). Another good option is SeedProd, which is a WordPress website builder with built-in redirect features and 404 page templates.
Disclosure: Our content is reader-supported. This means if you click on some of our links, then we may earn a commission. We only recommend products that we believe will add value to our readers.
Want to Try AIOSEO for Free?
Enter the URL of your WordPress website to install AIOSEO Lite.