Looking for practical URL redirection tips to improve user experience and boost your search rankings?
Learn from my mistakes.
When I first started blogging, I didn't think twice about changing a URL. I’d update a post's slug, hit save, and move on.
It wasn't until a few weeks later that I noticed how my traffic had tanked, and how old URLs were leading to dead ends. Worse still, I lost valuable backlinks.
That's when I learned about redirects.
Redirects tell search engines and visitors where your content moved, preserving your traffic and SEO.
In this guide, I’ll break down everything you need to know about URL redirects, from the basics to advanced tricks. You’ll learn:
- How redirects impact SEO
- Different types of redirects (and when to use them)
- Step-by-step instructions for setting them up in WordPress
By the end, you’ll know how to avoid costly mistakes and handle redirects like a pro.
In This Article
What Is a URL Redirect?
A URL redirect tells search engines content has moved to a new web page.
It’s like saying, “This content isn’t here anymore, go to this page instead.”
You can think of it like a forwarding address when you move to a new house. Instead of letting important letters (or visitors) go to the mailbox you no longer have access to, you tell the system to forward your mail (traffic) to the new address (URL).
Here are some common scenarios when URL redirection comes in handy:
- Site Migration: When a website changes its domain, setting up redirects ensures that visitors and search engines can find your new pages without running into errors
- HTTP → HTTPS: Redirecting from HTTP to HTTPS protects user data with encryption and signals to search engines that your site is secure.
- Fixing Broken Links: Redirect old URLs to relevant alternatives.
- Merging Duplicate Content: Redirecting duplicates to a single authoritative page consolidates SEO value and strengthens your ranking potential.
- Seasonal Campaigns: Redirect temporary landing pages when the event ends.
Why URL Redirection Matters for SEO & UX
Redirects are essential for a positive user experience (UX) and search engine crawlability. When done properly, they help:
- Preserve link equity: When a high-authority site links to an old URL, a redirect ensures most of the “SEO value,” or link equity, flows to the new page.
- Prevent traffic loss: Without redirects, broken links result in 404 errors, leading to lost traffic. These can drive visitors and potential customers away.
- Enhance user experience (UX): Redirects keep visitors on your site, rather than causing them to bounce (leave your site) in frustration.
Ultimately, URL redirects keep visitors engaged, search engines happy, and your hard-earned rankings intact.
How to Handle URL Redirection in WordPress
Now that you understand what redirects are, let’s see how to set them up in WordPress.
Step 1: Install & Activate All In One SEO
The first step in handling URL redirection is to download and install All In One SEO (AIOSEO).

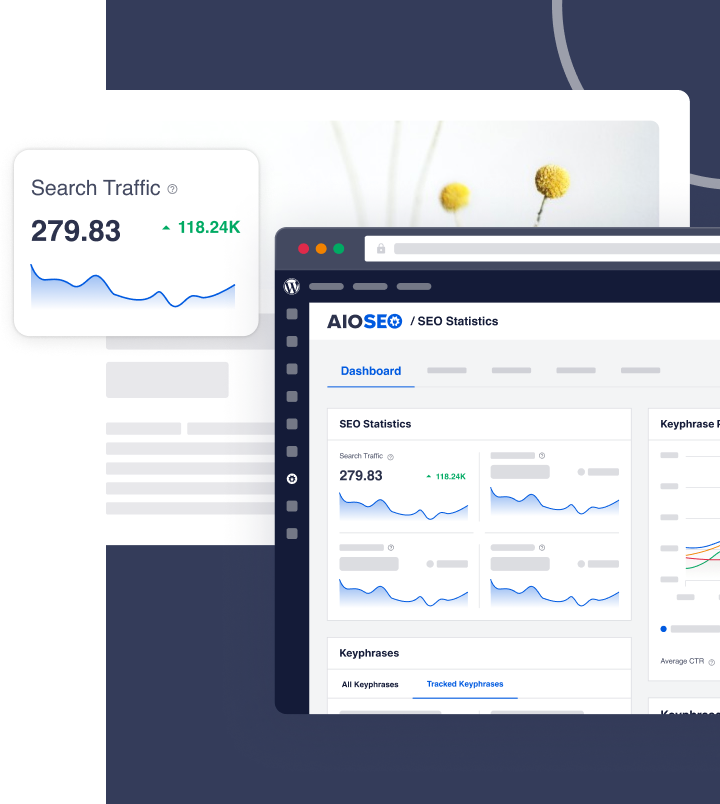
AIOSEO is a powerful and easy-to-use SEO plugin with over 3 million active installs. Digital marketers and business owners use AIOSEO to boost their search engine rankings and drive qualified traffic to their WordPress sites.
One of its standout tools is the Redirection Manager, which makes it easy to create, manage, and track redirects.
Whether you’re fixing broken links, moving content, or consolidating pages, this feature ensures visitors and search engines always reach the right destination.

Redirection Manager allows you to oversee redirects and eliminate 404 errors, making it easier for search engines to crawl and index your site.
At the same time, it ensures your visitors enjoy a smooth, frustration-free experience by reaching their destination.
For step-by-step instructions on how to install AIOSEO, check out our installation guide.
Step 2: Open the Redirection Manager & Redirect Your Page
Once you’ve installed AIOSEO, the next step is to set up your redirects.
To do this, navigate to AIOSEO » Redirects. You’ll be taken to the Redirection Manager, where you can add your redirect.

Start by entering the Source URL (the page you want to redirect from).
Then, add the Target URL, which is where you want visitors to land.
You can even start typing the page title, slug, or ID, and AIOSEO will automatically suggest matching pages for you.
For a step-by-step walkthrough, see how to how to redirect a post or page in WordPress.
Common Types of URL Redirects Explained
Not all redirects are created equal. Depending on your situation, you’ll want to use a specific type of redirect to ensure both search engines and users end up in the right place.
Below are the most common types you’ll come across, along with when to use them.
301 Permanent Redirect
A 301 redirect tells browsers and search engines that content has moved permanently. It’s the best choice when you’ve permanently changed a URL.
For example, moving from http:// to https:// or rebranding with a new domain.
The big advantage?
301 redirects pass link equity from the old page to the new one, helping you preserve search rankings and backlinks.
For more information, check out our tutorial on implementing 301 redirects.
302 Temporary Redirect
A 302 redirect is for short-term changes. Use it when you want to temporarily redirect visitors to another page.
For example, imagine you’re promoting a seasonal sale, such as Black Friday. In this scenario, you’d only want users to reach this page for a specific period of time. And the rest of the year, when the sale isn’t active, you’d likely redirect them to your standard pricing page.
A common mistake is using 302 redirects for permanent moves, which can confuse search engines and result in the loss of valuable SEO signals.
So, remember:
- 301 = permanent move
- 302 = temporary move
307 Temporary Redirect
A 307 redirect is the modern upgrade to a 302, with stricter handling of request methods. It’s useful for temporary scenarios where precision is required, such as testing or handling secure connections.
In WordPress, plugins like AIOSEO make it simple to add a 307 redirect with just a few clicks.
Special Redirects
- 404 to Homepage Redirects: Sometimes, site owners redirect all broken pages (404s) to the homepage. While this can reduce bounce rates in the short term, it’s risky if overused. Google may see it as a poor user experience.
- Regex (Pattern-Based) Redirects: For more advanced setups, regex rules let you redirect multiple URLs that follow a pattern. For instance, you could send everything under /blog/* to /articles/* in one step, saving time on large sites.
6 URL Redirection Tips & Tricks You Should Know
1. Redirecting a Single Post or Page in WordPress
Redirecting a single post or page is the most common type of redirect. And with AIOSEO, setting one up is simple.
To get started, navigate to Redirects in the All in One SEO menu in your WordPress dashboard.

You'll see the Redirects screen, and at the top will be the Add New Redirection form.
In the Source URL field, enter the URL you want to redirect from. Ensure that you use a relative URL. This means you should exclude the https://yourdomain.com part of the URL. For example, use /old-page instead of the full URL (https://yourdomain.com/old-page).

In the Target URL field, enter the URL you want to redirect to. You can use either a relative URL (e.g., /new-page) or an absolute URL (e.g., https://yourdomain.com/new-page).
You can also start typing the title, slug, or ID of any post, page, or other content on your site in the Target URL field. AIOSEO will display matching content automatically. Simply click the post or page you want to set as your target.
And just like that, anyone visiting the old URL will automatically land on the new page.
Pro Tips:
- Check for typos: A small typo in your target URL can break the redirect and hurt your SEO. Always double-check!
- Test with an incognito window: This ensures your browser cache isn’t showing you the old page by mistake.
- Track performance: Some redirects might affect traffic patterns. Keep an eye on analytics to see if users are landing where you expect.
2. Redirecting Links in Bulk Using CSV
If your site has hundreds—or even thousands—of pages, setting up redirects one by one is a nightmare.
The trick?
Use AIOSEO’s CSV import feature to make the process quick and painless. It helps you add bulk redirects using a CSV file.

Start by gathering all the information about the links you want to redirect.
Using a spreadsheet is a great way to organize this data. It allows you to track the source URLs, target URLs, and any notes about why the redirect is necessary.

Using a spreadsheet will make the process faster and help you avoid mistakes when setting up multiple redirects. I recommend using the following headers for your columns:
- Source URL
- Target URL
- Redirect Type
- Ignore Slash
- Ignore Case
- Regex
Once you’ve saved your CSV file, return to the AIOSEO Redirection Manager and upload it under the Import/Export tab.

Finally, click Import.
And that’s it.
AIOSEO will set your redirects up in bulk from your CSV file, saving you valuable time and ensuring all your links point to the right place.
Pro Tips:
- Keep a master CSV: Save every CSV you use for redirects. It’s a lifesaver for future audits or site migrations.
- Use status codes wisely: If some URLs are only temporarily moved, mark them as 302 or 307 instead of 301. This keeps search engines from assuming it’s permanent.
- Batch testing: After importing, test a few URLs randomly to confirm everything works before assuming all redirects are live.
- Watch for redirect chains: If URL A redirects to URL B, which then redirects to URL C, it can slow down your site and dilute your SEO value. Try to redirect straight to the final destination (i.e., URL A to URL C).
3. Setting Up Automatic Redirects in WordPress
Ever changed a page or post URL only to find your visitors hitting a dreaded 404 page?
One of my favorite features in AIOSEO is the Automatic Redirects tool. It’s like having a safety net for your URLs. The Redirection Manager automatically detects when a URL changes and instantly creates a redirect for you.
To enable this function, all you have to do is head over to the Redirects menu in AIOSEO. Then, open the Settings tab and make your selection for if you want to apply automatic redirects to all post types or just specific ones.

You can even configure default settings so that any time you update or delete content, AIOSEO takes care of the redirect automatically. This is ideal for solo business owners who want help keeping their site and traffic running smoothly.

Once you’ve got it set up, I also recommend checking in on your redirects every so often.
AIOSEO keeps an organized log under the Redirects tab, and marks the automatically added ones as Modified Post. This allows you to easily see which automatic redirects it created.

Personally, I like to give them a quick test using the Check Redirects button just to make sure everything’s working as expected.
Pro Tips:
- Double-check old URLs: While AIOSEO handles the redirect, ensure that any high-value pages are mapped correctly.
- Monitor performance: Use Google Search Console to check if the old URLs are still appearing in search results. You may need to nudge search engines with a sitemap update.
- Combine with broken link checks: Automatic redirects won’t fix links on other sites pointing to your old URL. A quick broken-link audit can help you identify and address these issues.
- Use for internal reorganizations: Changing category or post structures? Automatic redirects save you hours of manual work.
4. Scheduling Redirects in WordPress
One tip I wish I knew when I started managing websites is that you can schedule redirects.
Scheduling redirects in AIOSEO is one of those “set it and forget it” features that can save you a ton of time and stress.
Instead of scrambling to fix broken links after the fact, you can plan ahead for URLs you know will change.
This works perfectly whether you’re running a short-term promo, switching from HTTP to HTTPS, or permanently moving a page.
And the good news is that the process is pretty simple.
First, figure out which URLs need redirects and where they should go.
Once you’ve got your list, you can add them using the Add New Redirection tool we saw earlier.

If you’re dealing with multiple links (like I was when cleaning up old blog posts), you can even upload them all at once using a CSV file.
This bulk option is a lifesaver compared to adding them one by one. It’s like upgrading from washing dishes by hand to running a dishwasher.
After you’ve added the redirects, you’re ready to schedule.
You can set redirects to go live at a specific time. And if it’s a temporary redirect, you can also set an expiration date.

This way, your site automatically reverts back when the promo or event is over. No more late-night logins to fix expired links. (Trust me, I’ve been there, and it’s no fun.)
With scheduling, you get peace of mind knowing your redirects will run on autopilot, keeping your visitors (and Google) happy.
Pro Scheduling Tips:
- Plan ahead: Make a calendar of your campaigns with start and end dates. This prevents expired promotions from confusing visitors.
- Use descriptive redirect names: Label scheduled redirects clearly so you (or your team) know their purpose at a glance.
- Combine with analytics: Track traffic to the redirected pages to see which campaigns perform best.
- Test timing: Schedule a test redirect for a low-traffic page first. This ensures everything triggers correctly before high-stakes campaigns.
5. Using Regex-Based Redirects (Catch-All Rules)
Another trick I wish I’d learned earlier is how powerful regex (regular expressions) can be for redirects.
Regex is a sequence of characters that defines a search pattern. It's a way to find and match specific text strings, and in this case, it helps you match entire groups of URLs at once.
Instead of setting up dozens (or even hundreds) of individual redirects, you can create a single rule that handles them all at once.
This is perfect for large sites, category cleanups, or URL structure changes.
For example, let’s say you moved everything from /blog/ to /articles/. Instead of adding redirects one by one, you can use a regex rule to catch every URL under /blog/ and send it to /articles/ in a single step.
It’s a massive time saver and makes site management way easier.
So, how to do it?
In AIOSEO, setting up a regex redirect is simple. Just check the Regex box when creating your redirect rule, then enter your pattern.

Don’t worry. You don’t need to be a coding pro to use this. With a few basics, you can unlock a powerful way to keep your site organized and error-free.
Want help? See this tutorial to learn how to use regex in Redirection Manager.
Pro Tips:
- Start small: Test your pattern on one or two URLs first to make sure it’s not too broad. A bad pattern can accidentally redirect half your site.
- Use anchors wisely: Adding ^ (start) and $ (end) helps you match URLs instead of catching extra characters you didn’t mean to.
- Document your rules: Regex can get tricky fast. Keep notes on what each rule does so you don’t have to play detective later.
- Pair with analytics: After creating a regex redirect, check your logs to see which URLs are being caught. This helps you confirm the rule is working as intended.
6. Monitoring & Tracking URL Redirects
One of the biggest lessons I learned after setting up redirects is this: your job doesn’t end once the redirect is live. (Disappointing, I know…sorry.)
The reality is that redirects can break, stack up in chains, or even stop working the way you expected.
That’s why continuous monitoring is just as important as creating them in the first place.
Think of it like checking the oil in your car. You wouldn’t just fill it once and never look at it again.
The same goes for redirects. Regular check-ins help you catch problems before they drain your SEO or frustrate visitors.
The good news? You don’t need to guess. There are plenty of tools that make monitoring easy.
For example, AIOSEO’s Redirect Log let you see exactly which redirects are being used and how often.

Google Search Console (GSC) also alerts you to crawl errors, broken links, and redirect issues.
And for an even deeper dive, Screaming Frog acts like a site-wide X-ray, finding redirect chains, loops, and other hidden problems.
Pro Tips:
- Track redirect hits: See which redirects get the most traffic so you can prioritize and protect them.
- Watch for broken links: Even with redirects in place, some URLs may still slip through the cracks. A quick audit helps you fix them fast.
- Check regularly: Make monitoring part of your monthly SEO routine so small issues never turn into big headaches.
Common Redirect Mistakes to Avoid
Even seasoned site owners make mistakes with redirects. The problem is, a small misstep can quietly chip away at your SEO, and, before you know it, you’ve lost your traffic.
Let’s review the most redirect mistakes so you can avoid this unfortunate scenario.
Using 302 Instead of 301
This is one of the biggest mistakes I see.
A 302 tells search engines that the move is only temporary, so they won’t pass link equity to the new page.
If your page has permanently moved, always use a 301.
That way, you keep your rankings and backlinks intact.
Creating Redirect Chains
A redirect chain happens when URL A points to URL B, which then points to URL C.
This slows down your site and can confuse search engines. Visitors also notice the lag.
The fix is simple: redirect straight to the final destination and cut out the middle steps.
Redirecting Everything to the Homepage
It’s tempting to dump all broken links onto your homepage, but this creates a poor user experience.
Imagine clicking on an article about “SEO tips” and landing on the homepage with no clue where to go.
Google sees this as unhelpful too, which can hurt your SEO.
Instead, redirect users to the most relevant page. (For example, that “SEO tips” link is probably better redirecting to an SEO best practices blog or something similar.)
Then, in cases where you do need to redirect to the homepage, you can automatically set them up in AIOSEO.

Check out our tutorial on how to automatically redirect pages to your homepage for more on this.
Overusing Redirects
Redirects are helpful, but too many of them can slow your site down and eat up crawl budget.
Search engines only have so much time to crawl your site—wasting it on unnecessary redirects can hurt indexing.
Use redirects only when truly needed, and clean up old ones regularly.
Mastering URL Redirection for Long-Term Success
URL redirection is a behind-the-scenes task that has a front-facing affect on user experience and how search engines crawl your site. When done right, it:
- Preserves your hard-earned rankings
- Safeguards your organic traffic
- Keeps visitors engaged
- Prevents broken links and 404 errors
Plus, when you have tools like AIOSEO, redirect management is relatively simple.
Whether you’re setting up a quick 301, scheduling redirects for a promo, or handling complex regex patterns, you can do it all in just a few clicks.
Combine that with regular monitoring and smart redirect habits, and you’ll avoid costly mistakes while keeping your site running smoothly.
I hope this post helped you know how the top ticks and tricks for managing redirects. You may also want to check out other articles like our ultimate guide to WordPress SEO or our list of the best redirect plugins for WordPress.
If you found this article helpful, then subscribe to our YouTube Channel. You’ll find many more helpful tutorials there. You can also follow us on X (Twitter), LinkedIn, or Facebook to stay in the loop.
FAQs About URL Redirection
What is a redirect?
A redirect is a way to send visitors and search engines from one URL to another automatically. It’s often used when a page has moved, been deleted, or replaced. This ensures users don’t hit dead ends and helps preserve your site’s SEO value.
Do redirects affect SEO?
Yes. When set up correctly, redirects help protect your SEO. A 301 redirect passes most of the link equity from the old page to the new one, so your hard-earned rankings and backlinks stay intact while giving users a smooth experience.
How do I avoid redirect chains and loops?
Redirect chains happen when a URL points to another, then another, and so on. Loops circle endlessly. To fix them, always redirect straight to the final destination URL. Tools like AIOSEO’s Redirect Logs or Screaming Frog help you spot and clean them up.
Can I bulk redirect multiple pages at once?
Yes. AIOSEO’s CSV import feature makes bulk actions easy. You can upload a spreadsheet with your source URLs, target URLs, and redirect types, and AIOSEO sets them all up at once. This is a lifesaver for site migrations or when cleaning up old blog posts.
How can I check if my redirects are working?
Start by testing your URLs in an incognito window to bypass caching. Then, use AIOSEO’s Redirect Logs to track hits and errors. Google Search Console can also flag issues, and tools like Screaming Frog let you crawl your site for broken links or chains.
Disclosure: Our content is reader-supported. This means if you click on some of our links, then we may earn a commission. We only recommend products that we believe will add value to our readers.
Want to Try AIOSEO for Free?
Enter the URL of your WordPress website to install AIOSEO Lite.